Просмотр новости
Найдите то, что Вас интересует
 Спутники
 РН
РН SpaceX
 Роскосмос
 NASA
NASA
СпутникиРНSpaceXРоскосмосNASAMy son and I were looking for a new game to get into. Something that was low on models, fun and reasonably quick to play. We decided on Bushido.
My son and I were looking for a new game to get into. Something that was low on models, fun and reasonably quick to play. We decided on Bushido.
This Project is ActiveSep 29 2026
After my heavy defeat with my new Horselords, my son wanted to try out the new faction that he picked up at UKGE – The Jung Pirates. Specifically, he picked up The Deep starter box that contains a lot of weird fish/human things. Like my experience with the Horselords, he hadn’t spent a lot of time reading the cards and so was going into the game fairly blind. In his warband were,
Jung Keikoku (JK) who is some octopus samurai thing. Comes with a useful grapple attack.
Fu Ran Ku (FRK) – a jellyfish with a poison attack
Mother of Pearl – a sea snake with a human body who also has some useful ki feats
Anko – an angler fish human that predictably has a hypnotic gaze attack to stun opponents
An Electric Eel, which does pretty much what you would expect
Kani-Chan – an enormous crab covered in vents spurting out fire
Some tiny crabs that spawn in from his terrain feature that don’t do much other than irritate the opposition.
He also took a stormwall terrain feature that blocks like of site and can move around each turn by 1”
For my side, I went back to my Cult of Yurei faction and took,
Waku the Soul Collector who I’ve also given Fearsome Presence which gives him Dread that further enhances his Fear ability.
One Animated Militia skeleton
Warui, another skeleton that if he dies, I get to bring on a kami of my choice
Mokoti for his control markers
Maiden of Sagoya to throw Fear markers around. She can also summon a ghost that loves to attack frightened enemy models.
The Wanyudo for some fiery slam attacks
I also took some upgrade cards. Feed on Fear allows me to add a Ki token to the card whenever a Fear test is failed and once it gets to 4 tokens, I can distribute this out to anyone in my faction.
Glimpse of Jigoku which allows me to pick an enemy model to make a test which, if they fail, the treat all enemy models as having Fear and Terror, so ideal for working with the Maiden, getting tokens for Feed on Fear and for disrupting an enemy model.
Pariah’s Voice, which I play in the starting phase and it removes 1 dice from all enemy Ki Challenge tests – extremely useful for getting Mokoti’s control Ki Feat to work.
Miserable Fraternity which is an event to play when an enemy model fails a Fear test. They take wounds equal to how much they fail by, so again, playing into the Fear element of my list.
We’re playing a scenario with three neutral objectives across the centre line of the board. If you are in BtB you can spend an activation to interact with the objective and turn it friendly. At the end of turn 2, 4 and 6, you gain 1 Scenario Point for each friendly objective and the person with the most scenario points gets 1 VP. The objectives reset at the start of turn 3 and 5.
Prior to the game starting, my son handed my the Red Pearl enhancement card to give to Waku. This gives Waku a Death Sentence Marker (which gives any model attacking him an extra melee dice) and it also removes Fear from Waku, which also negates the Fearsome Presence I gave to Waku as well.
Below is the deployment. My son is using a couple of rat swarms as proxies for his terrain pieces.
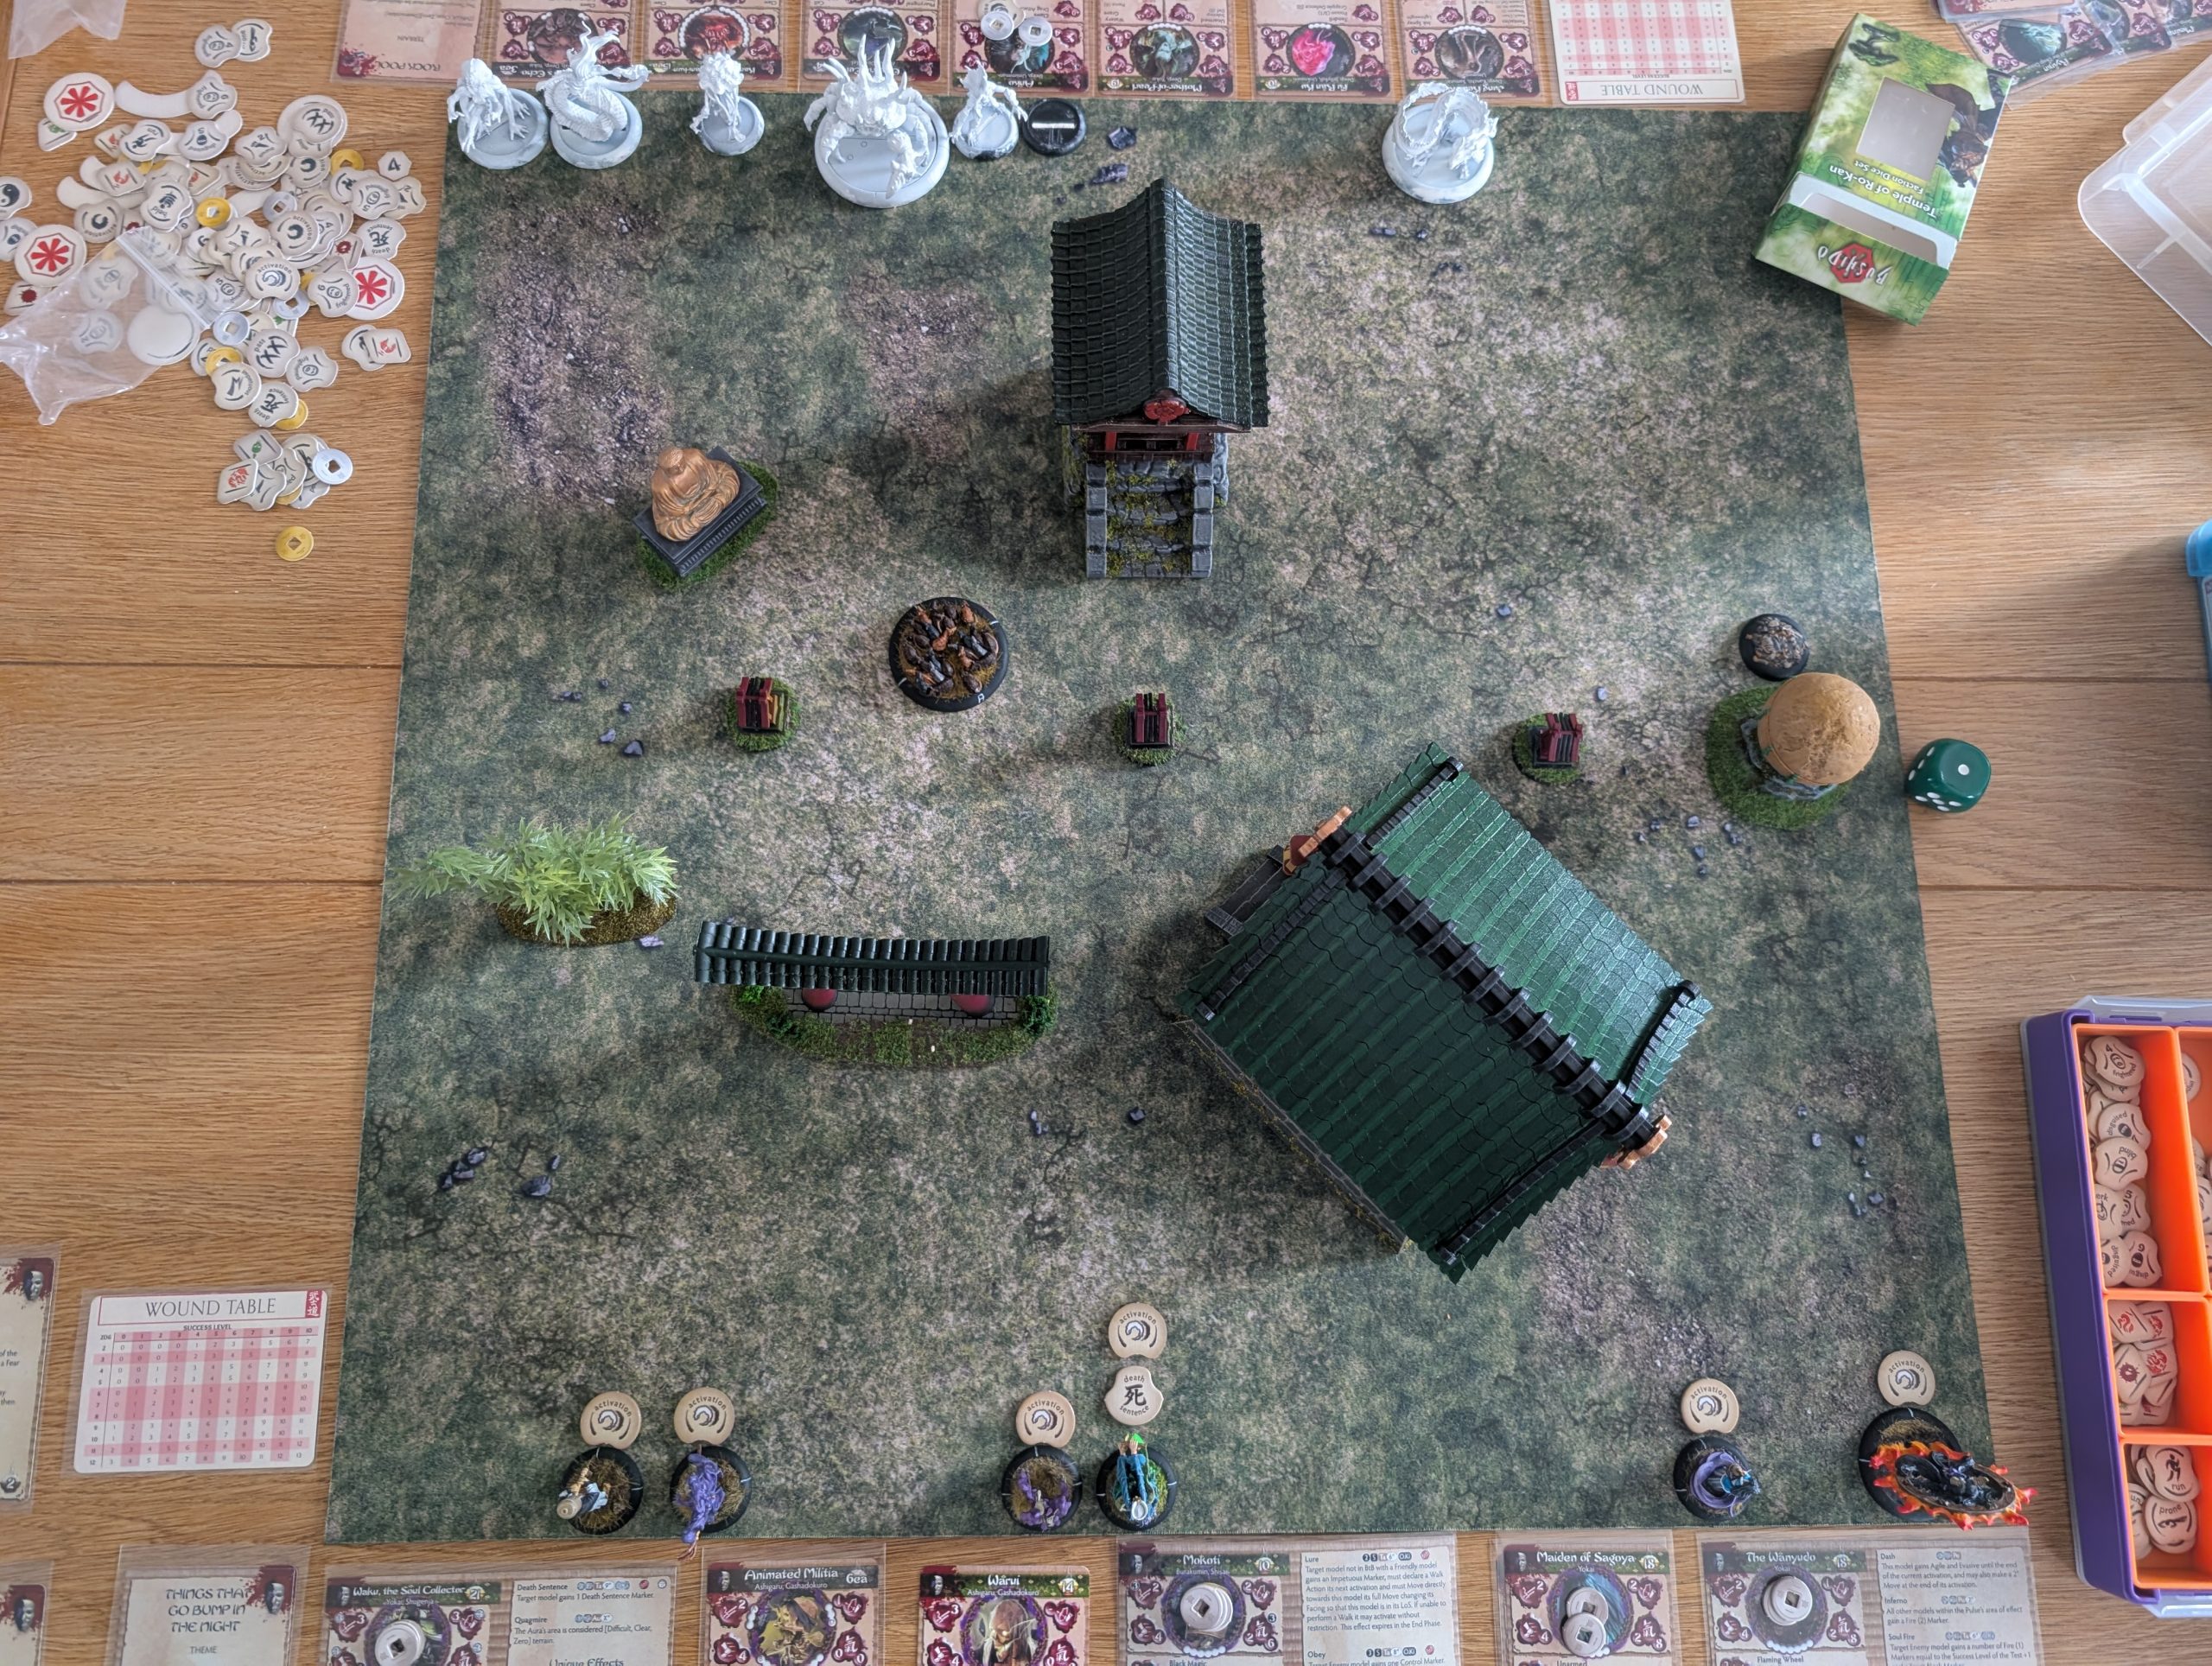
Turn 1.
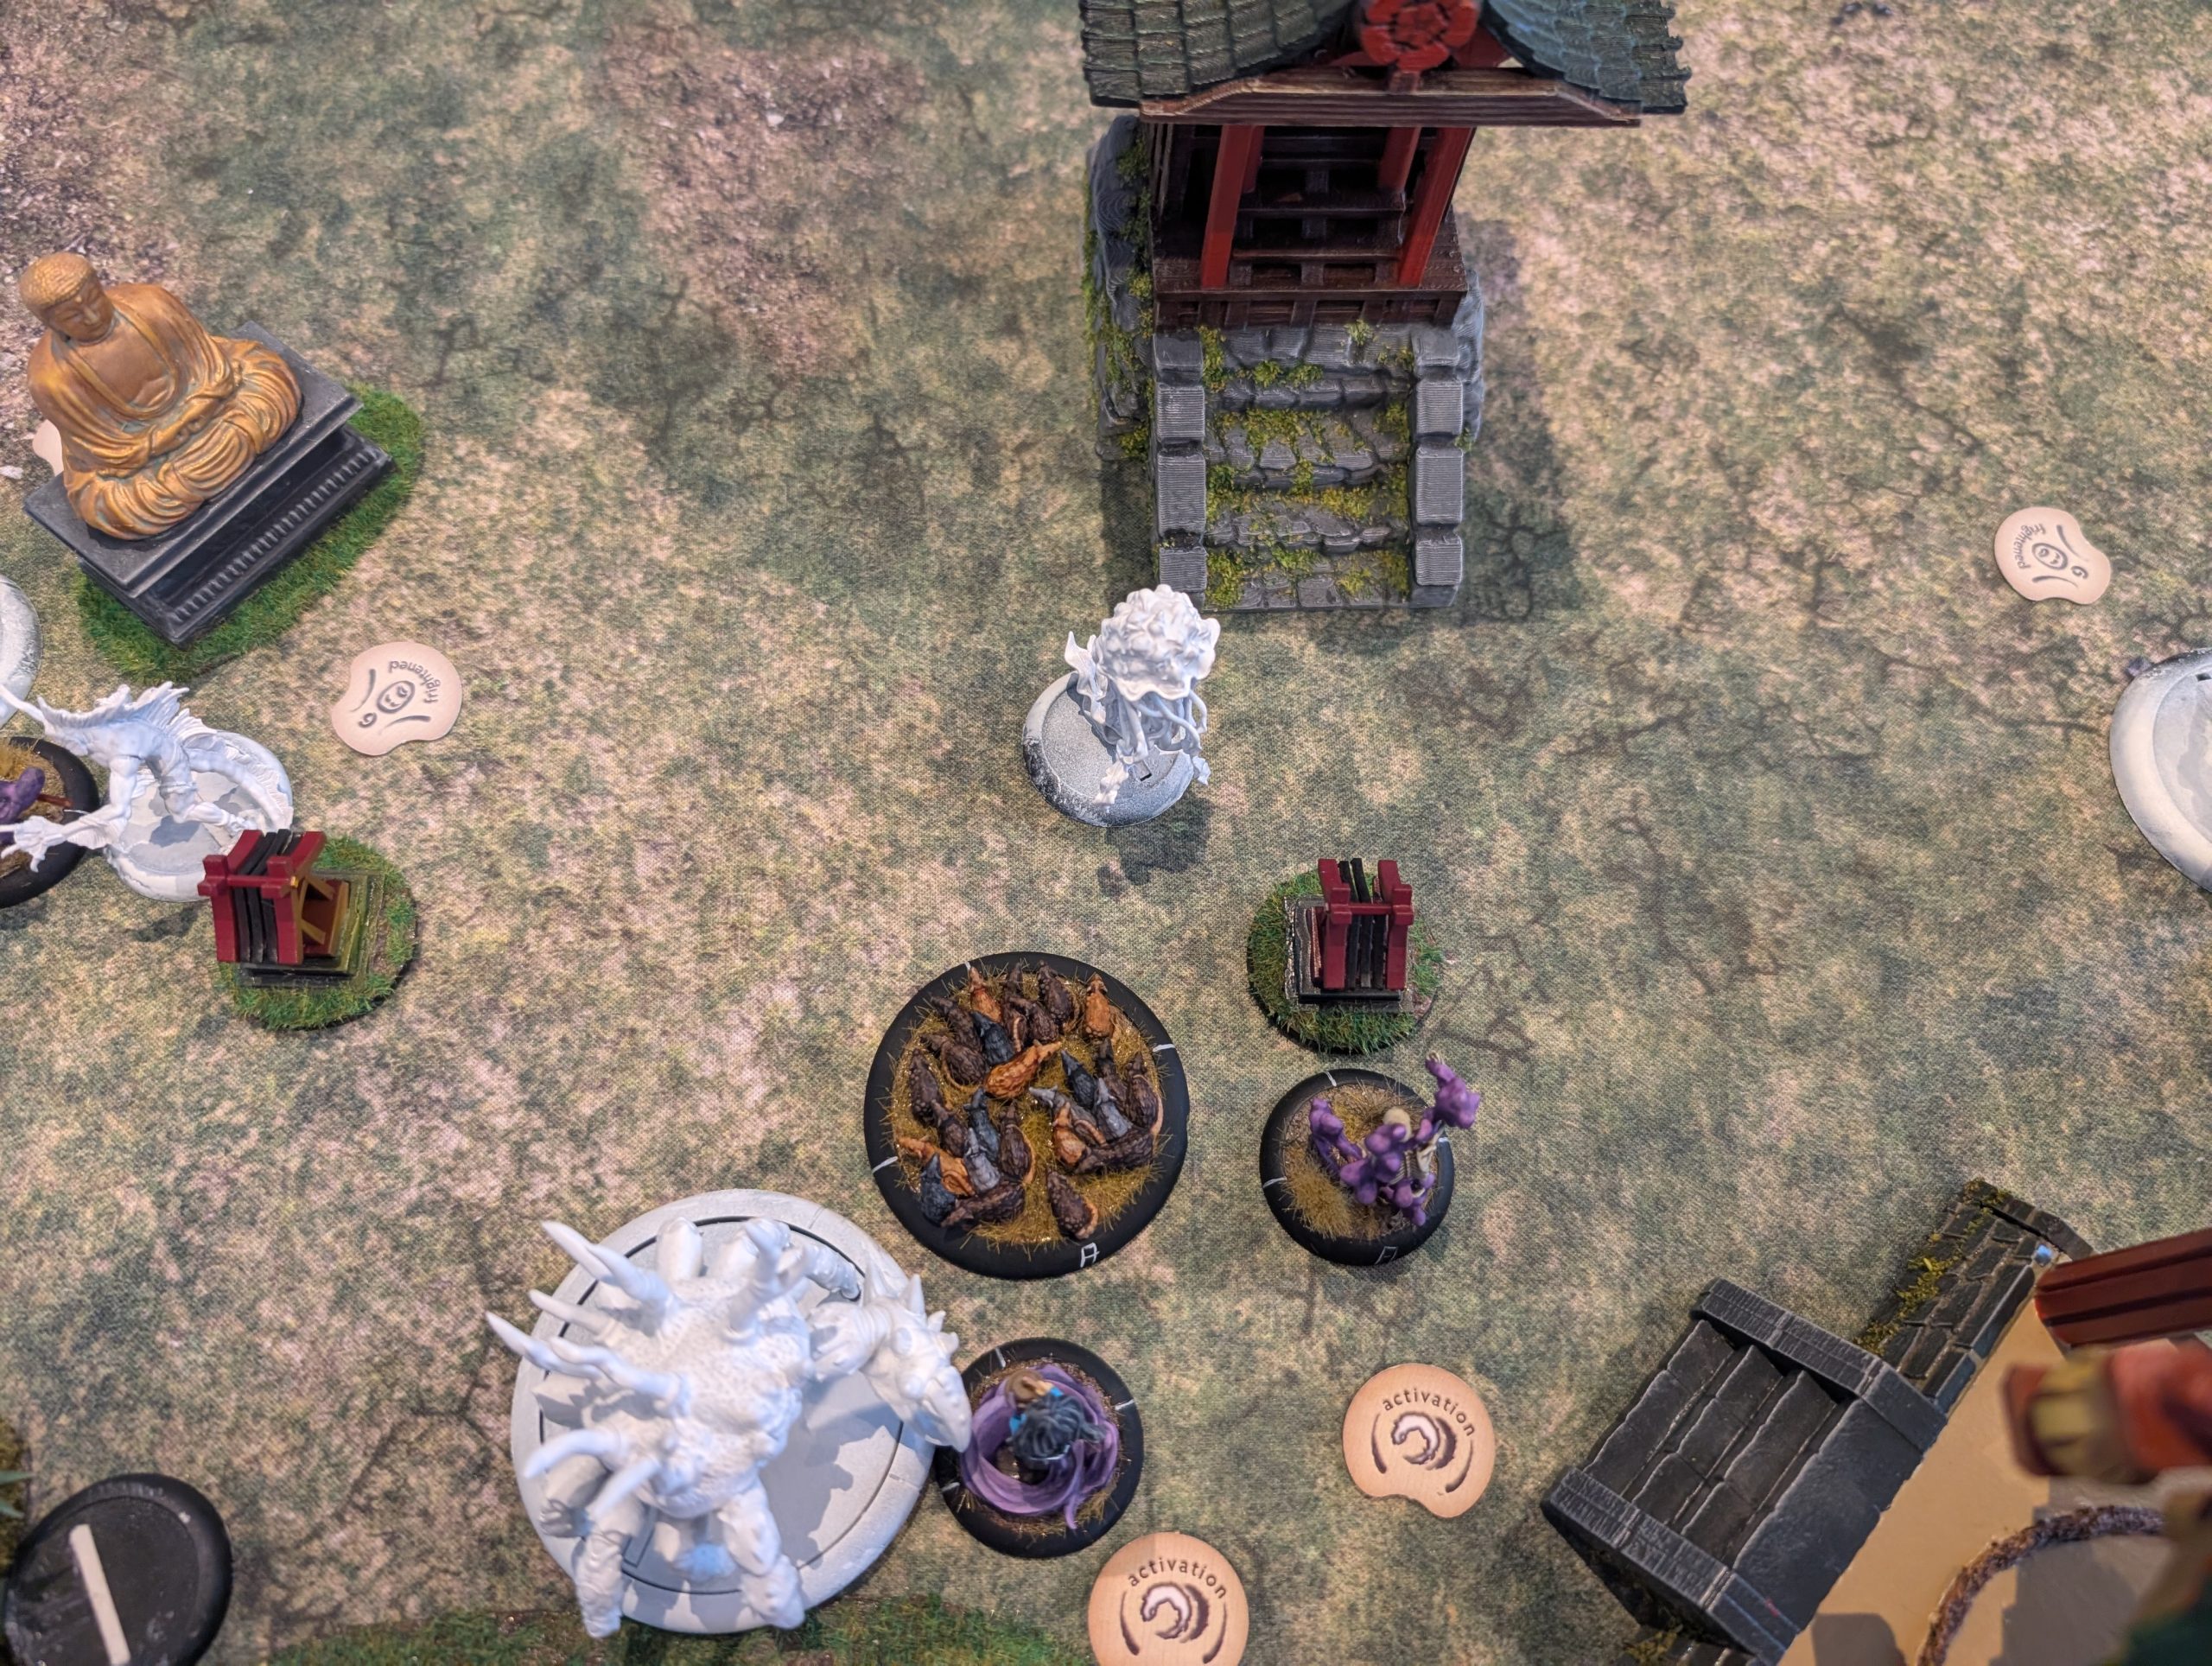
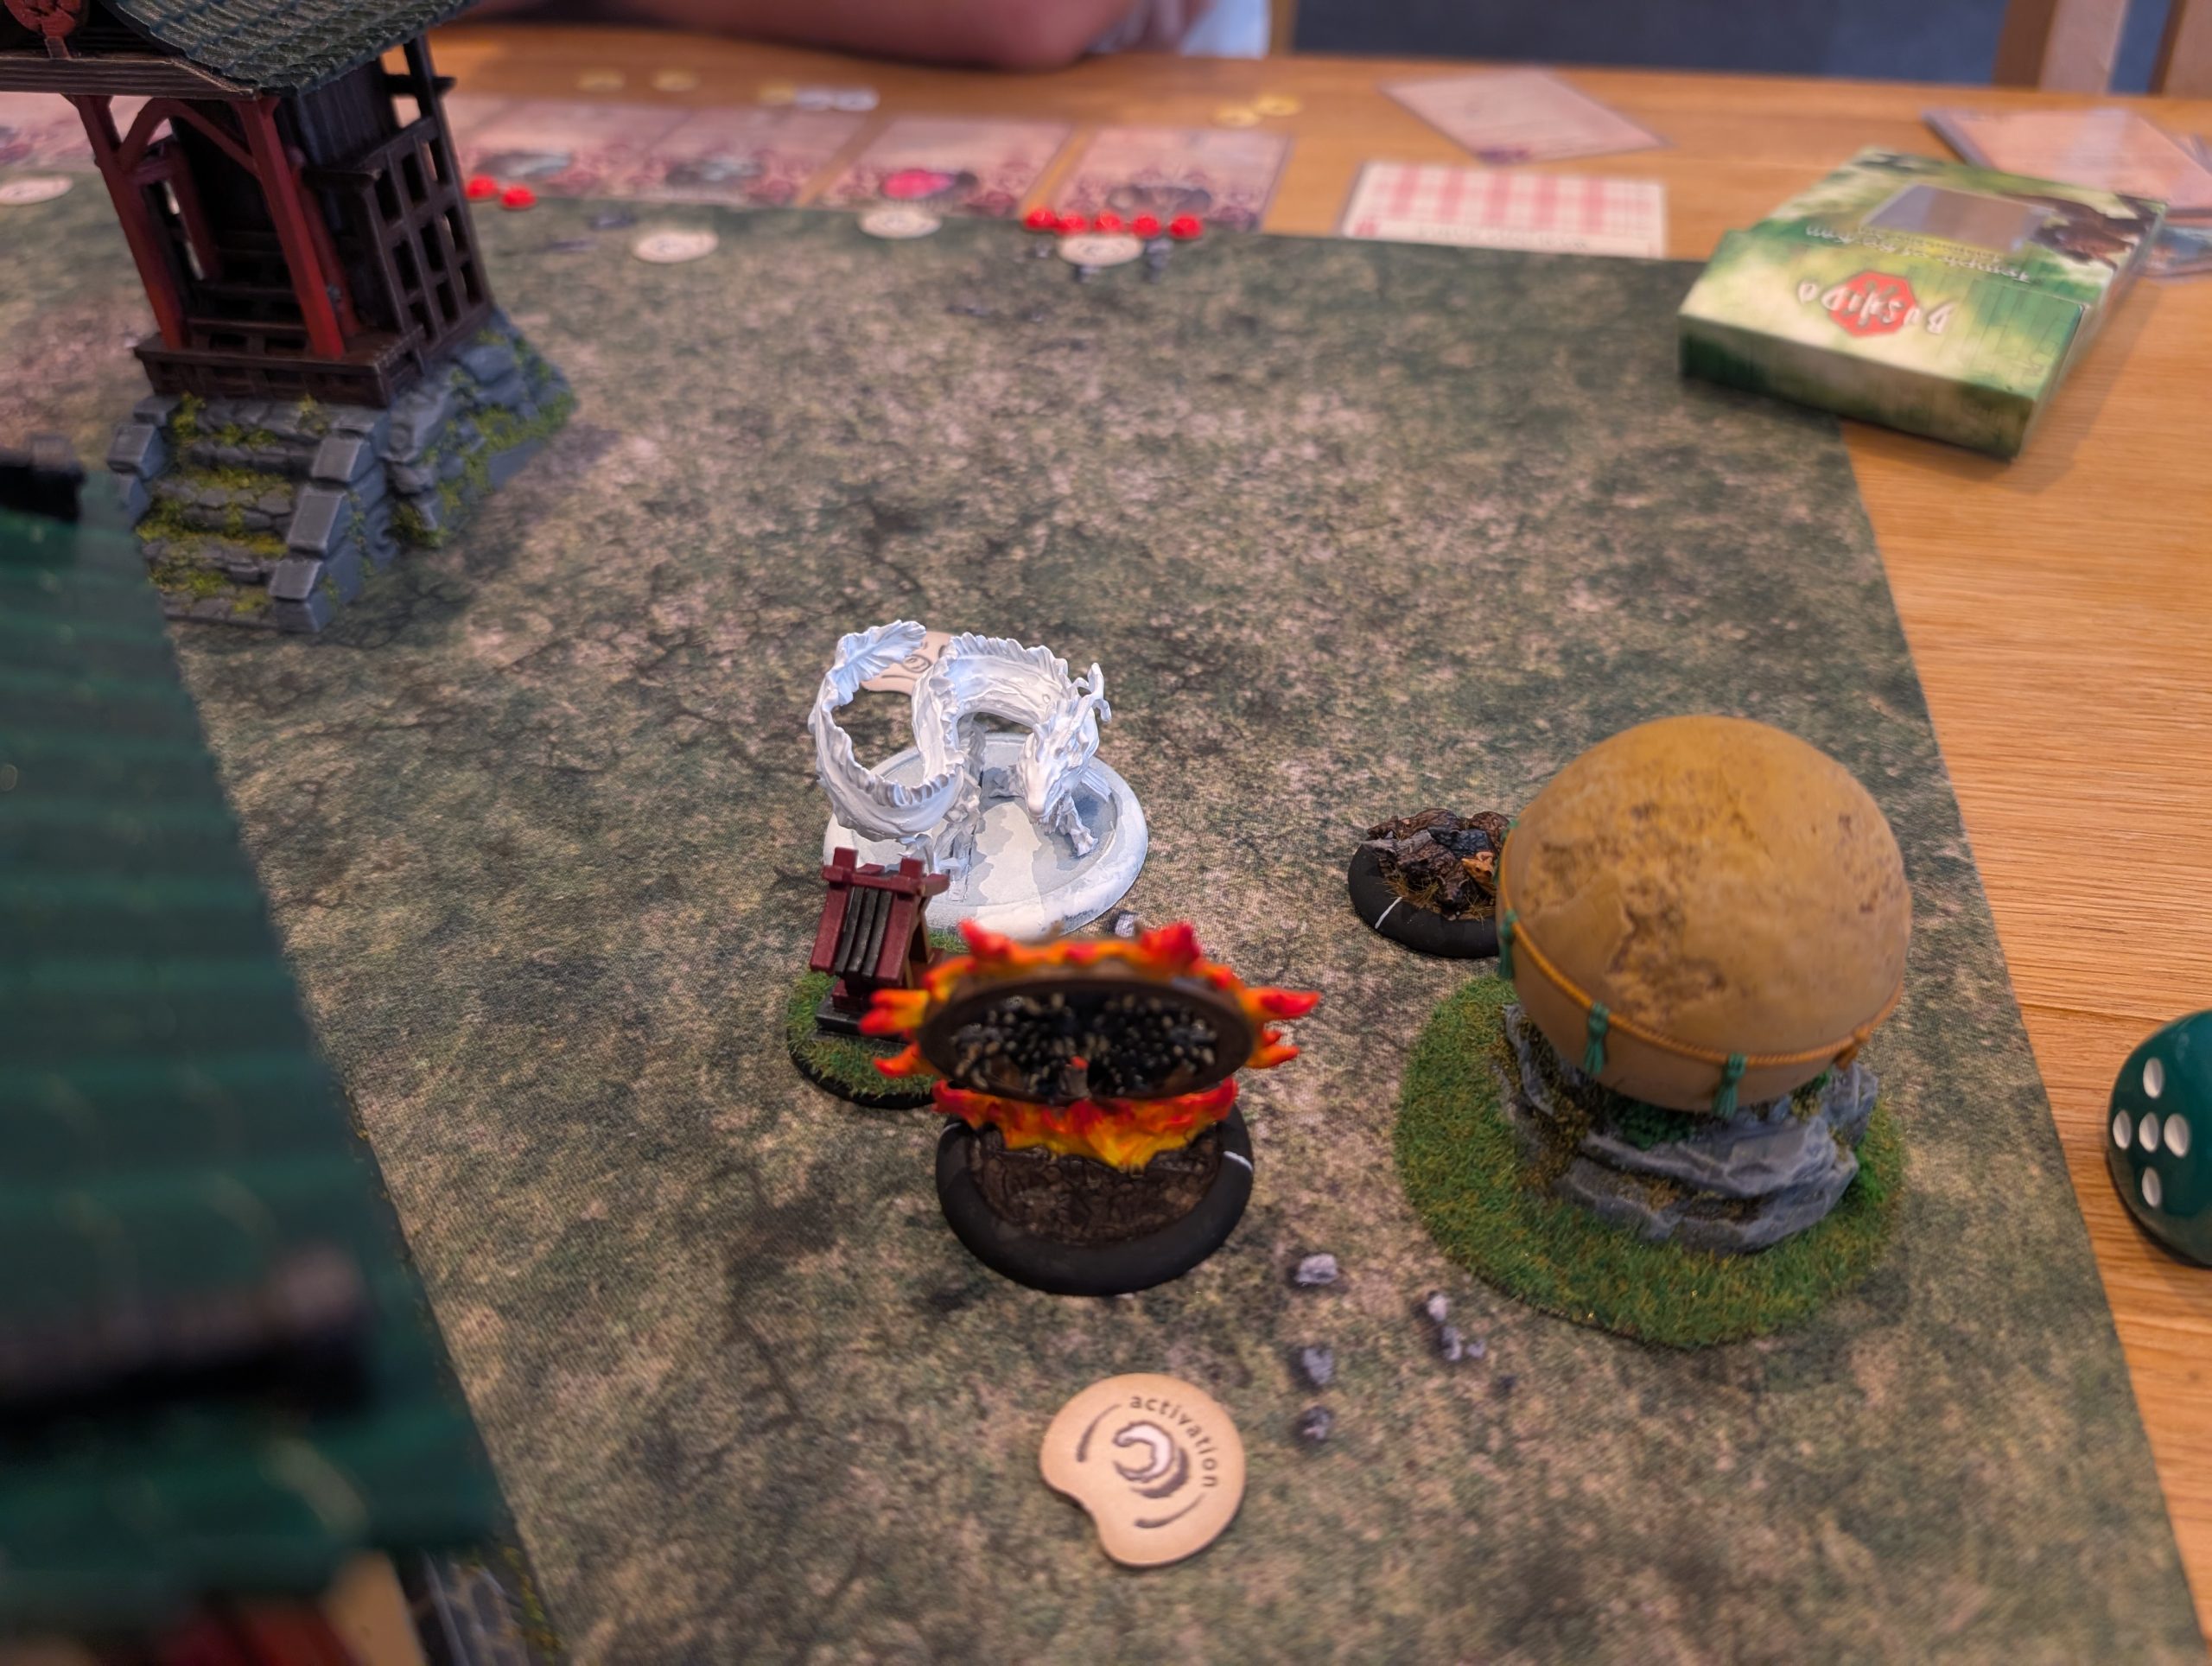
As usual, turn one is about moving models up into position. However, I kept The Wanyudo back and he was able to launch a Banzai charge into the electric eel that had strayed too far forward. The EE failed its Fear test (so one token to me) and the Wanyudo used Slam Attack to push the EE back 3” and deal out 1 wound. This also moved the EE away from the scenario objective.
Below are some shots of the end of the first turn.
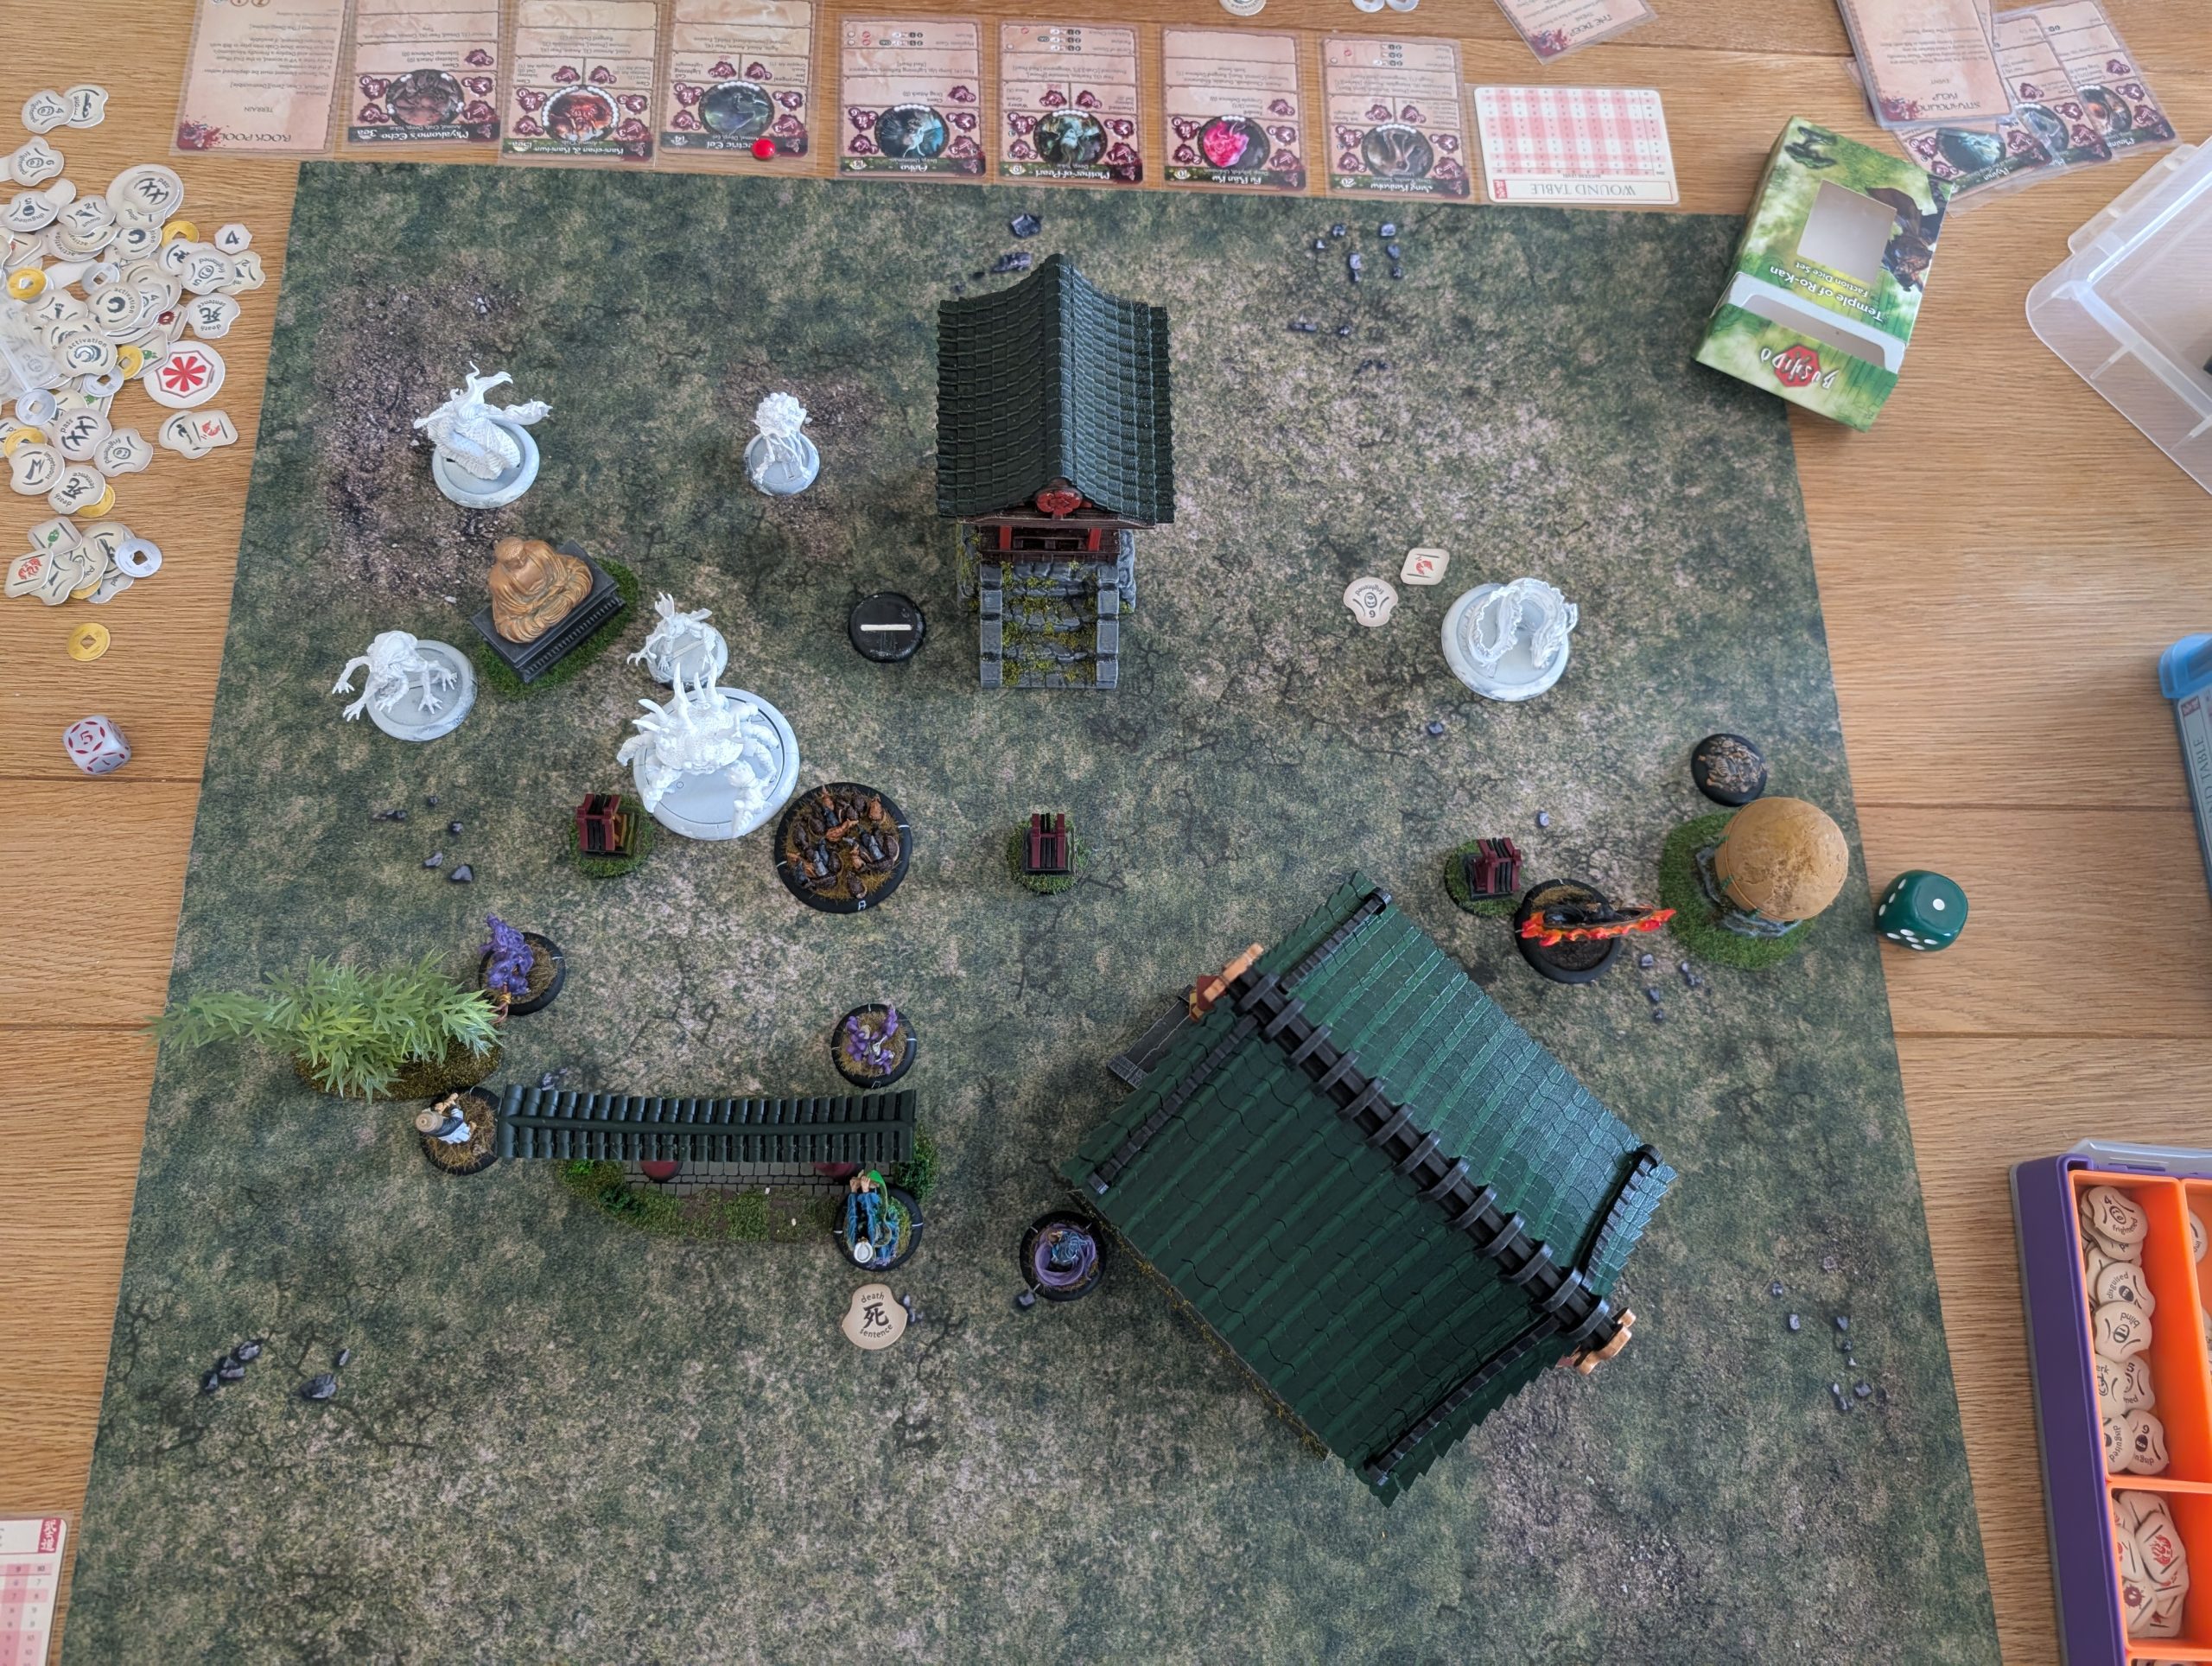
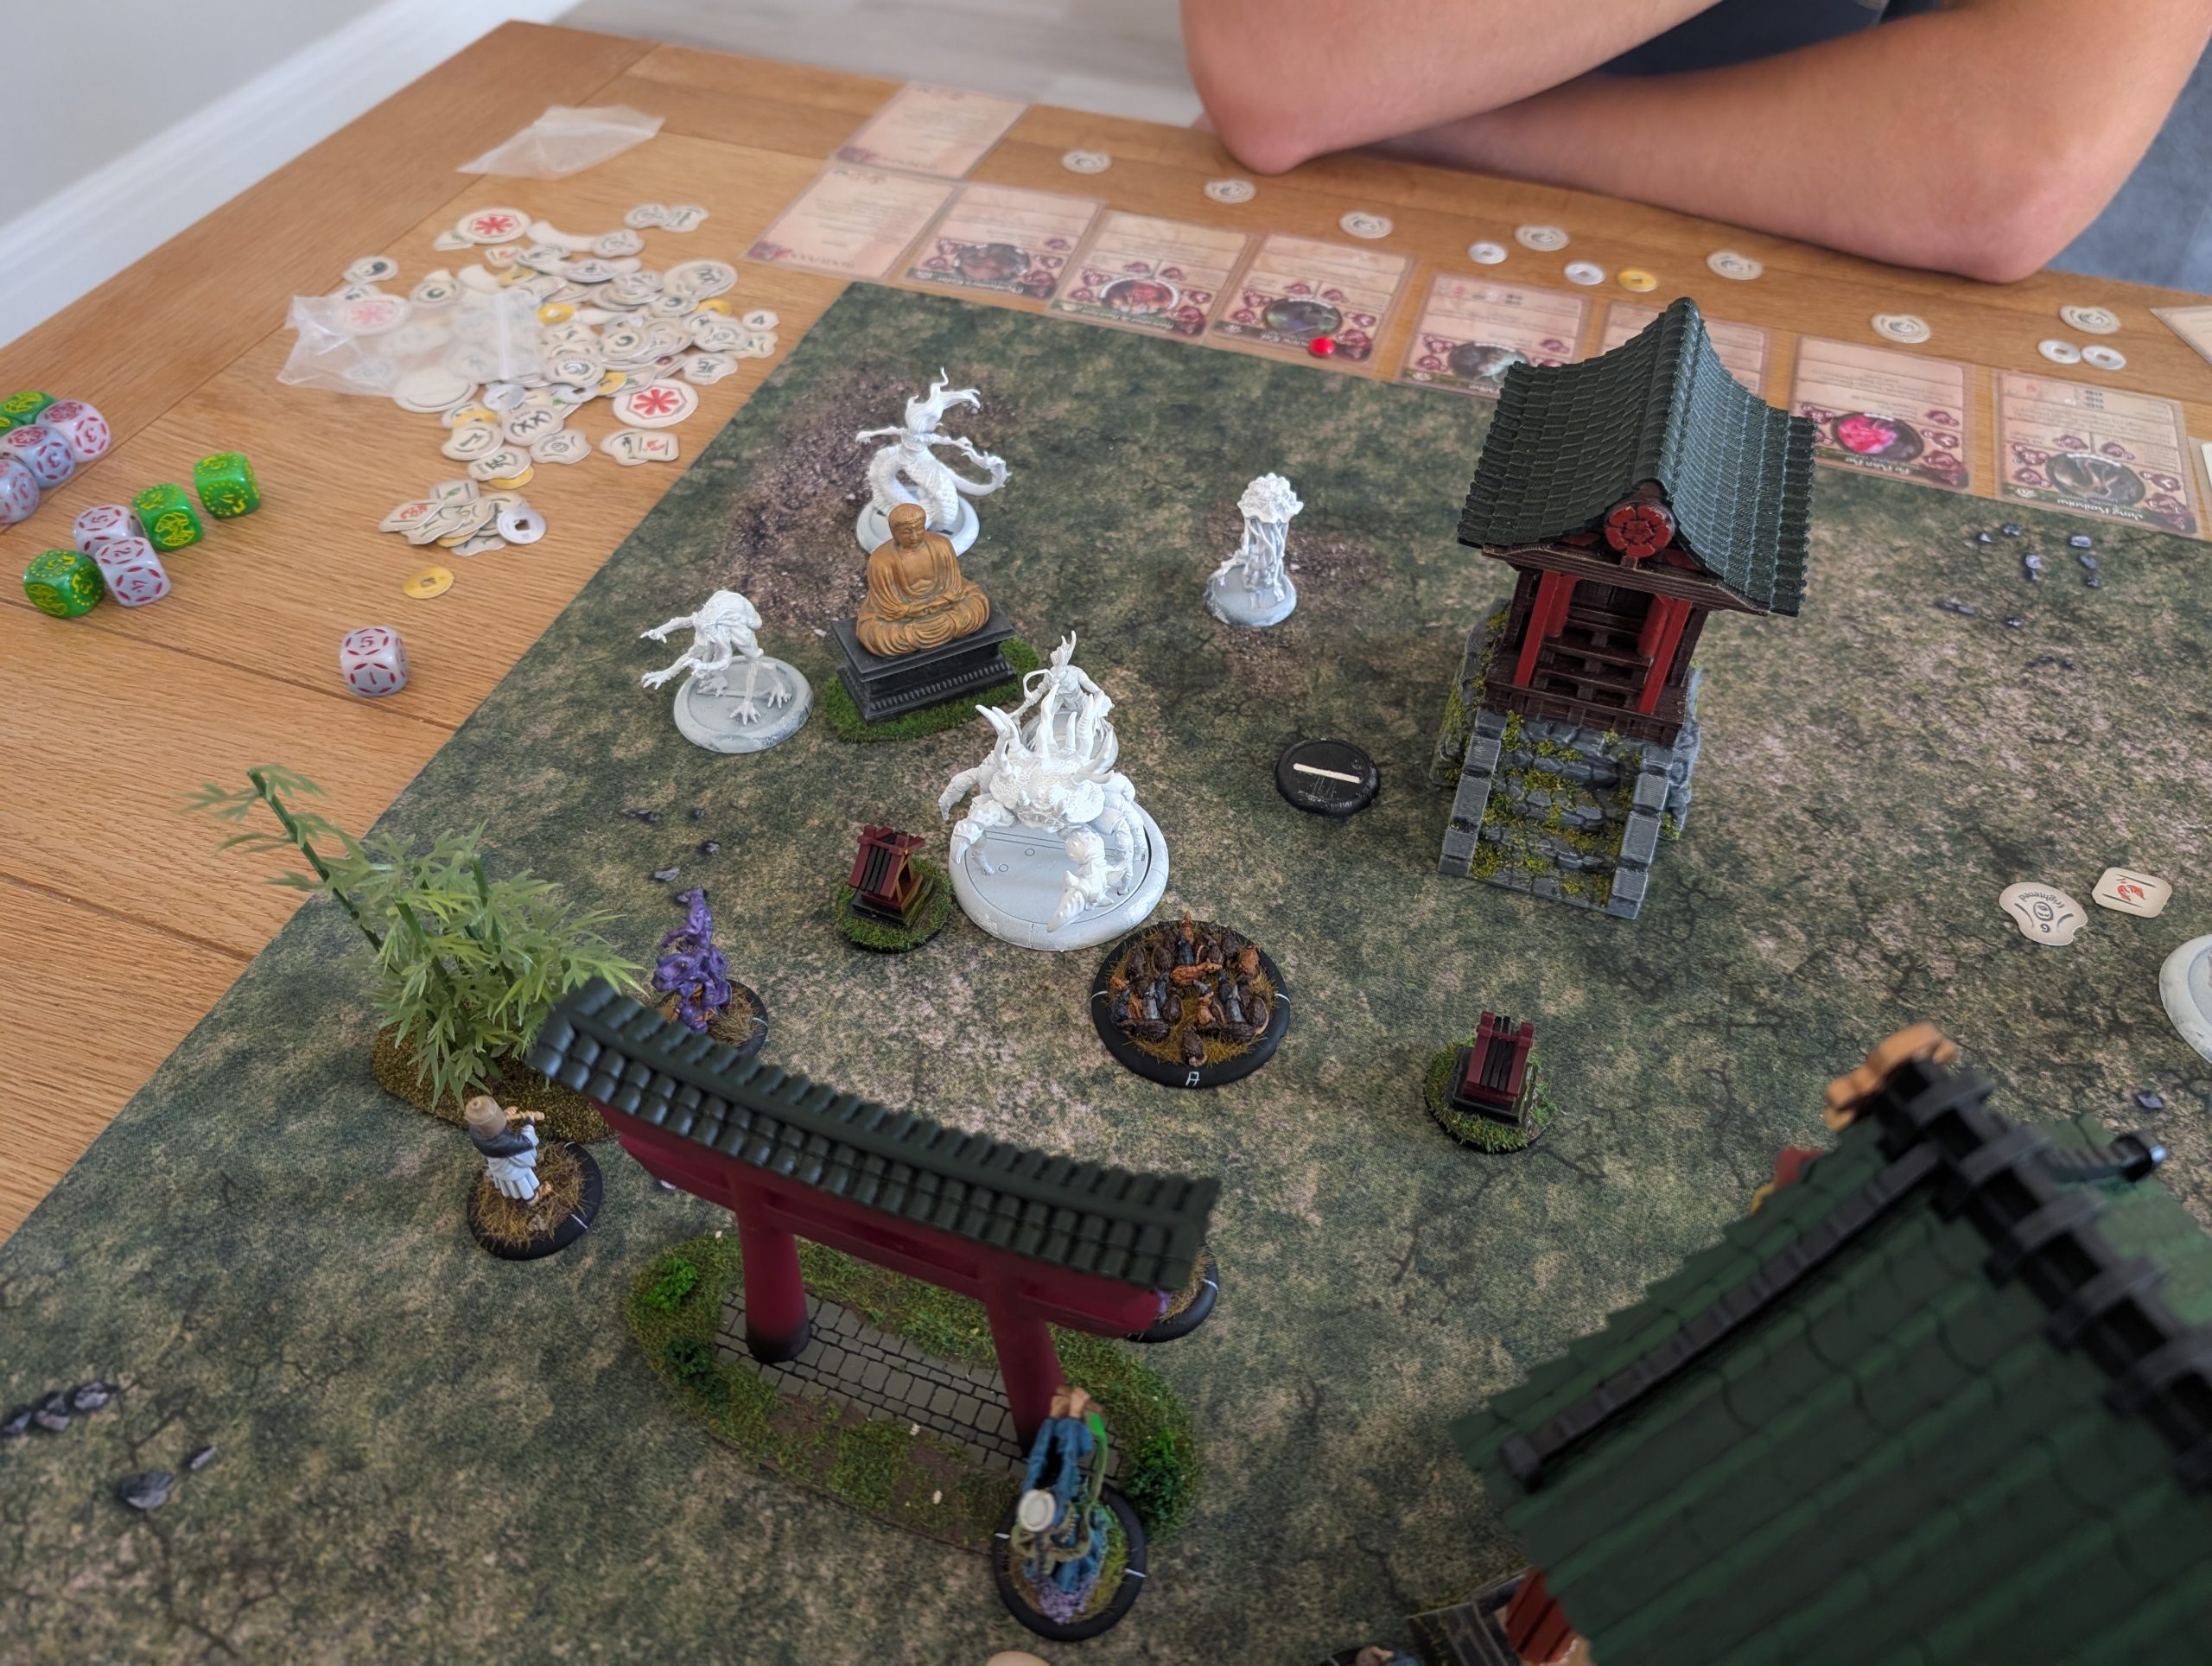
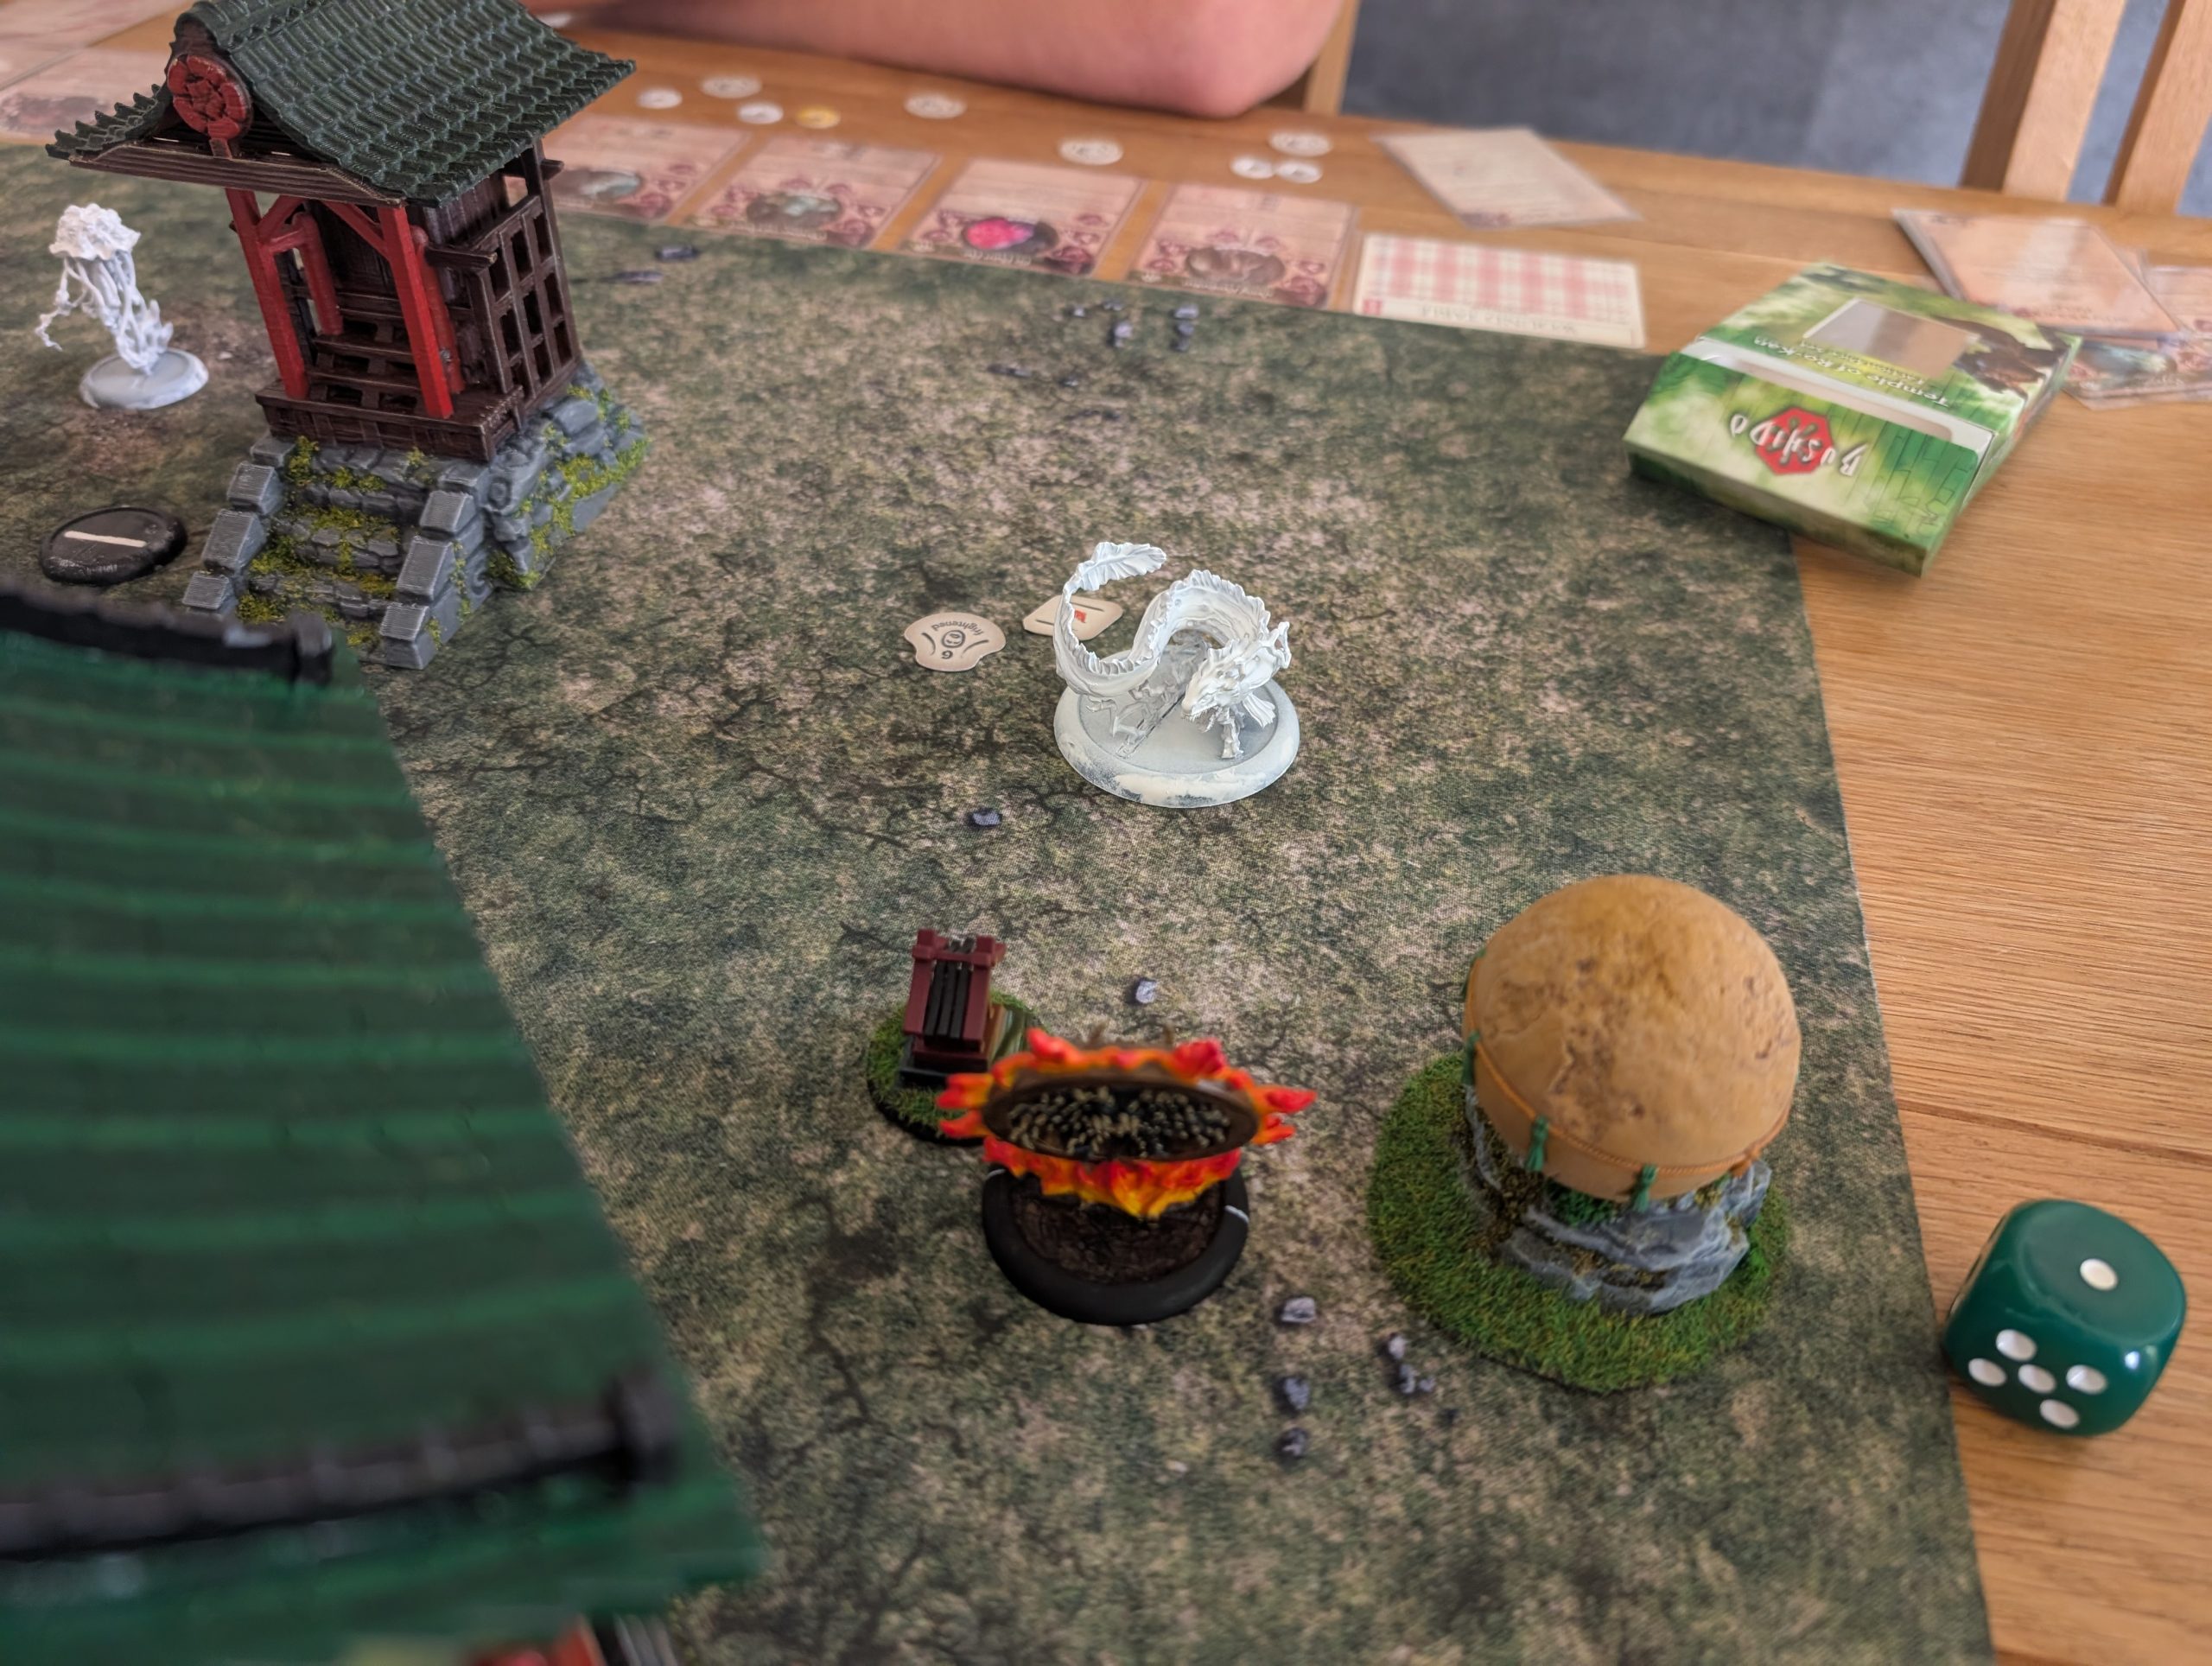
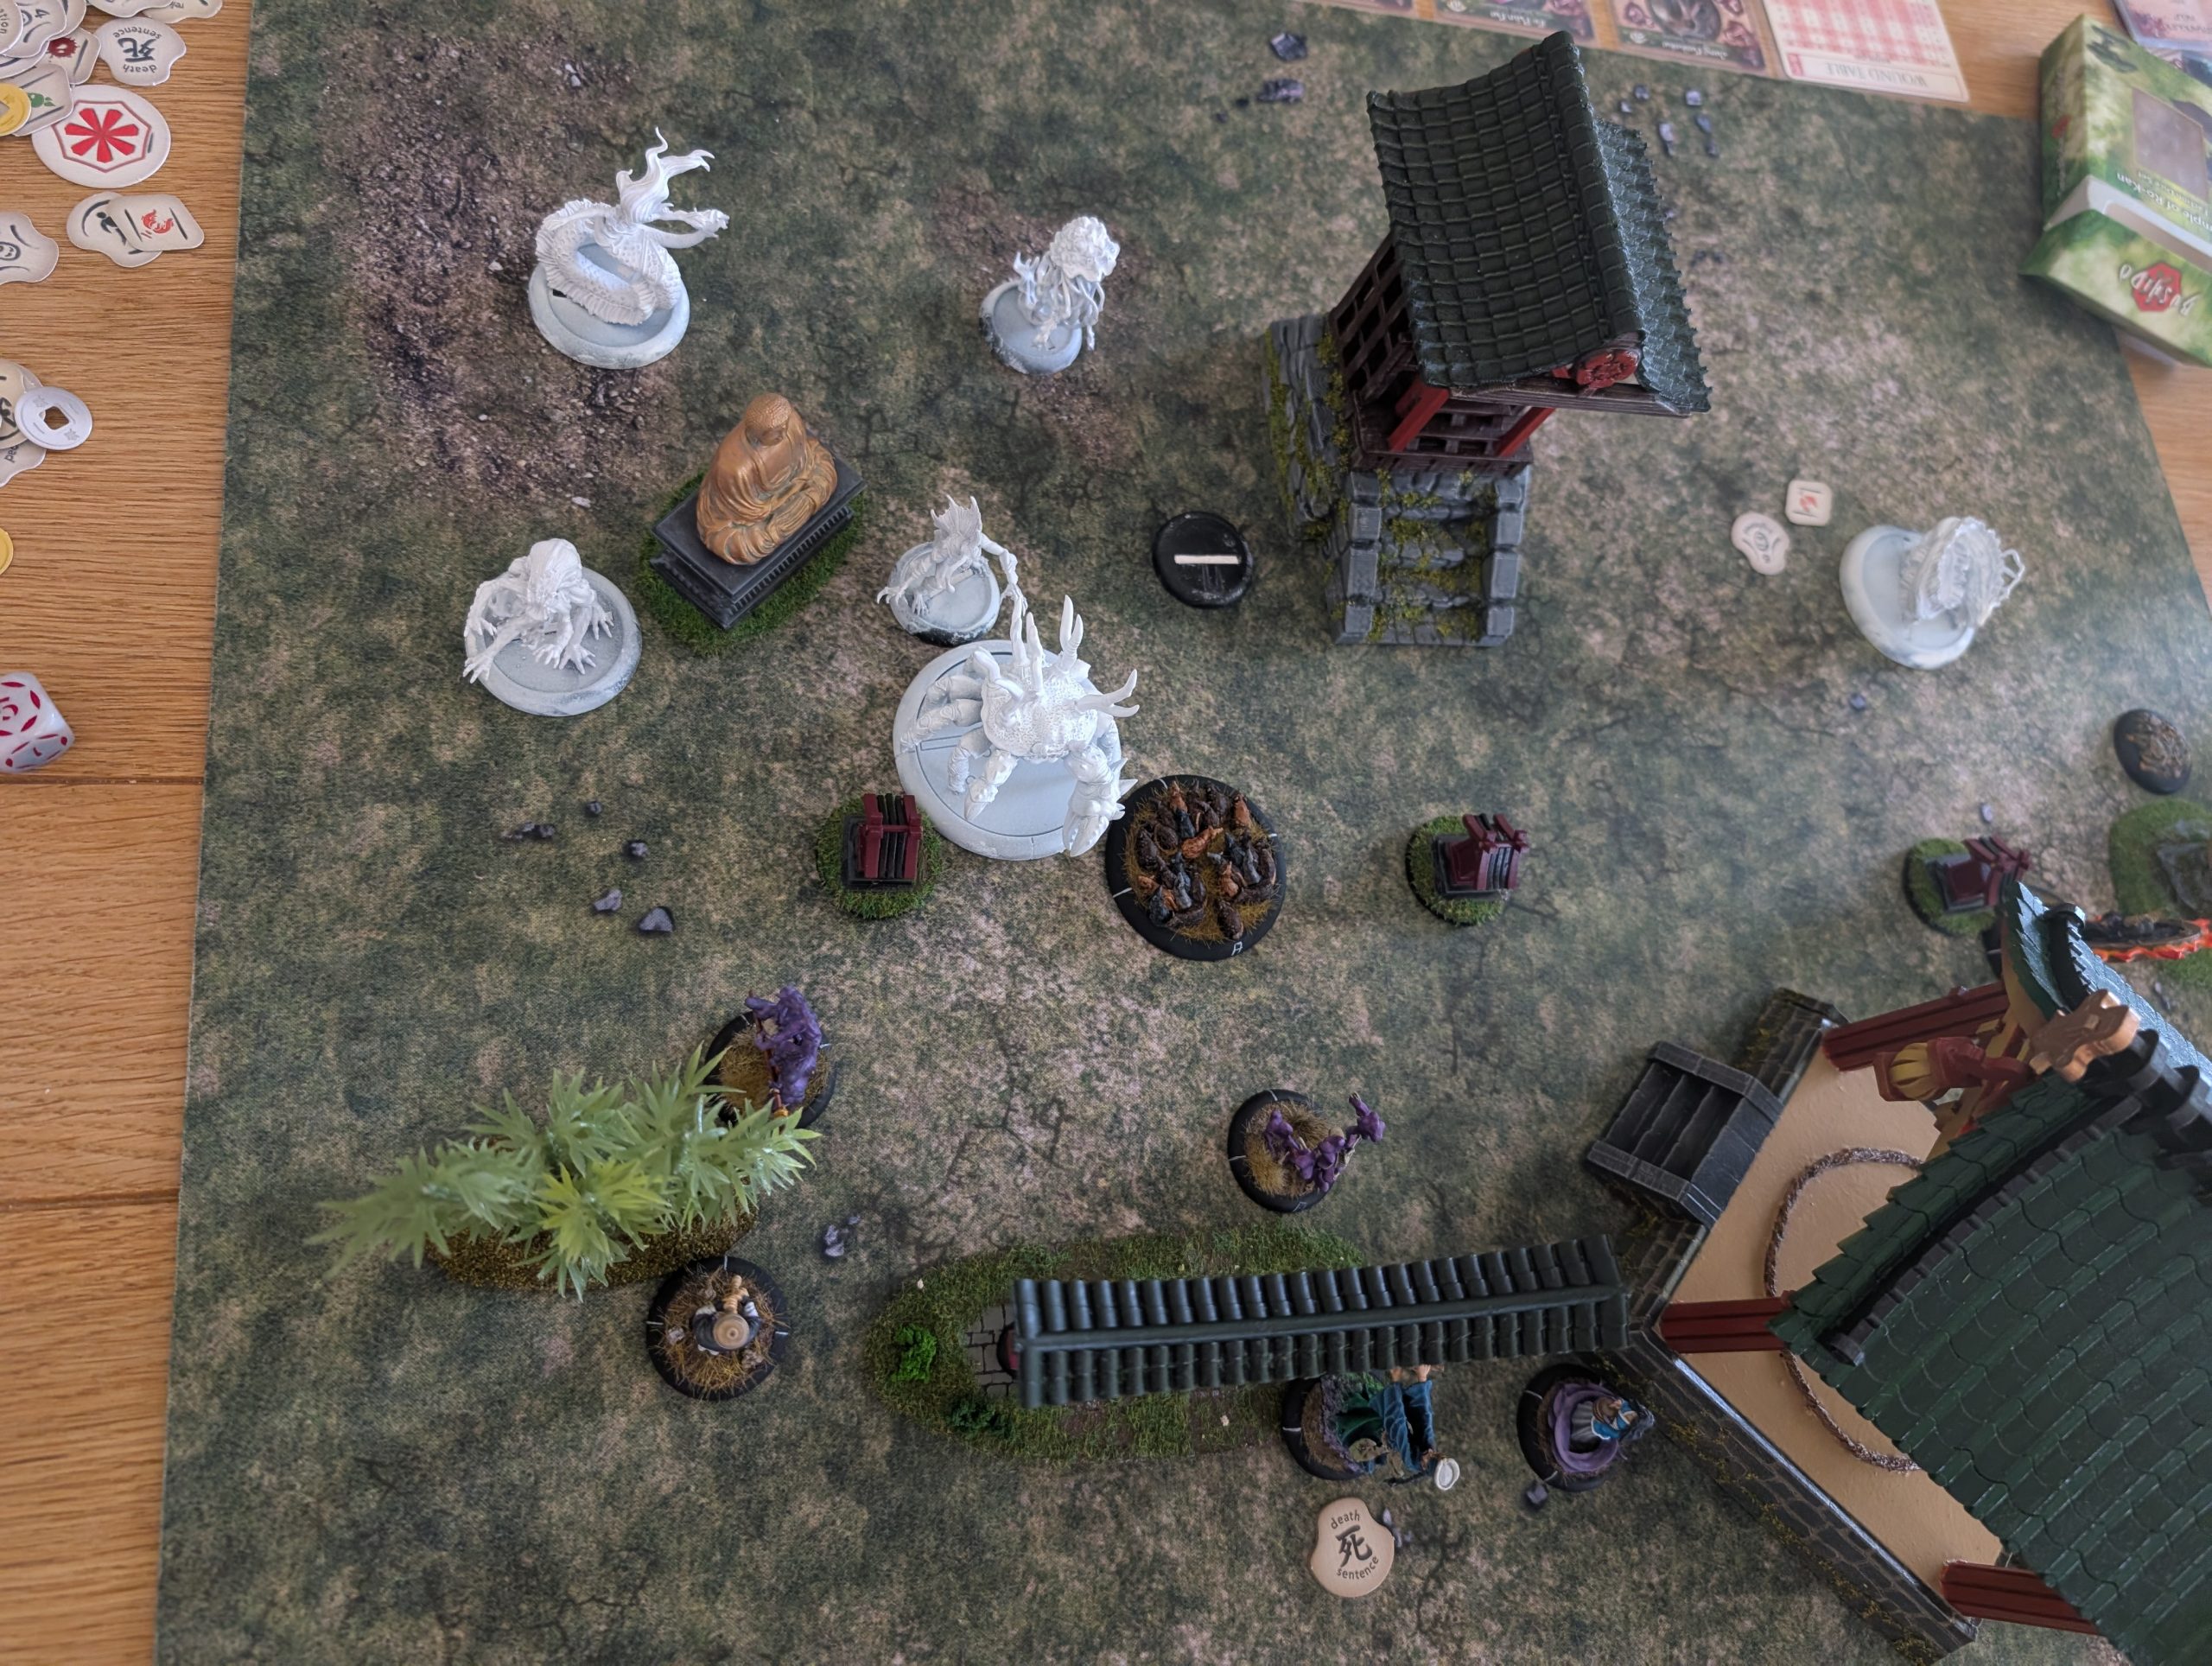
Turn 2
I play my Glimpse of Jigoku on Anko who fails the challenge test and now treats all enemy models as Fear 6 and having Terror.
I also play Pariahs Voice giving all enemy models 1 less dice when making a Ki test. I waste no time in activating Mokoti and using his Control Ki ability on the big grab which works and I now have a big crab working for me for 1 Activation.
The EE uses its electricity attack which basically zaps everything, friend and foe, within a couple of inches. At the moment, this is just the Wanyudo and my son rolls poorly and I avoid taking damage.
I use the large crab to attack Anko (we forgot the Fear test here) and Anko gets a face full of claw taking 3 damage and a fire marker.
Waku slaps a death sentence marker on JK which will make all future attacks by my models easier with the extra melee dice. I use this to good effect as I move Warui into melee with JK who struggles to handle the skeleton (mainly as I roll all dice in attack as being Durable, I’m only going to take one wound in return). This doesn’t go well for JK who takes 5 wounds but does manage to grapple Warui and hold him.
My son moves up Mother of Pearl and uses her once in a game Curse of Doom. This gives 4 doom markers to the target. You remove a doom marker each turn and once the last one is removed, the target takes 7 wounds. Poor old Mokoti gets this and 7 wounds will kill the plucky little monk outright in 4 turns.
The Maiden of Sagoya uses her ki feat to summon Sagoya Kaidan, a ghost that loves to attack models that are frightened.
The big crab tries to attack the Maiden of Sagoya but I’m able to roll well enough to deflect the attack away. I can then use the Wanyudo to interact with an objective to turn in friendly, but my son counters this by using the EE to turn it back friendly.
Finally, with my last activation of the Animated Militia skeleton, I interact with the middle objective to collect a scenario point at the end of the turn and therefore pick up a Victory Point. This triggers my son’s rockpool terrain feature that releases an annoying little crab.
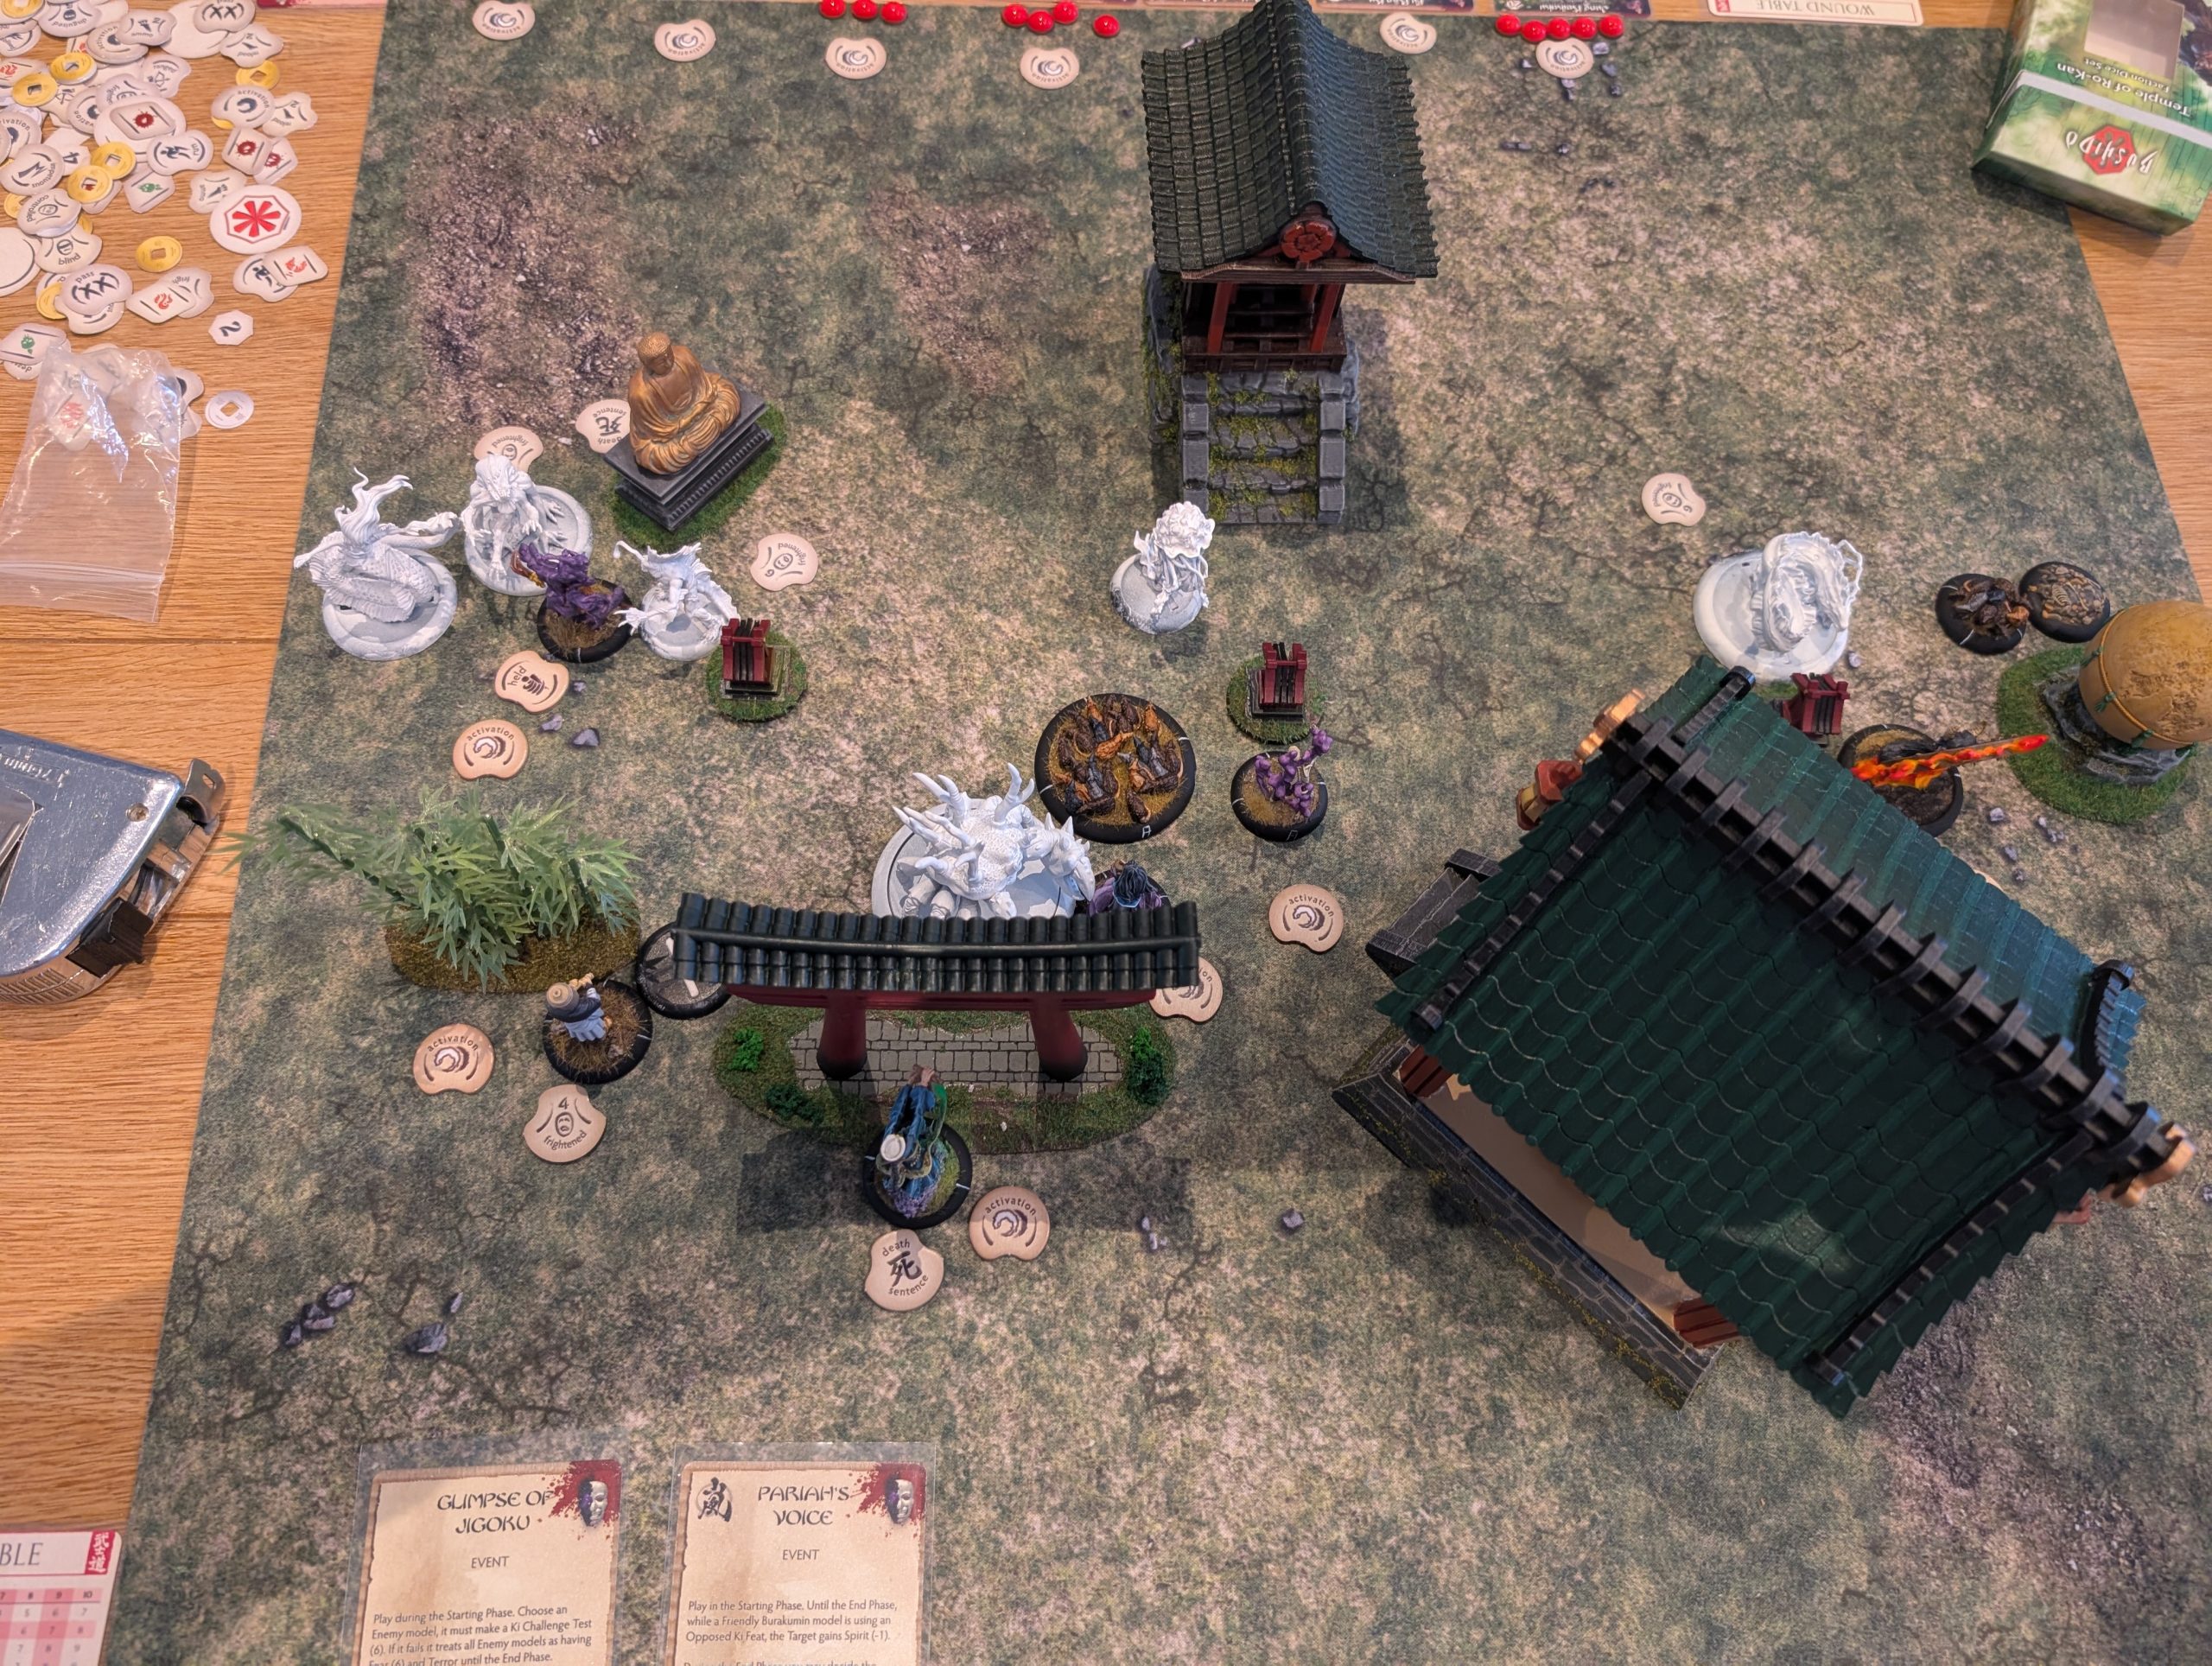
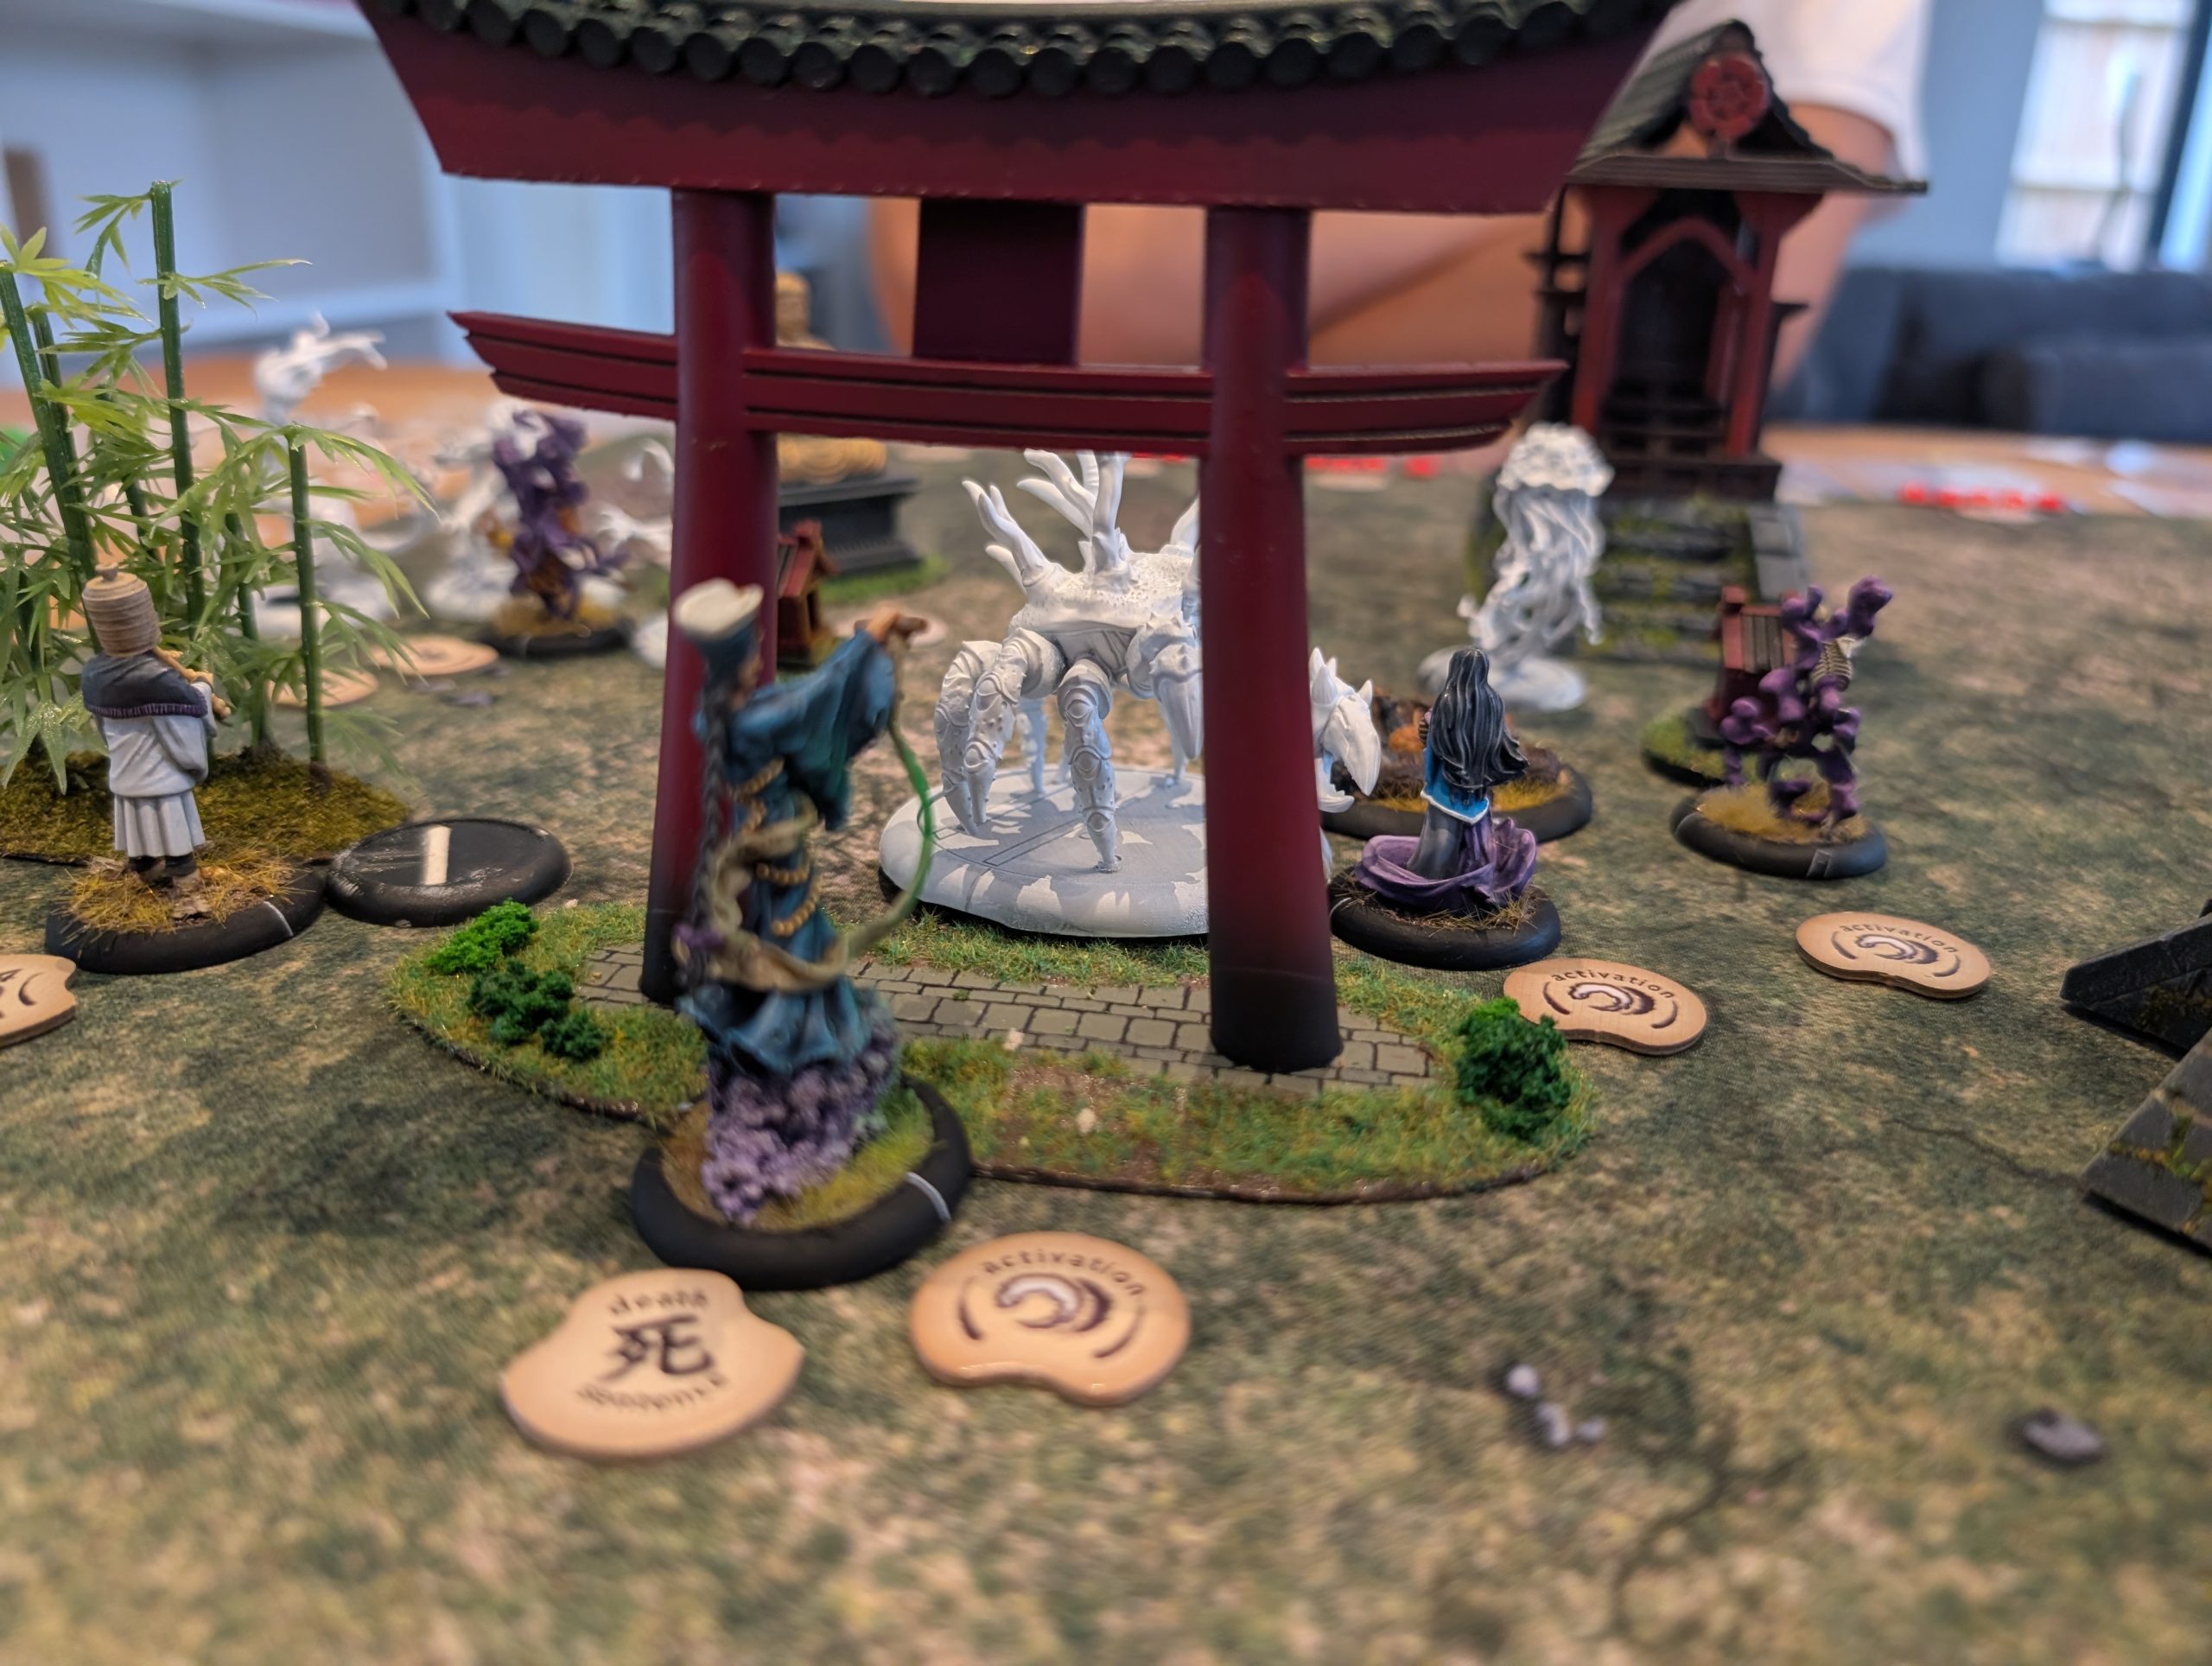
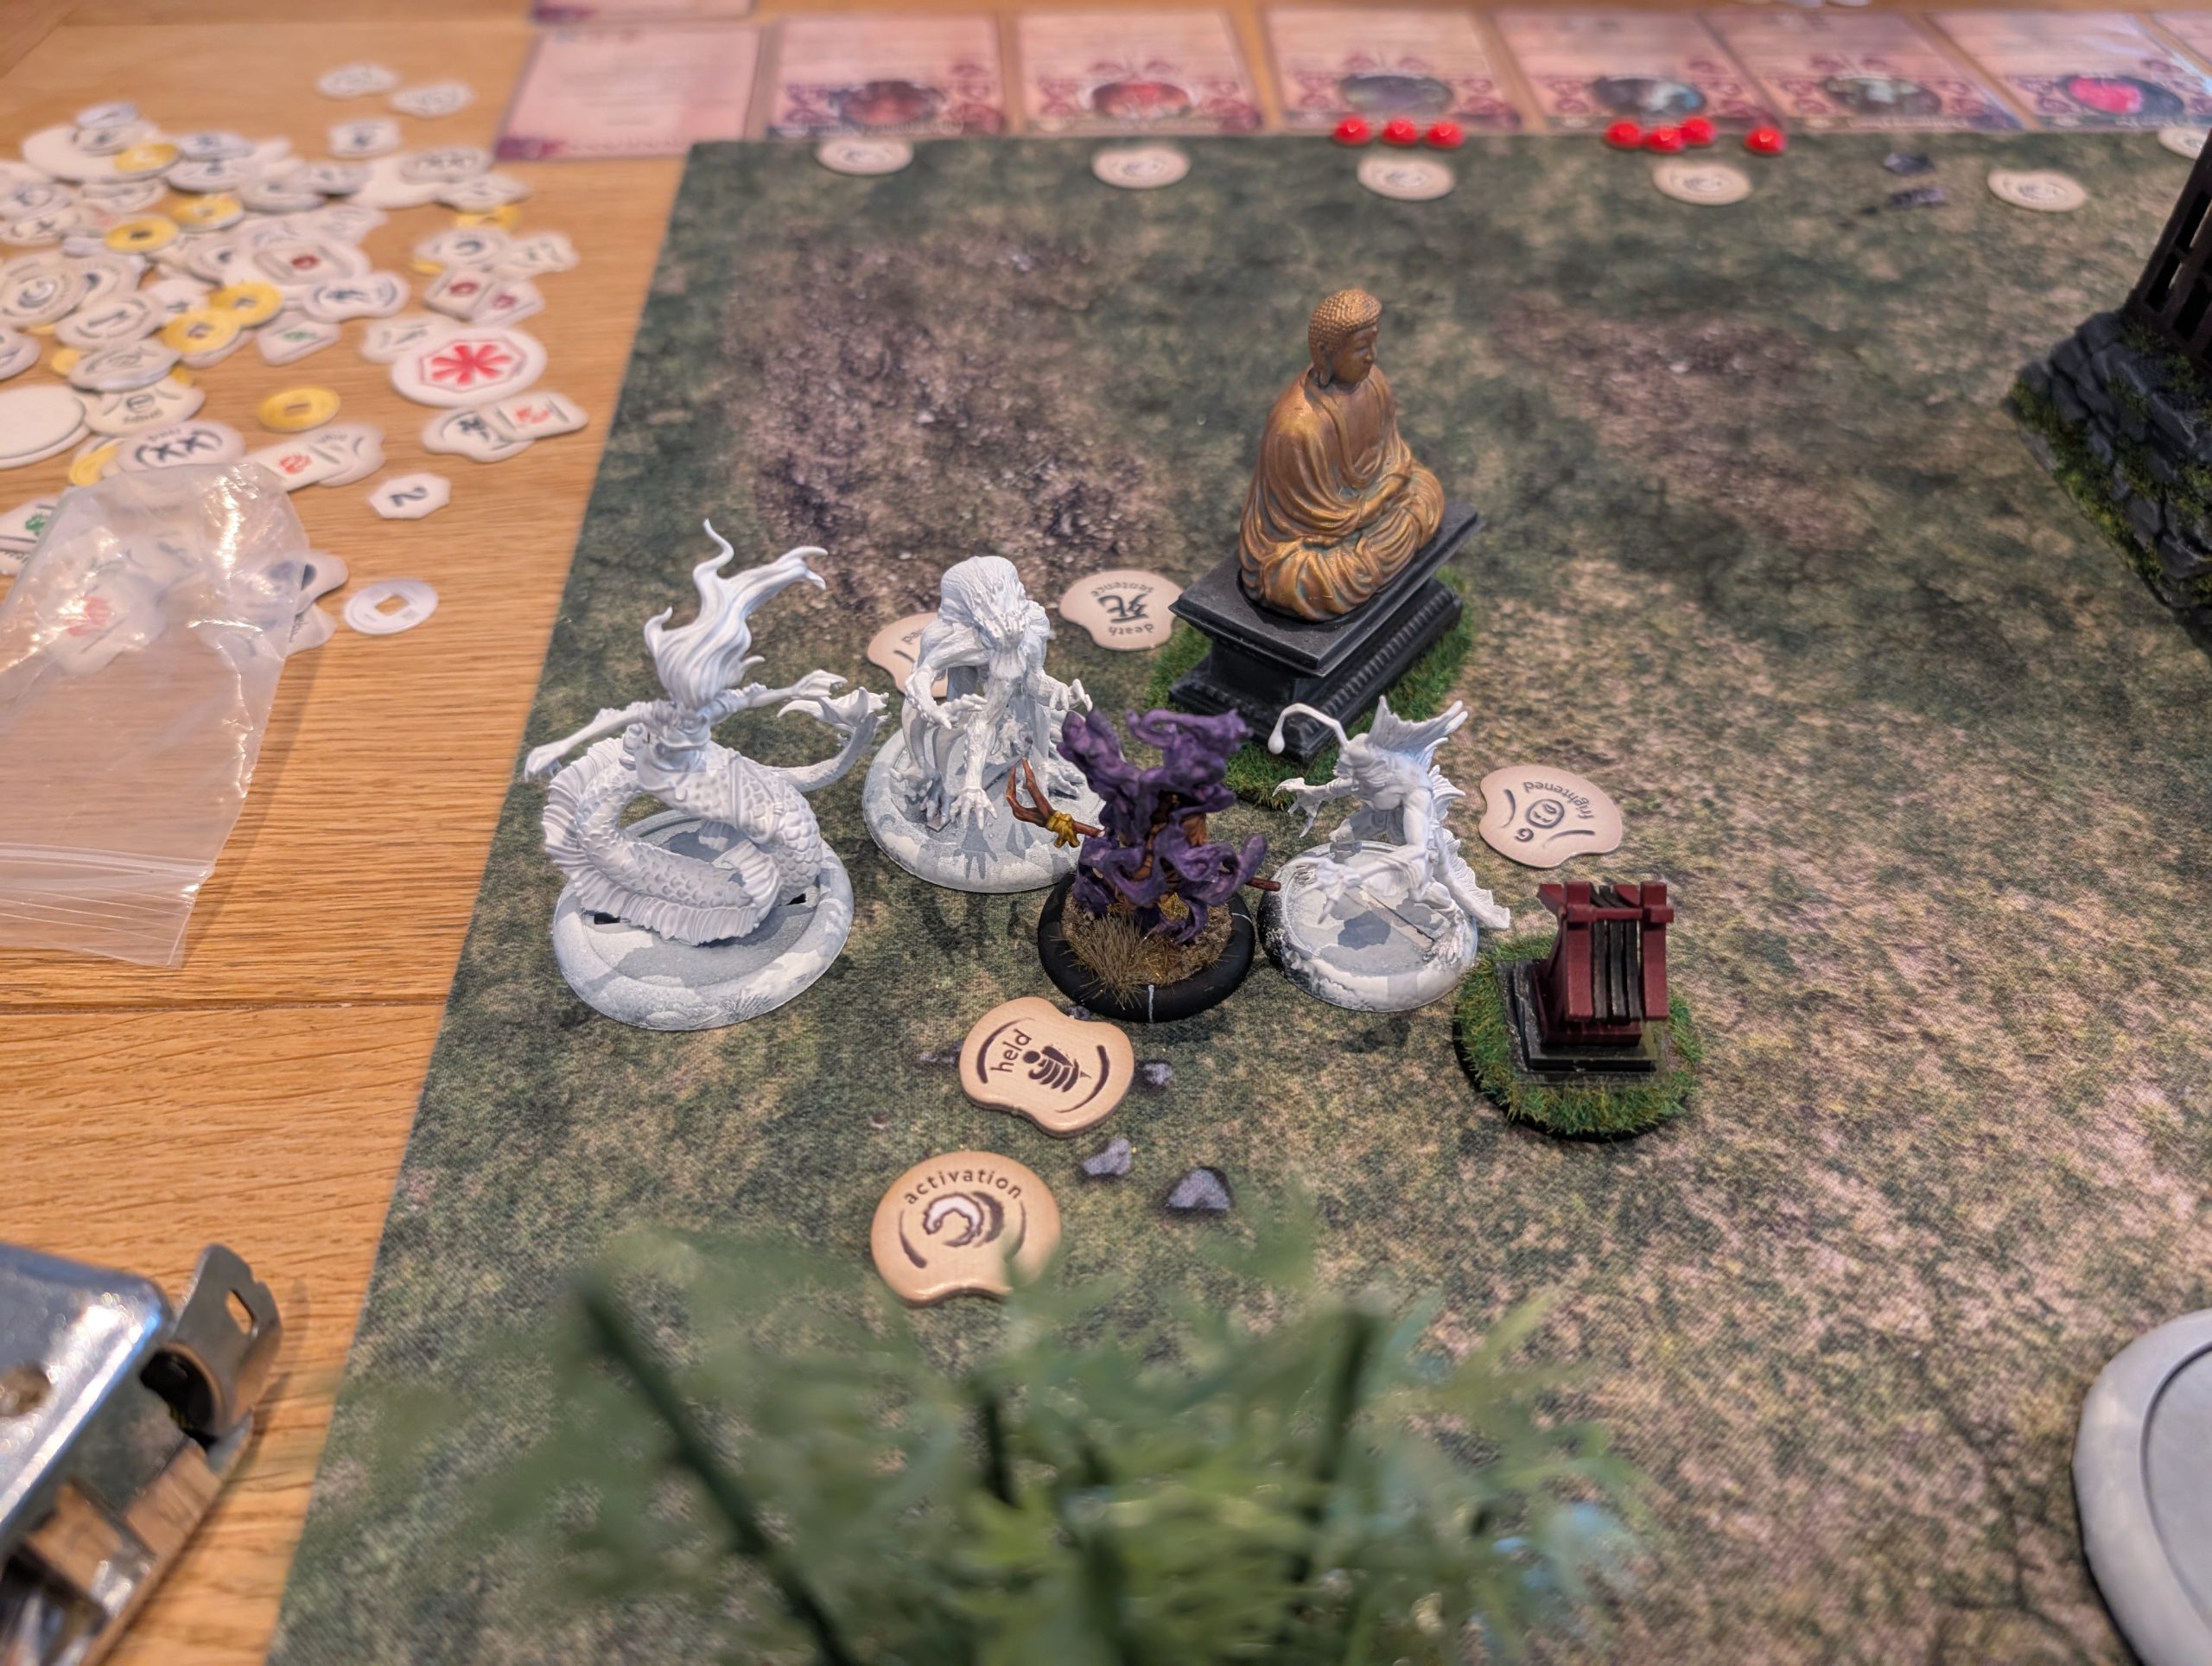
Turn 3.
The objectives reset to neutral.
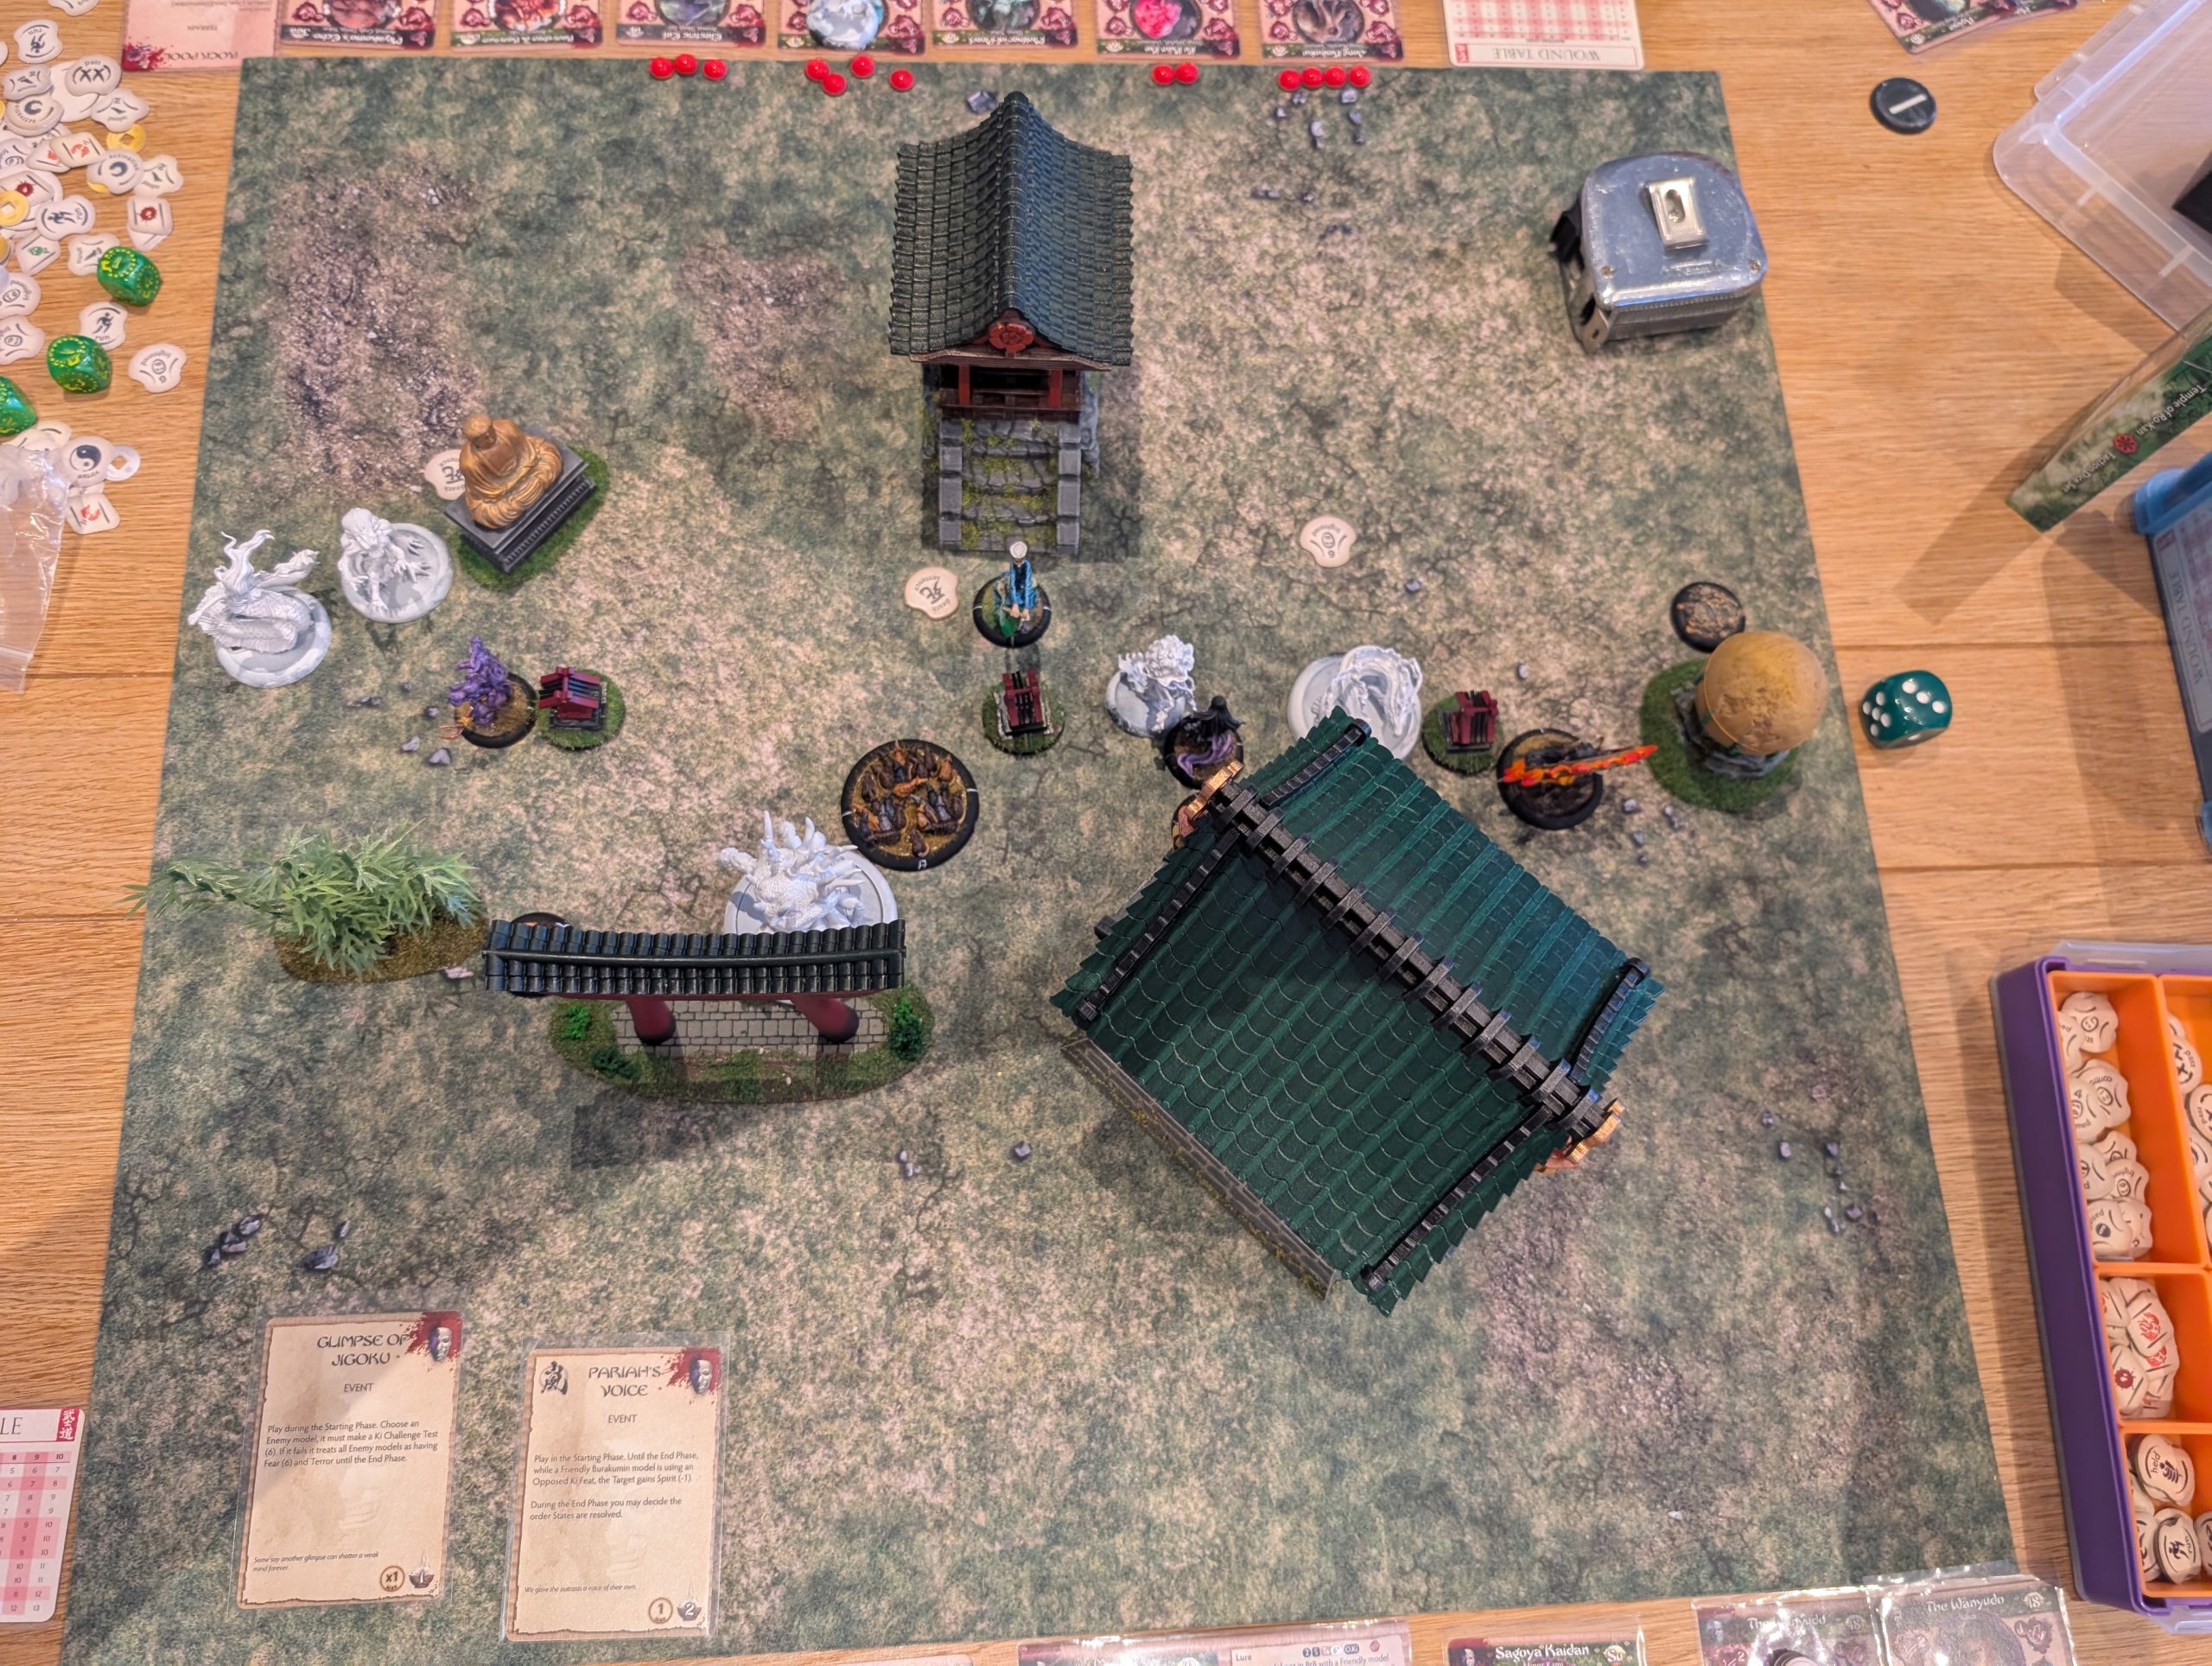
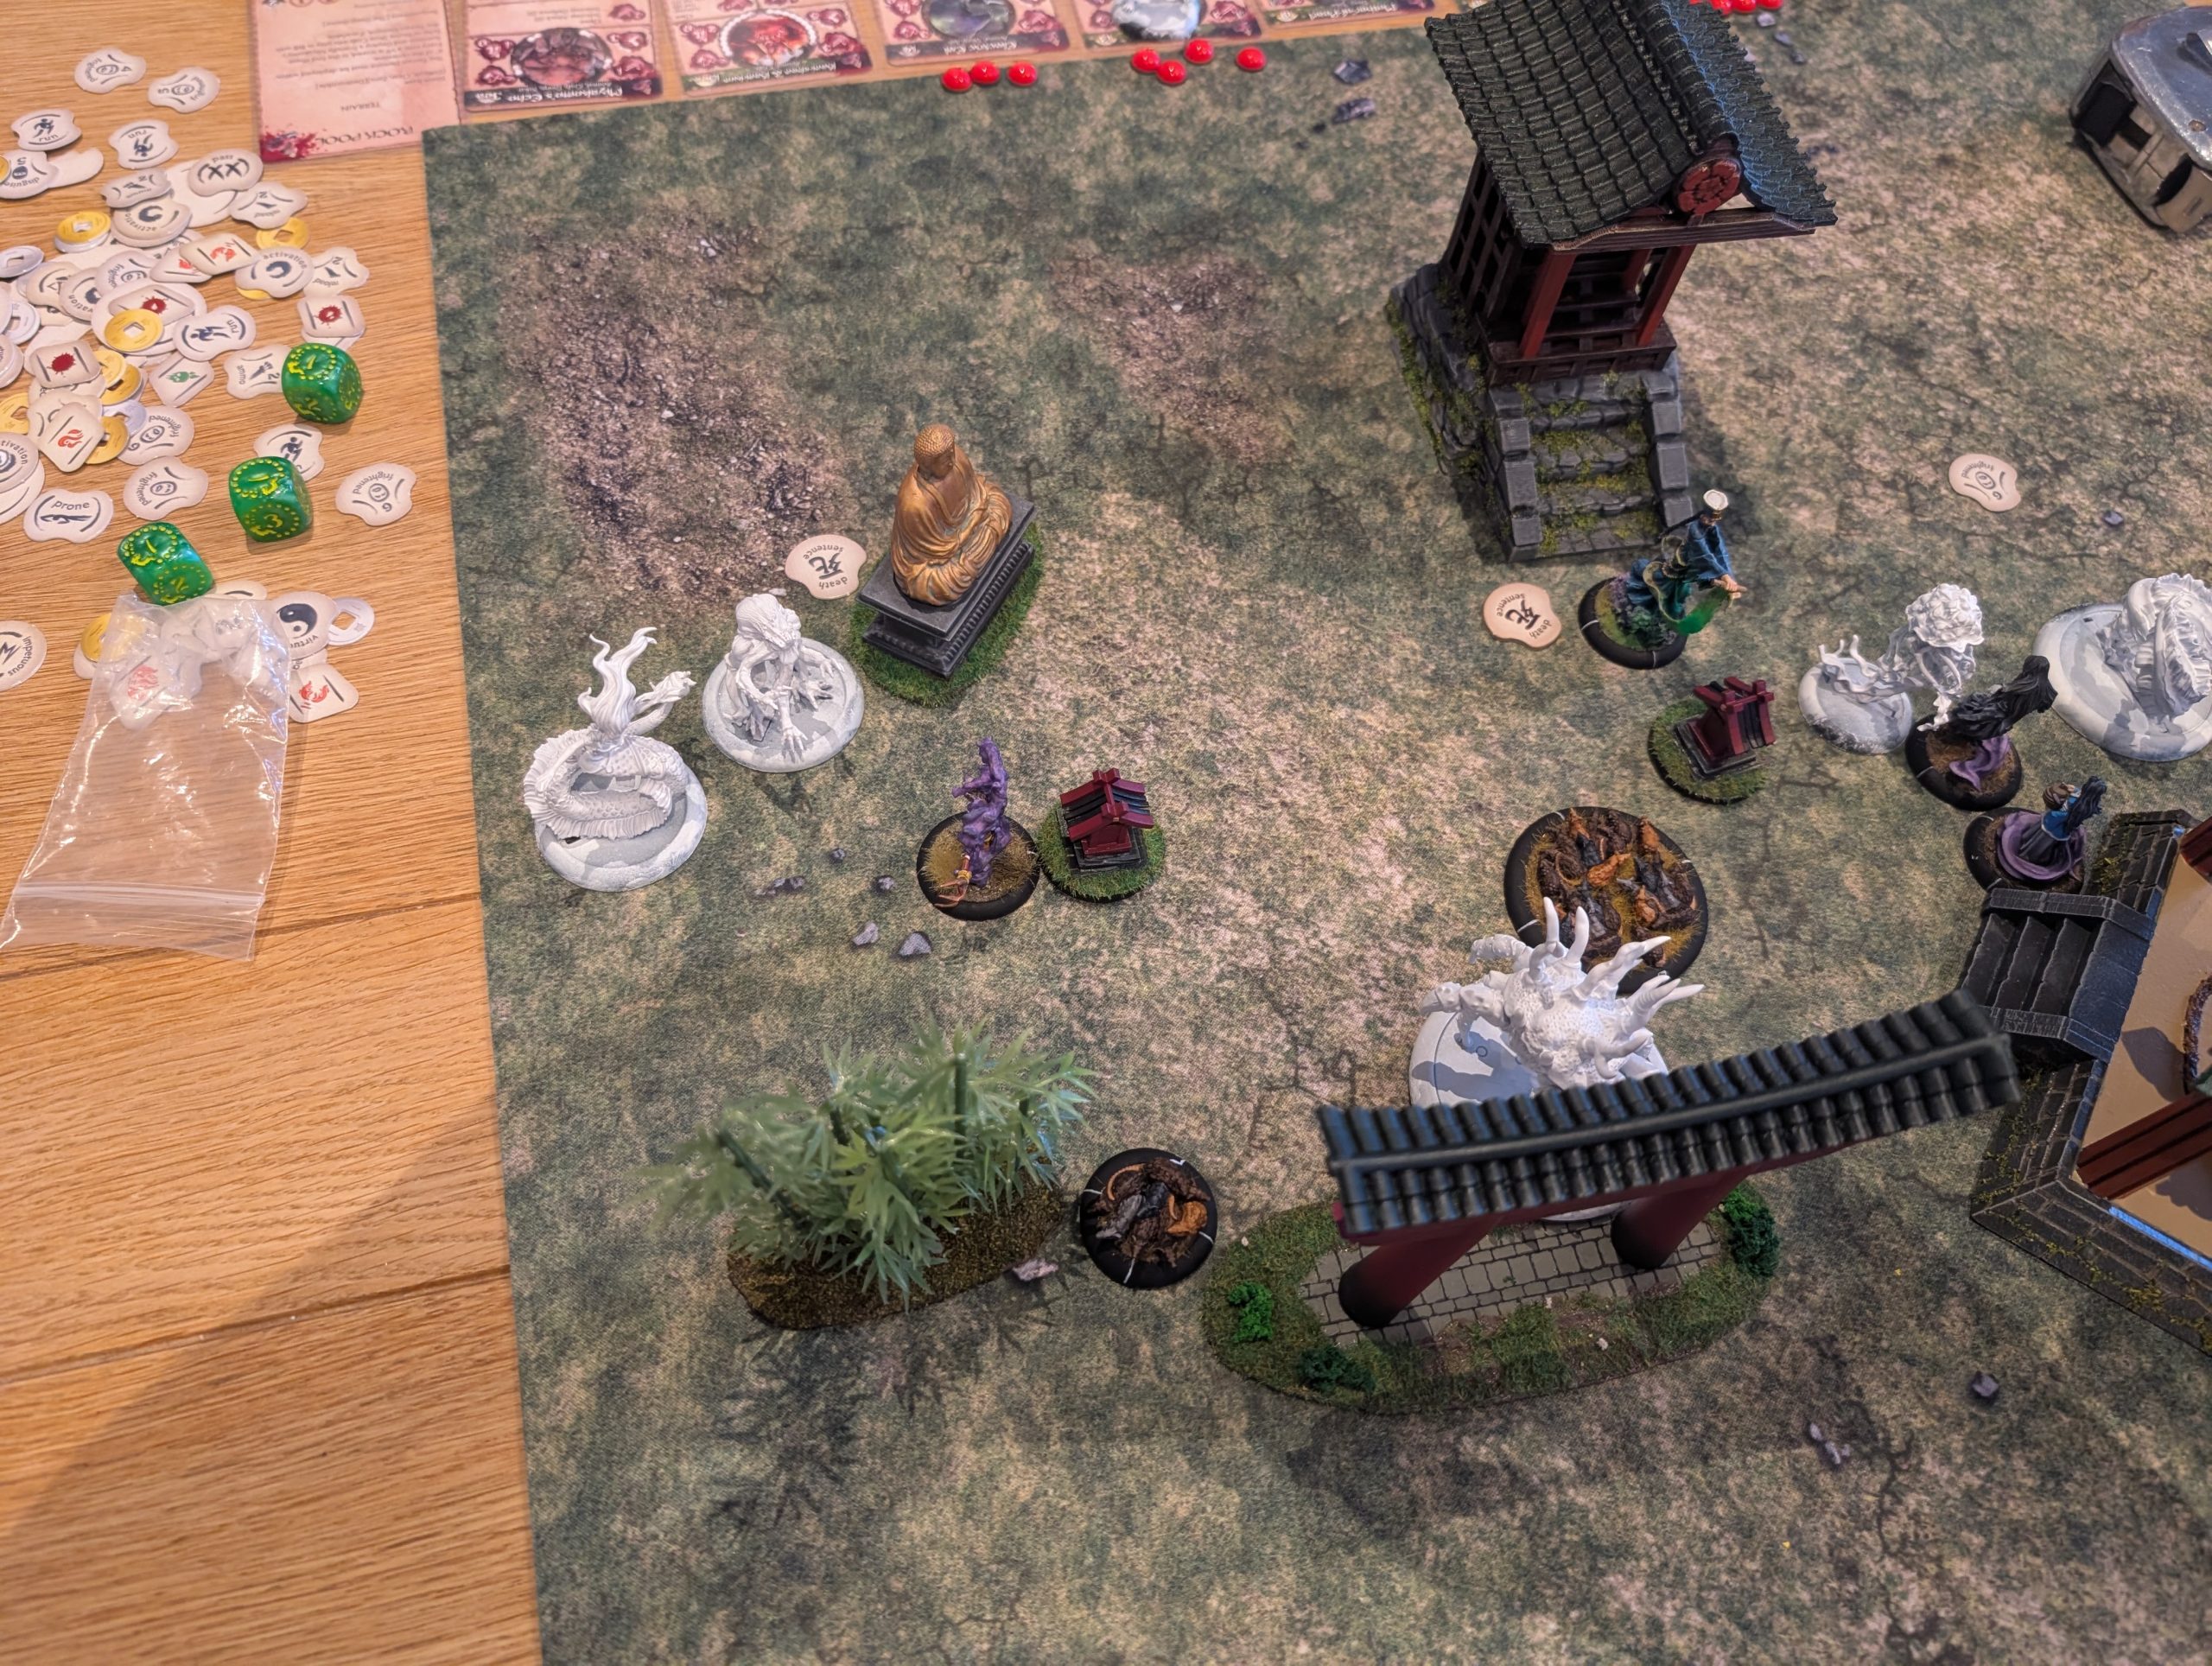
My son wins the initiative test and uses the EE to zap the Maiden for a wound and Sagoya Kaidan for a couple. I respond by getting The Wanyudo to activate his Inferno Ki feat, that gives the EE and the little crab that arrived at the end of turn 2 a couple of fire markers.
My animated militia skeleton attacks the jellyfish in the middle of the board and I deal 1 wound but there is a reason that these animated militia are so cheap – they have the critical strike debuff and any wound roll of a double kills it out right, which is exactly what my son rolled. He’s well chuffed with this kill, right in the centre of my line.
Mother of Pearl uses her ranged attack to target Warui who is currently in melee with Anko. This is high risk as she may hit Anko rather than Warui. Unfortunately, this is exactly what happens and Anko goes down.
The big crab attacks Waku but he has the Protected special ability, before the crab can roll any wound dice, I decide to sacrifice Mokoti to avoid the damage. Waku does however take a wound from picking up a bleed marker.
As the turn finishes, the little crab, who is still on fire, gets cooked and is removed. The EE also takes a couple of fire damage as well.
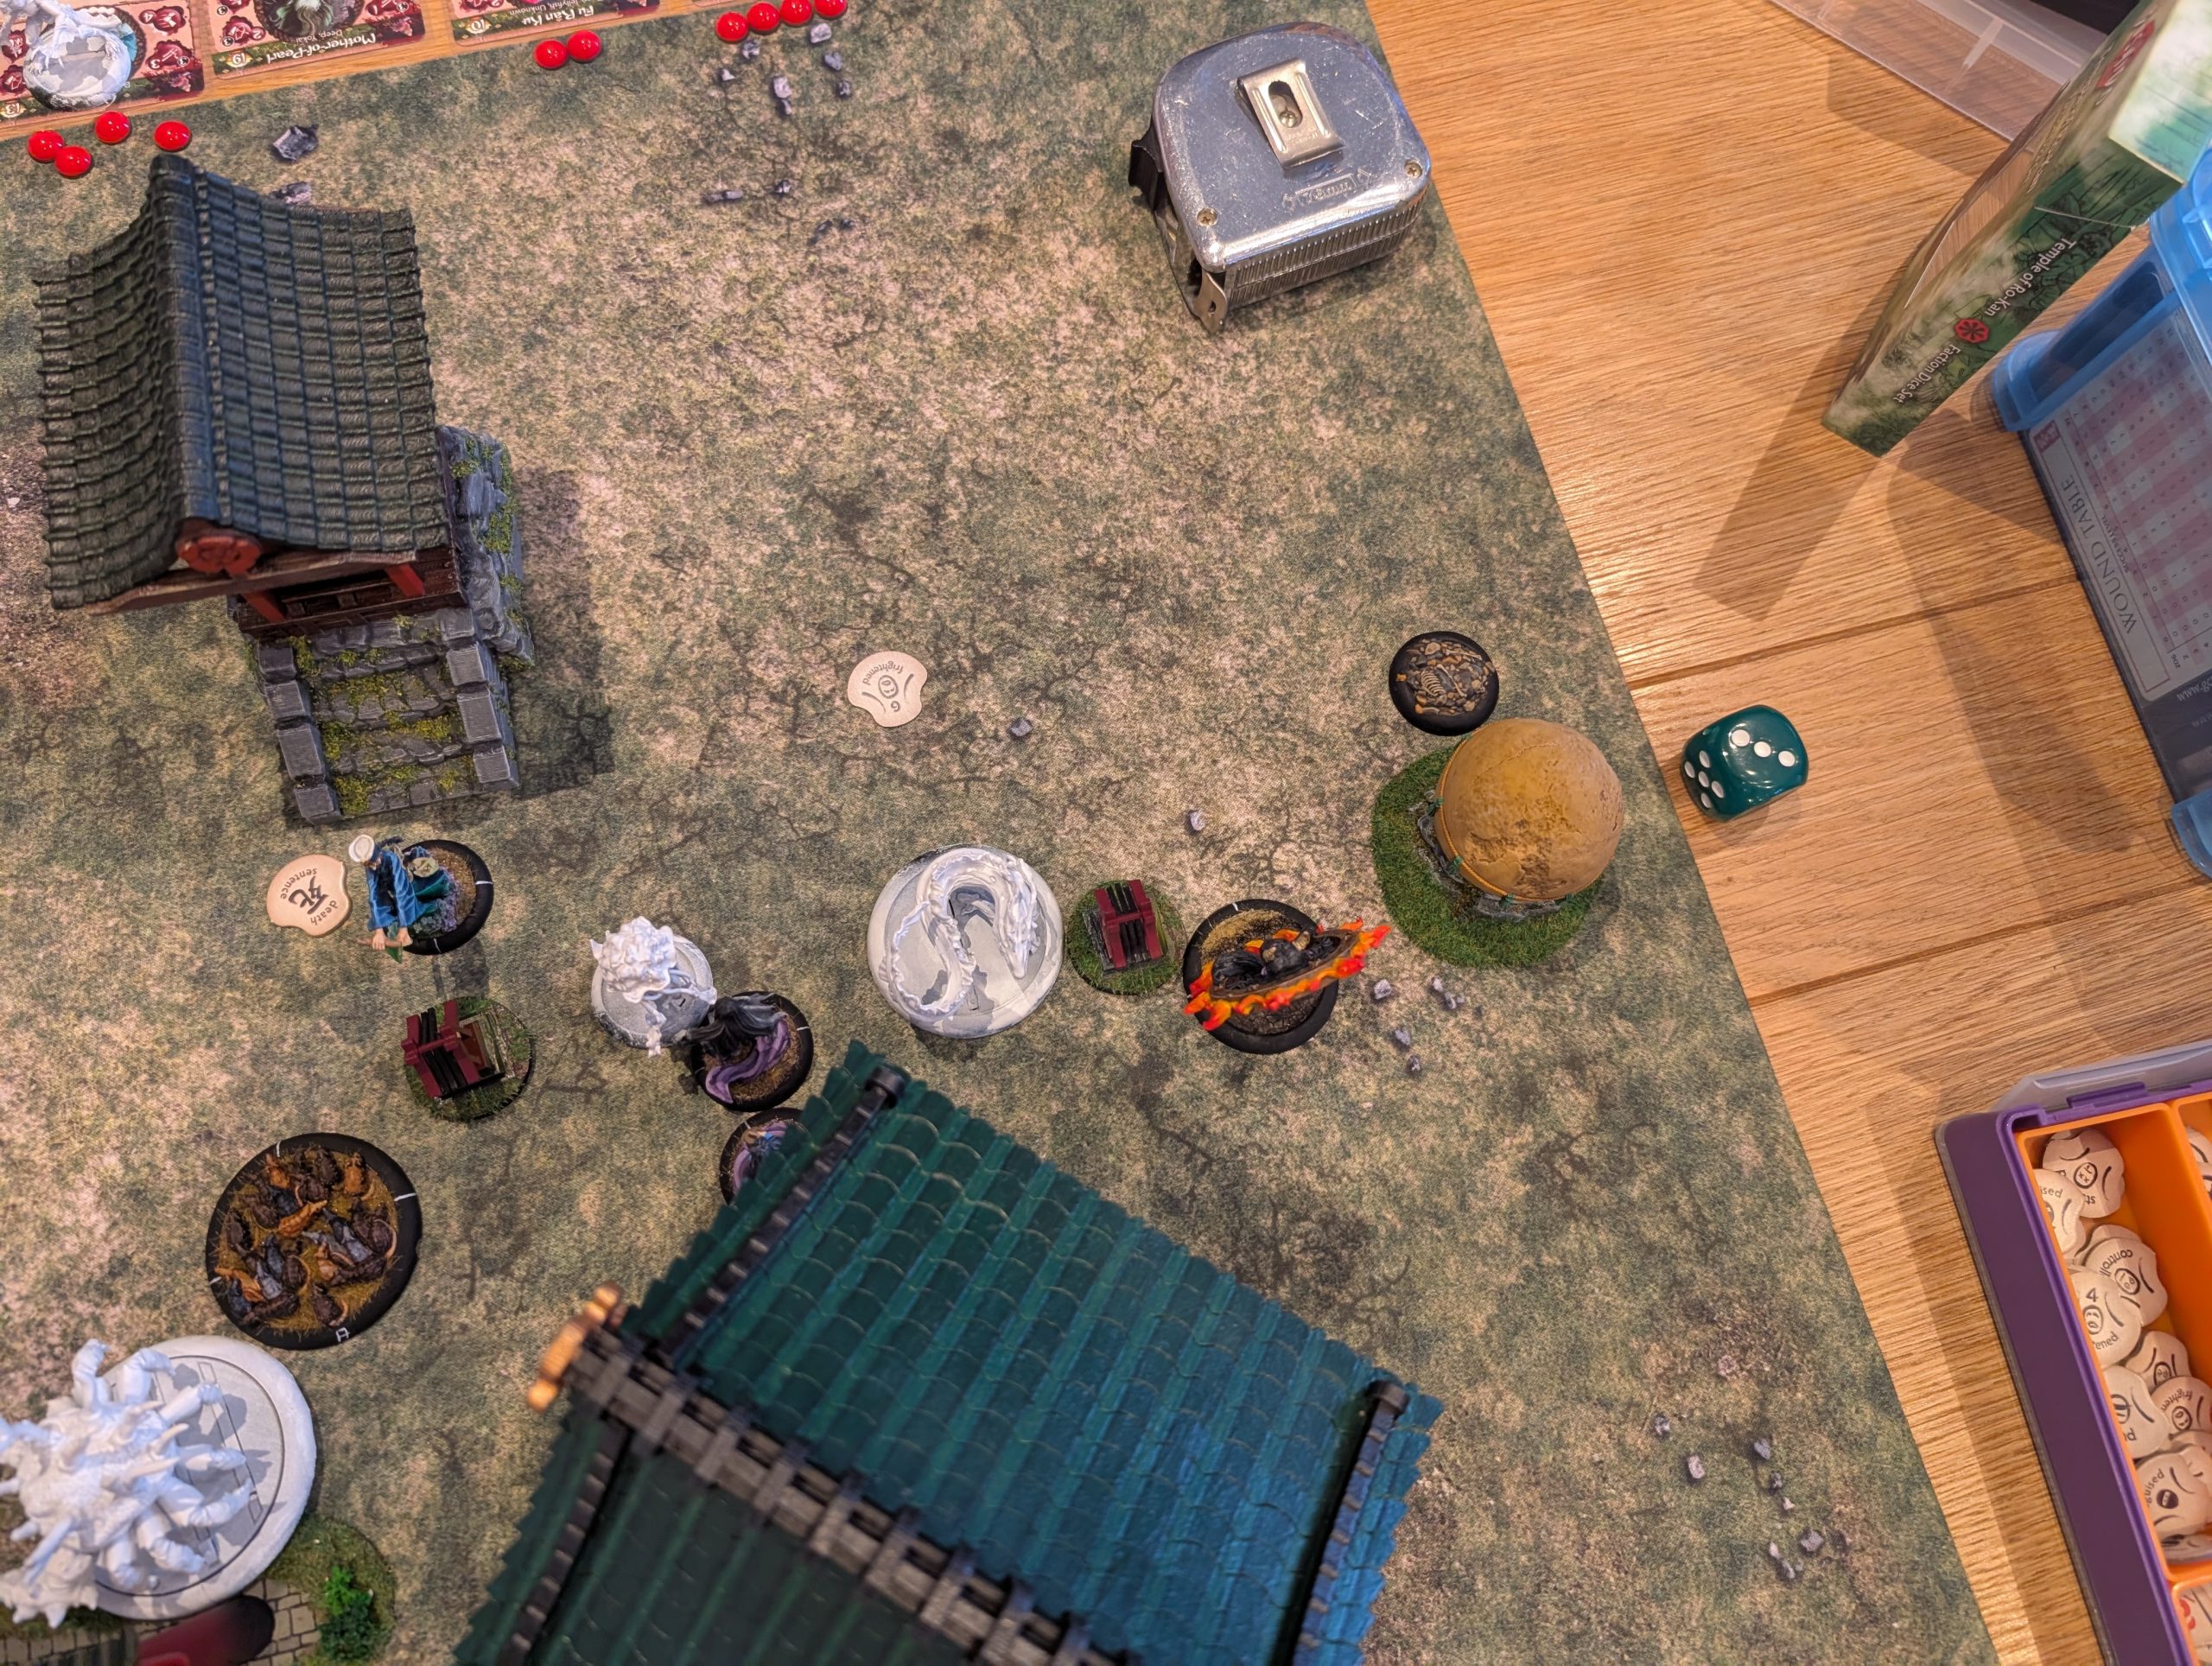
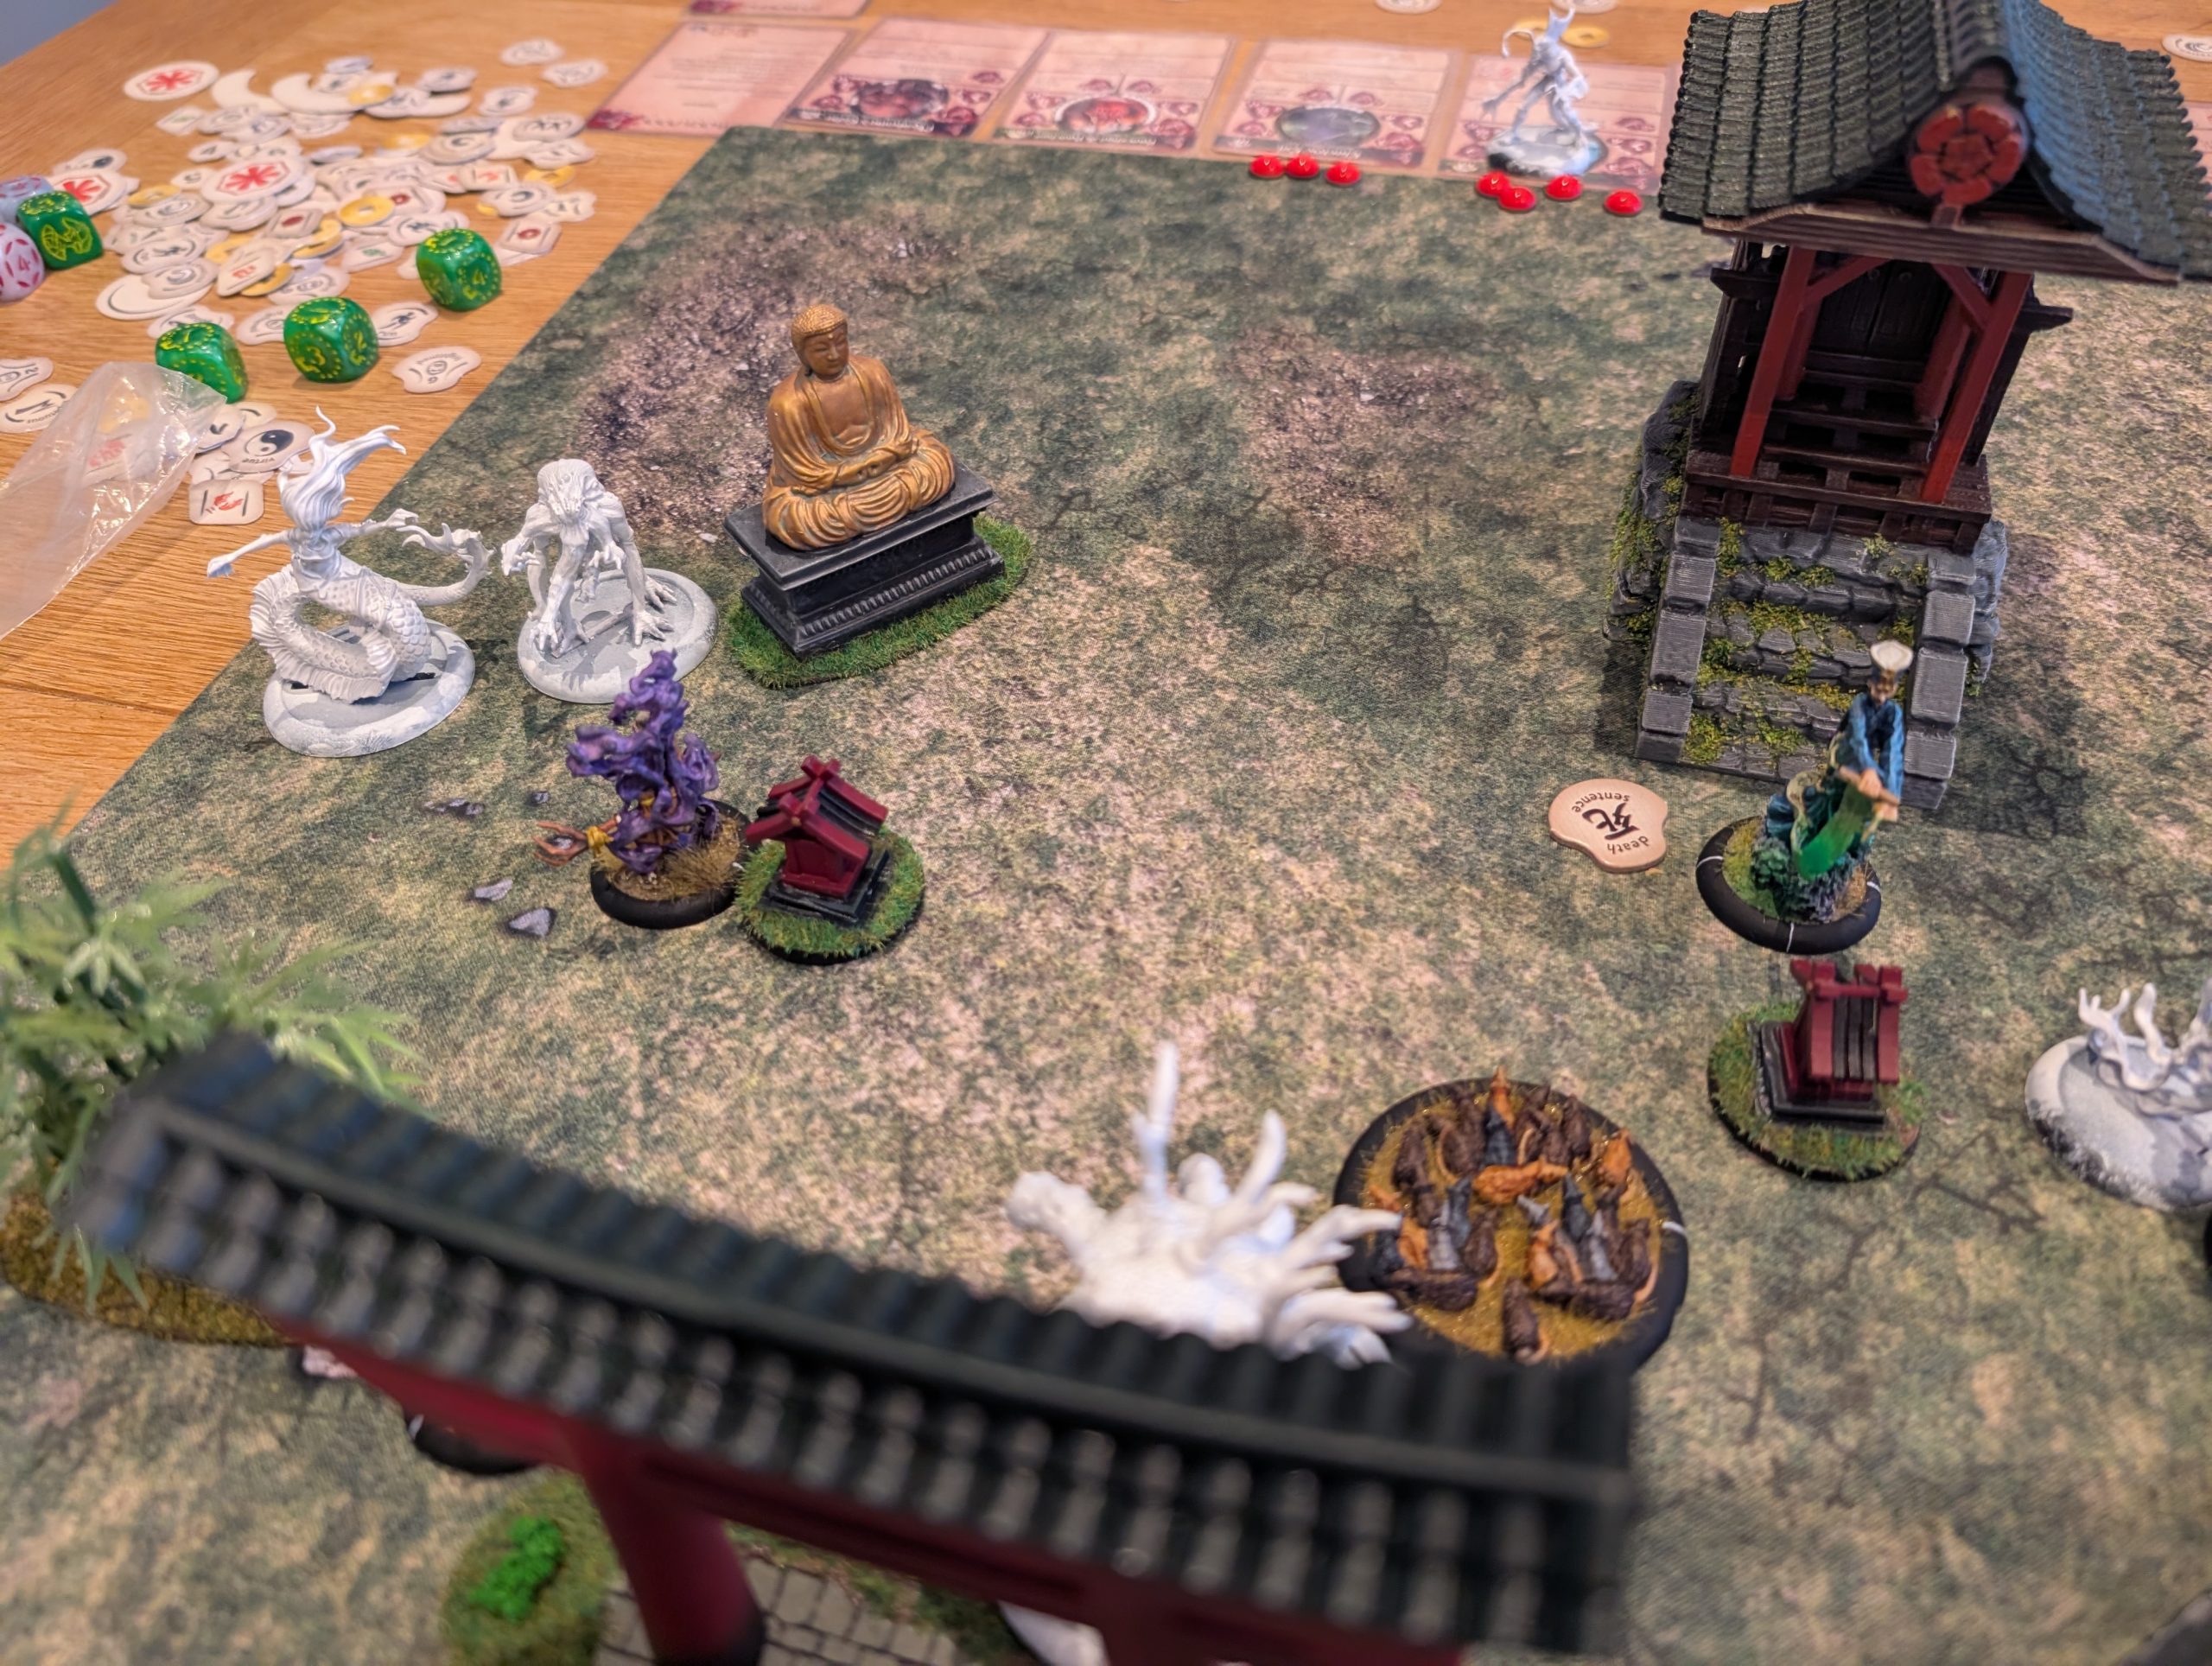
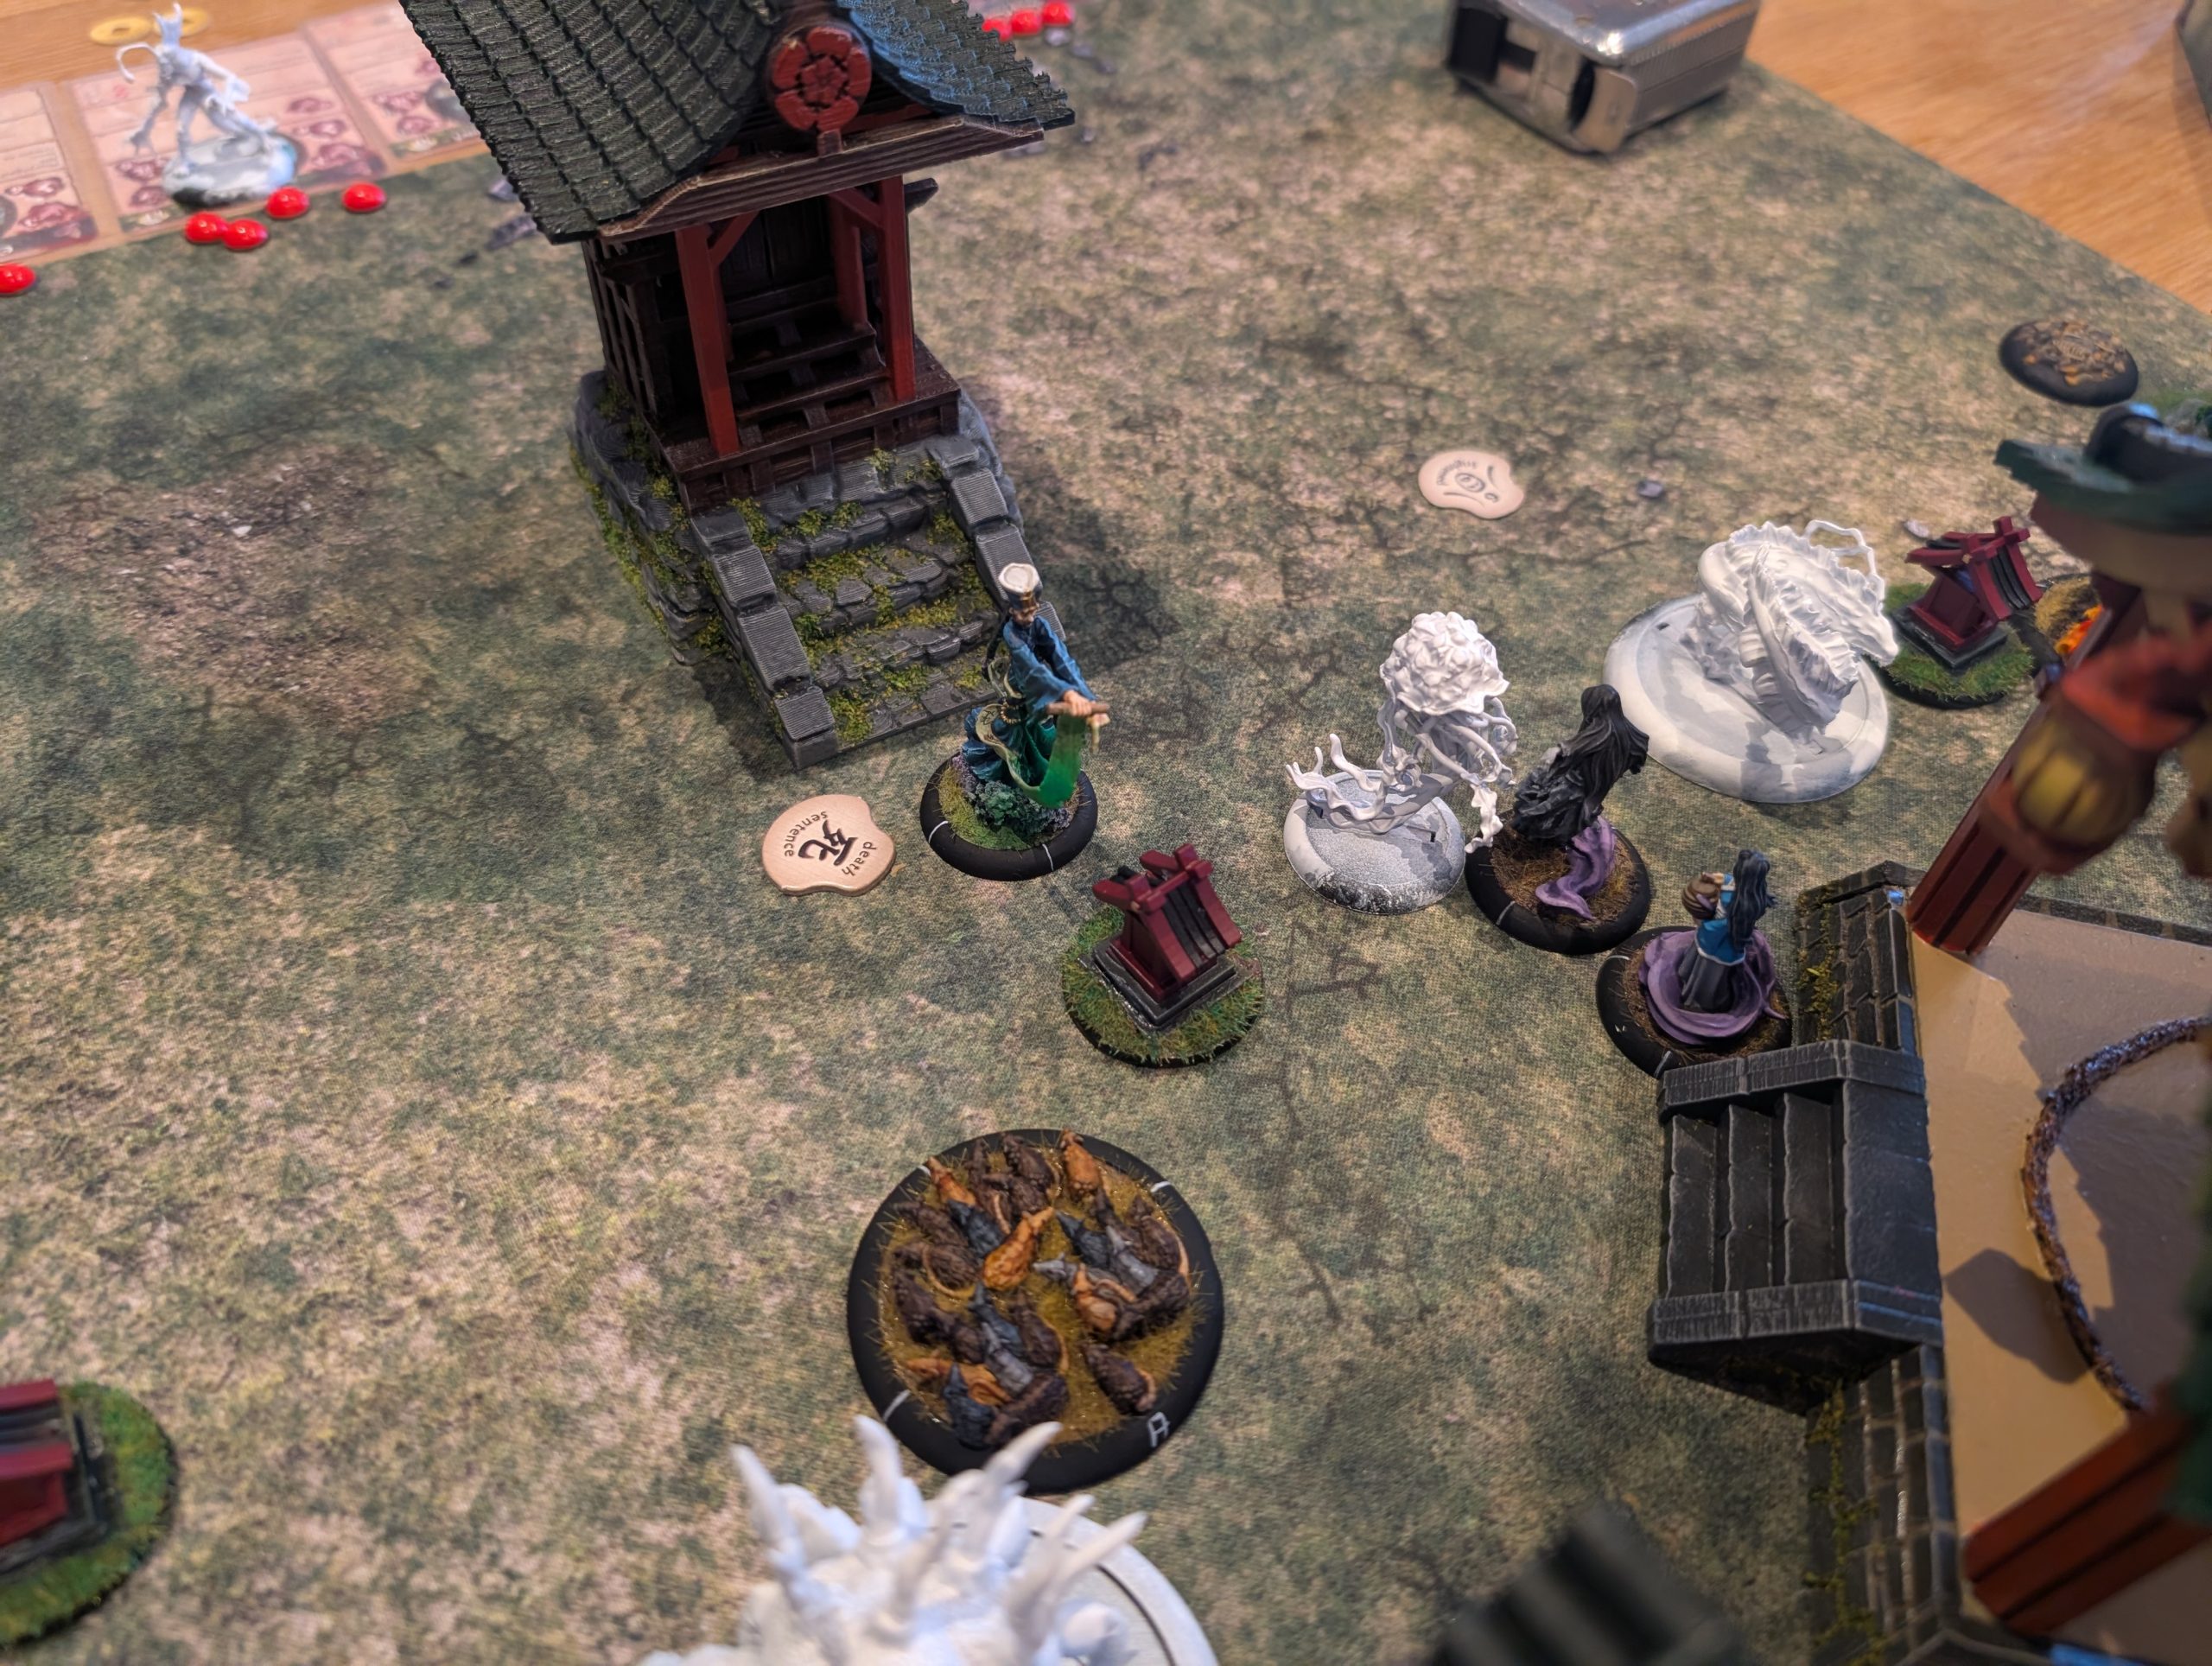
Turn 4
Again my son wins the initiative and uses the big crab to attack Waku. Given Waku’s death sentence, I roll all dice in defence but still end up taking a wound.
Sagoya Kaiden attacks the EE which fails its fear test. This is good news as not only is the EE now down a melee dice and is not allowed to roll more attack dice than defence dice, Sagoya Kaiden gains a melee dice as he has the Vengeance trait against frightened models. The EE loses badly, taking 3 wounds.
Warui gets attacked by the octopus thing and gets held, so can’t move or fight back. But I have one eye on the scenario objectives and as this is turn 4, it’s also a scoring round. So the Wanyudo turns the right hand objective friendly.
My son is running out of activations and this allows me to activate the Wanyudo again who kills the EE. This death, being close to Waku, gives Waku another activation counter as he harvests the soul of the EE.
This extra activation that Waku has just gotten is key as he disengages from the big crab and moves into BtB with the middle scenario. His extra activation allows him to turn this friendly and at this point my son realises that he does not have enough activations to turn two scenario objectives to at least draw the round. He concedes at this point.
Overall it was a good game. My son had some awful dice rolls where nothing went his way and he does need to practice with his new faction but the Jung Pirates have some interesting options to throw around.
Sep 23 2026
Time for another game. At UKGE, I picked up the Horse Lords faction pack and have gotten round to building them. Unfortunately they suffered a bit in the heat over the summer and, while stored in the garage, they melted a bit and I’ve had to try to repair them. But hopefully no serious damage. But having bought them, I wanted to give them a whirl, so, unprepared and without really reading the actual cards, I took on my son’s Kinshi Temple faction.
On my side, I selected Oiwa Yoshitaka (OY) who’s a bit of a beast in combat. Takeda Reiko (TK) who offers some useful support abilities. Inoue Kikuko (IK) who handily comes with a bow. Watanabe Yuka (WY) who has some useful Ki feats to gain activation. Tomato Kazuma (TK) who is also a beast in combat. All the models are mounted and as a consequence they’re all very mobile. They all also have the Banzai! Special rule that allows a Charge action as a simple action rather than a complex one (complex actions require two activation counters). I also selected a Themed list which gives some buffs but also a Curse card that only allows me to take 1 Activation counter for each model in the first turn.
My son’s Kinshi Temple are built upon their ability to add counters to their shared faction card that unlocks increasingly more powerful ki abilities. As the game progresses, Kinshi get increasingly more powerful. My son took Batsu, Shakaku, two Kami of the Empty Mind, Nagashikaku, Master Shi and Kodai.
We’re playing a scenario with three scoring zones that lay diagonally across the board. To control a zone, you must have more models fully within the zone than your opponent and the points cost of those models must be more that your opponent’s models. This is a small challenge for me as all of my models are on 50mm bases and the zones are 4” diameter, so getting fully in the zone and staying there will be tough.
Below you can see the board set up and deployment. After placing terrain, I triggered an event card that allowed me to remove a piece of terrain, so I promptly cleared a piece from my side that was blocking access to the zones. My son also deployed his faction terrain that included a burning ground zone and some portals that allows his models to move around easily and also use them as jump points for Ki feats.
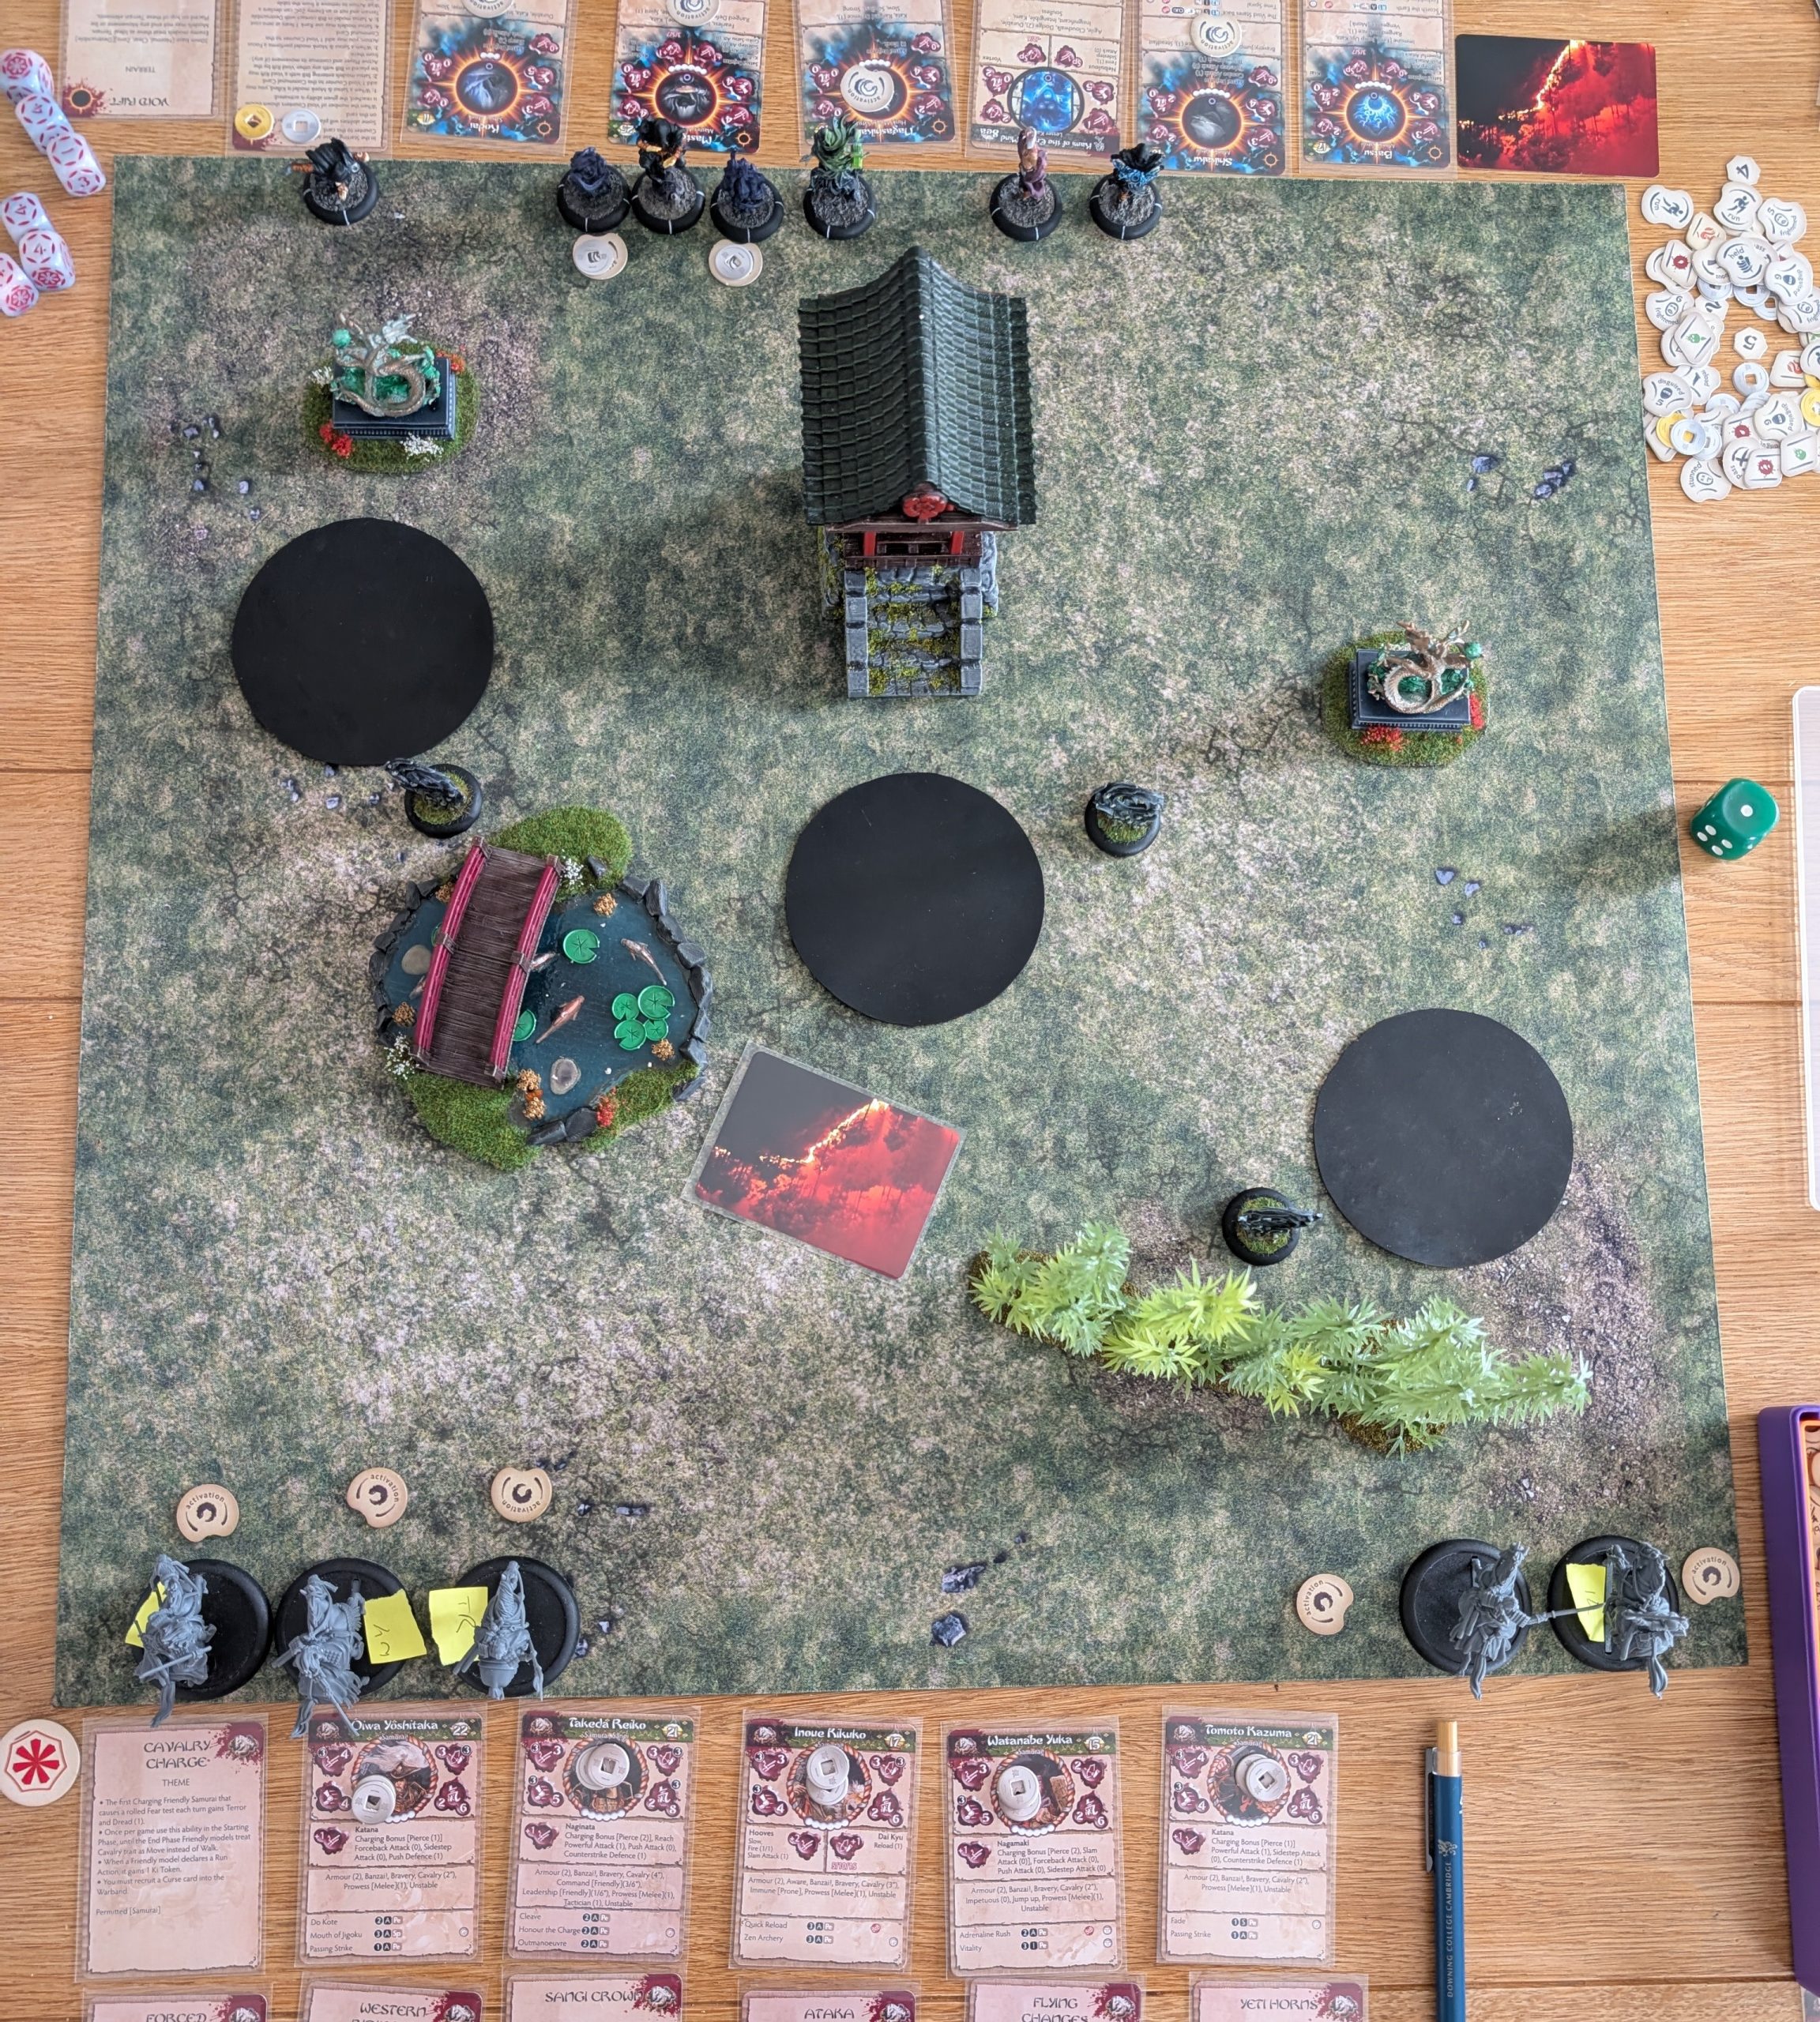
Turn 1.
My son starts off by inflicting a wound on one of his Kami models to gain a void token for his faction card. I start advancing my horselords to close the gap.
Shikaku uses his Look into the Void Ki feat and he’s able to win the challenge dice off and I’m lucky that this only inflicts 1 wound on TK – it could have been a lot worse. Master Shi is also able to successfully get off his Contemplate the Void feat that removes the only Activation counter that WY had and so WY is going nowhere this turn. Finally, one of the Kami is able to steal a Ki token from TR and recover the wound it took earlier in the round.
Below you can see the positions at the end of turn 1.
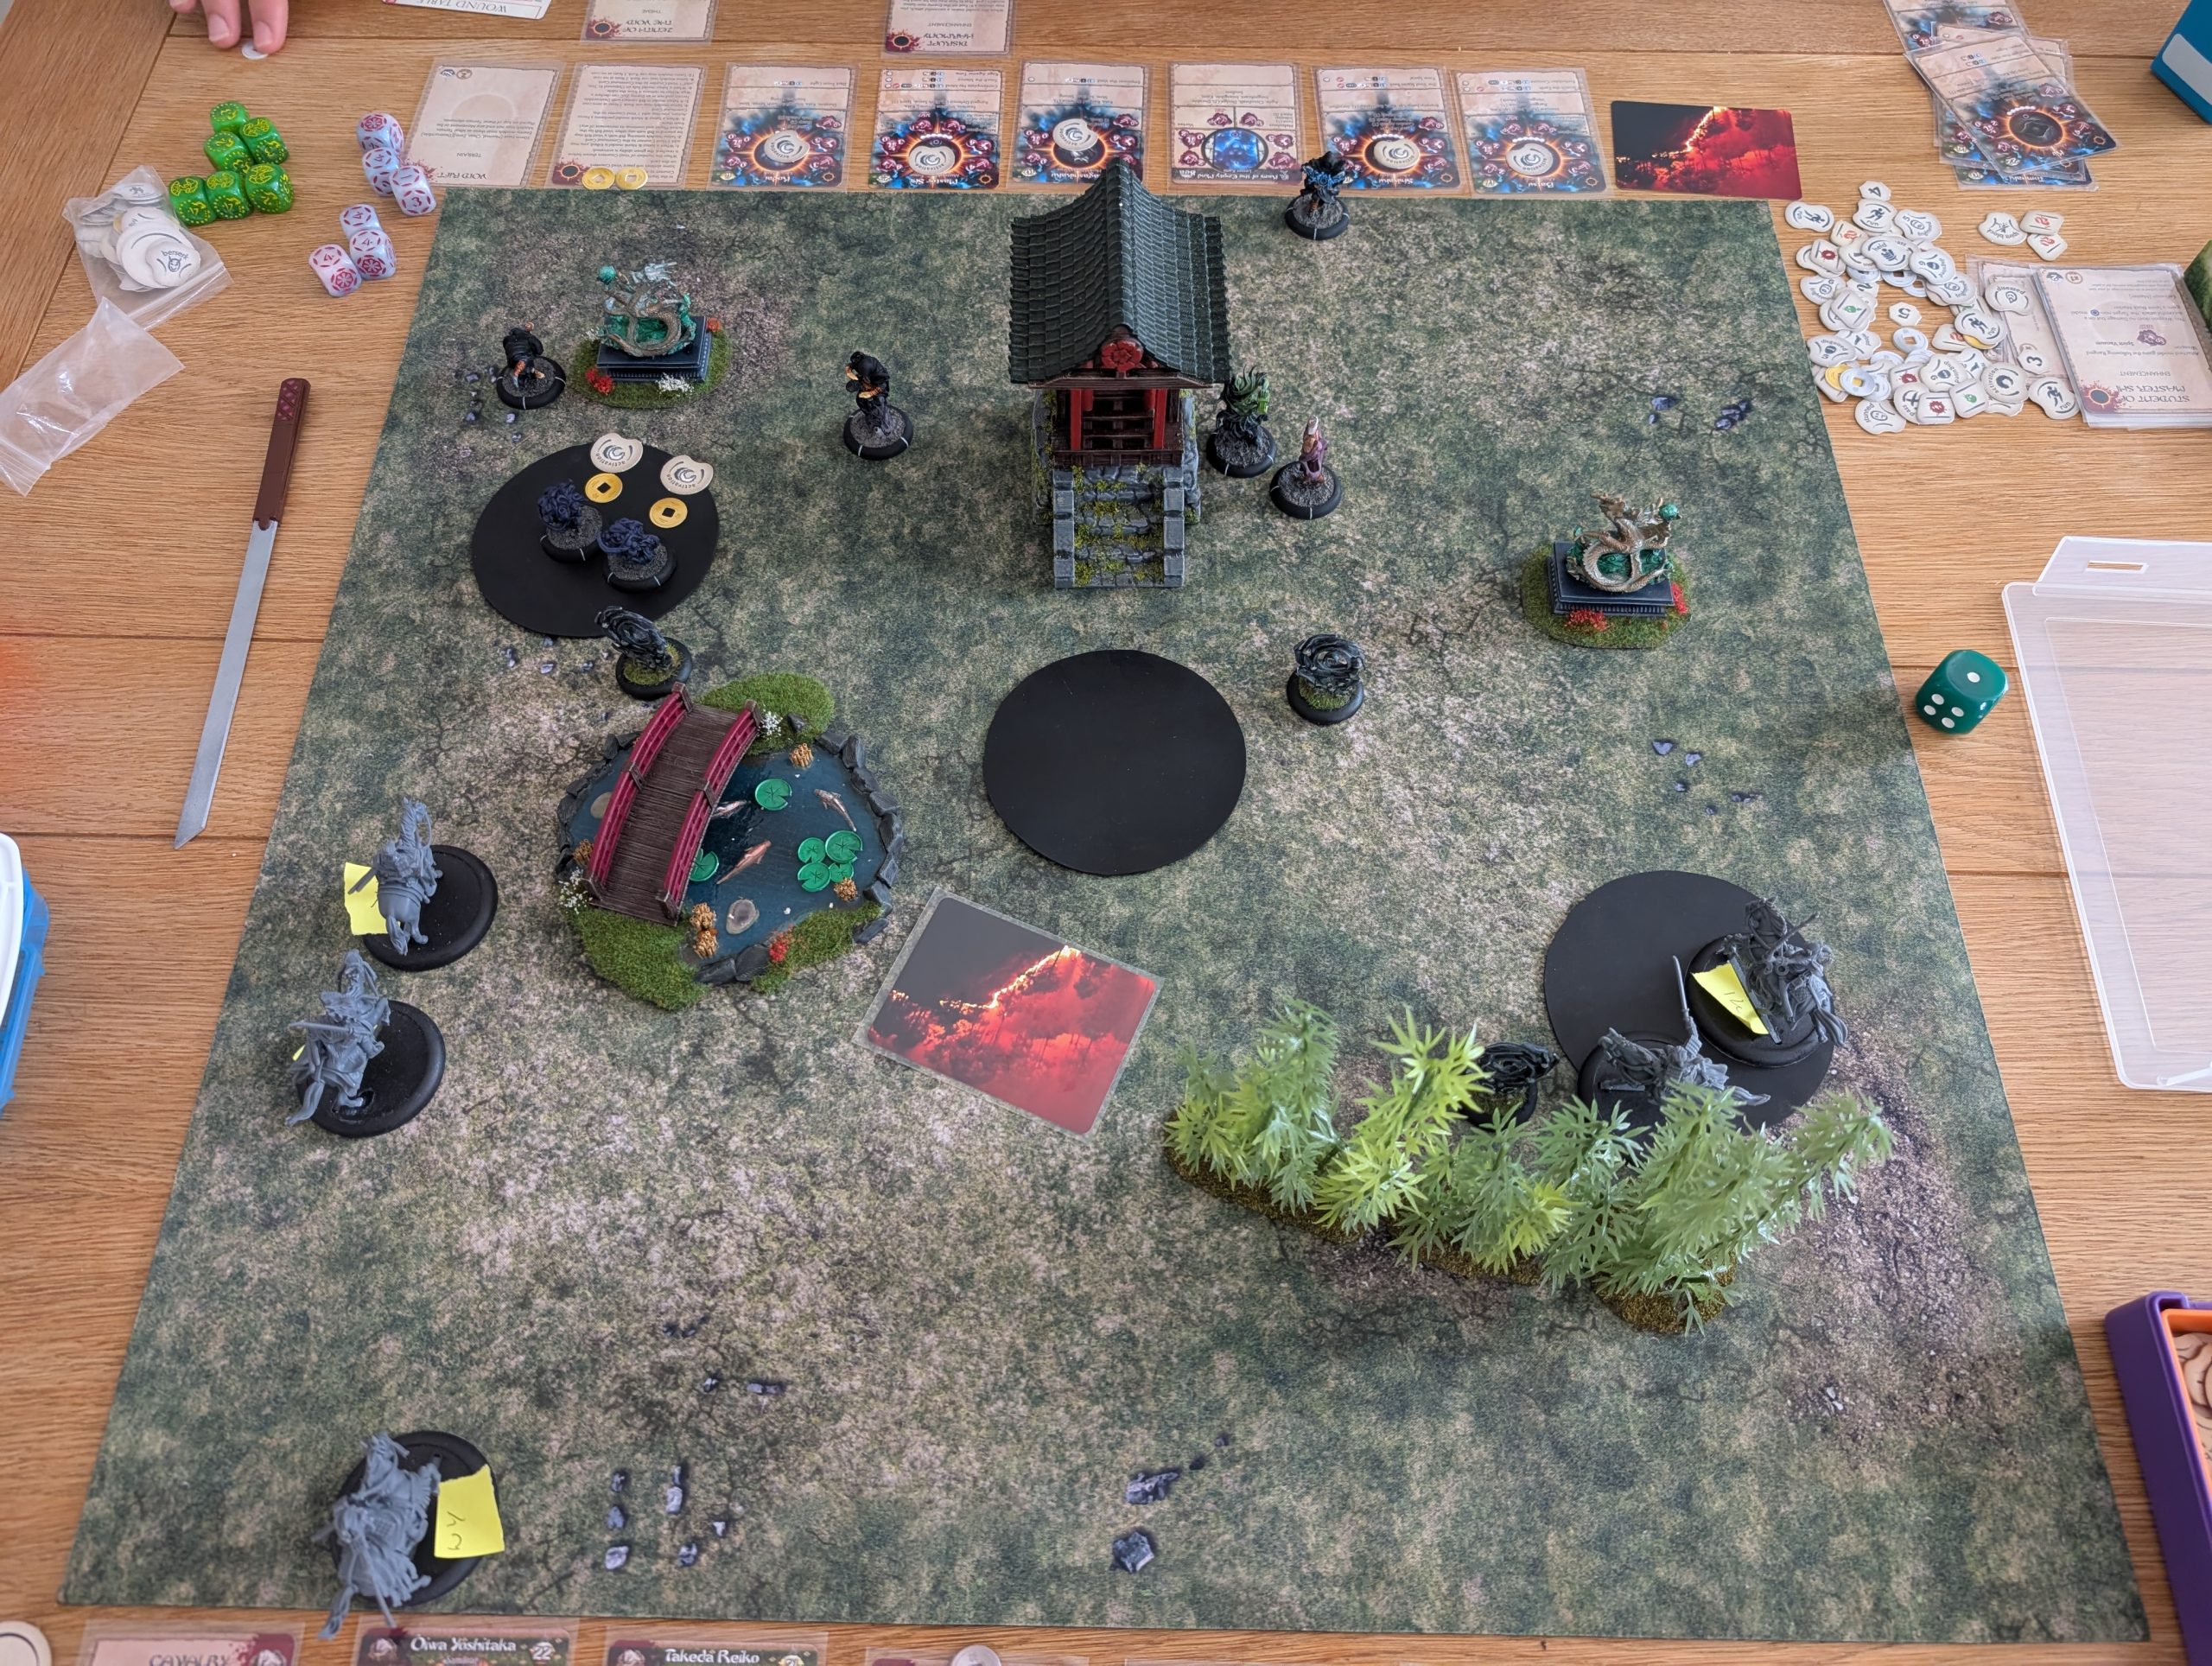
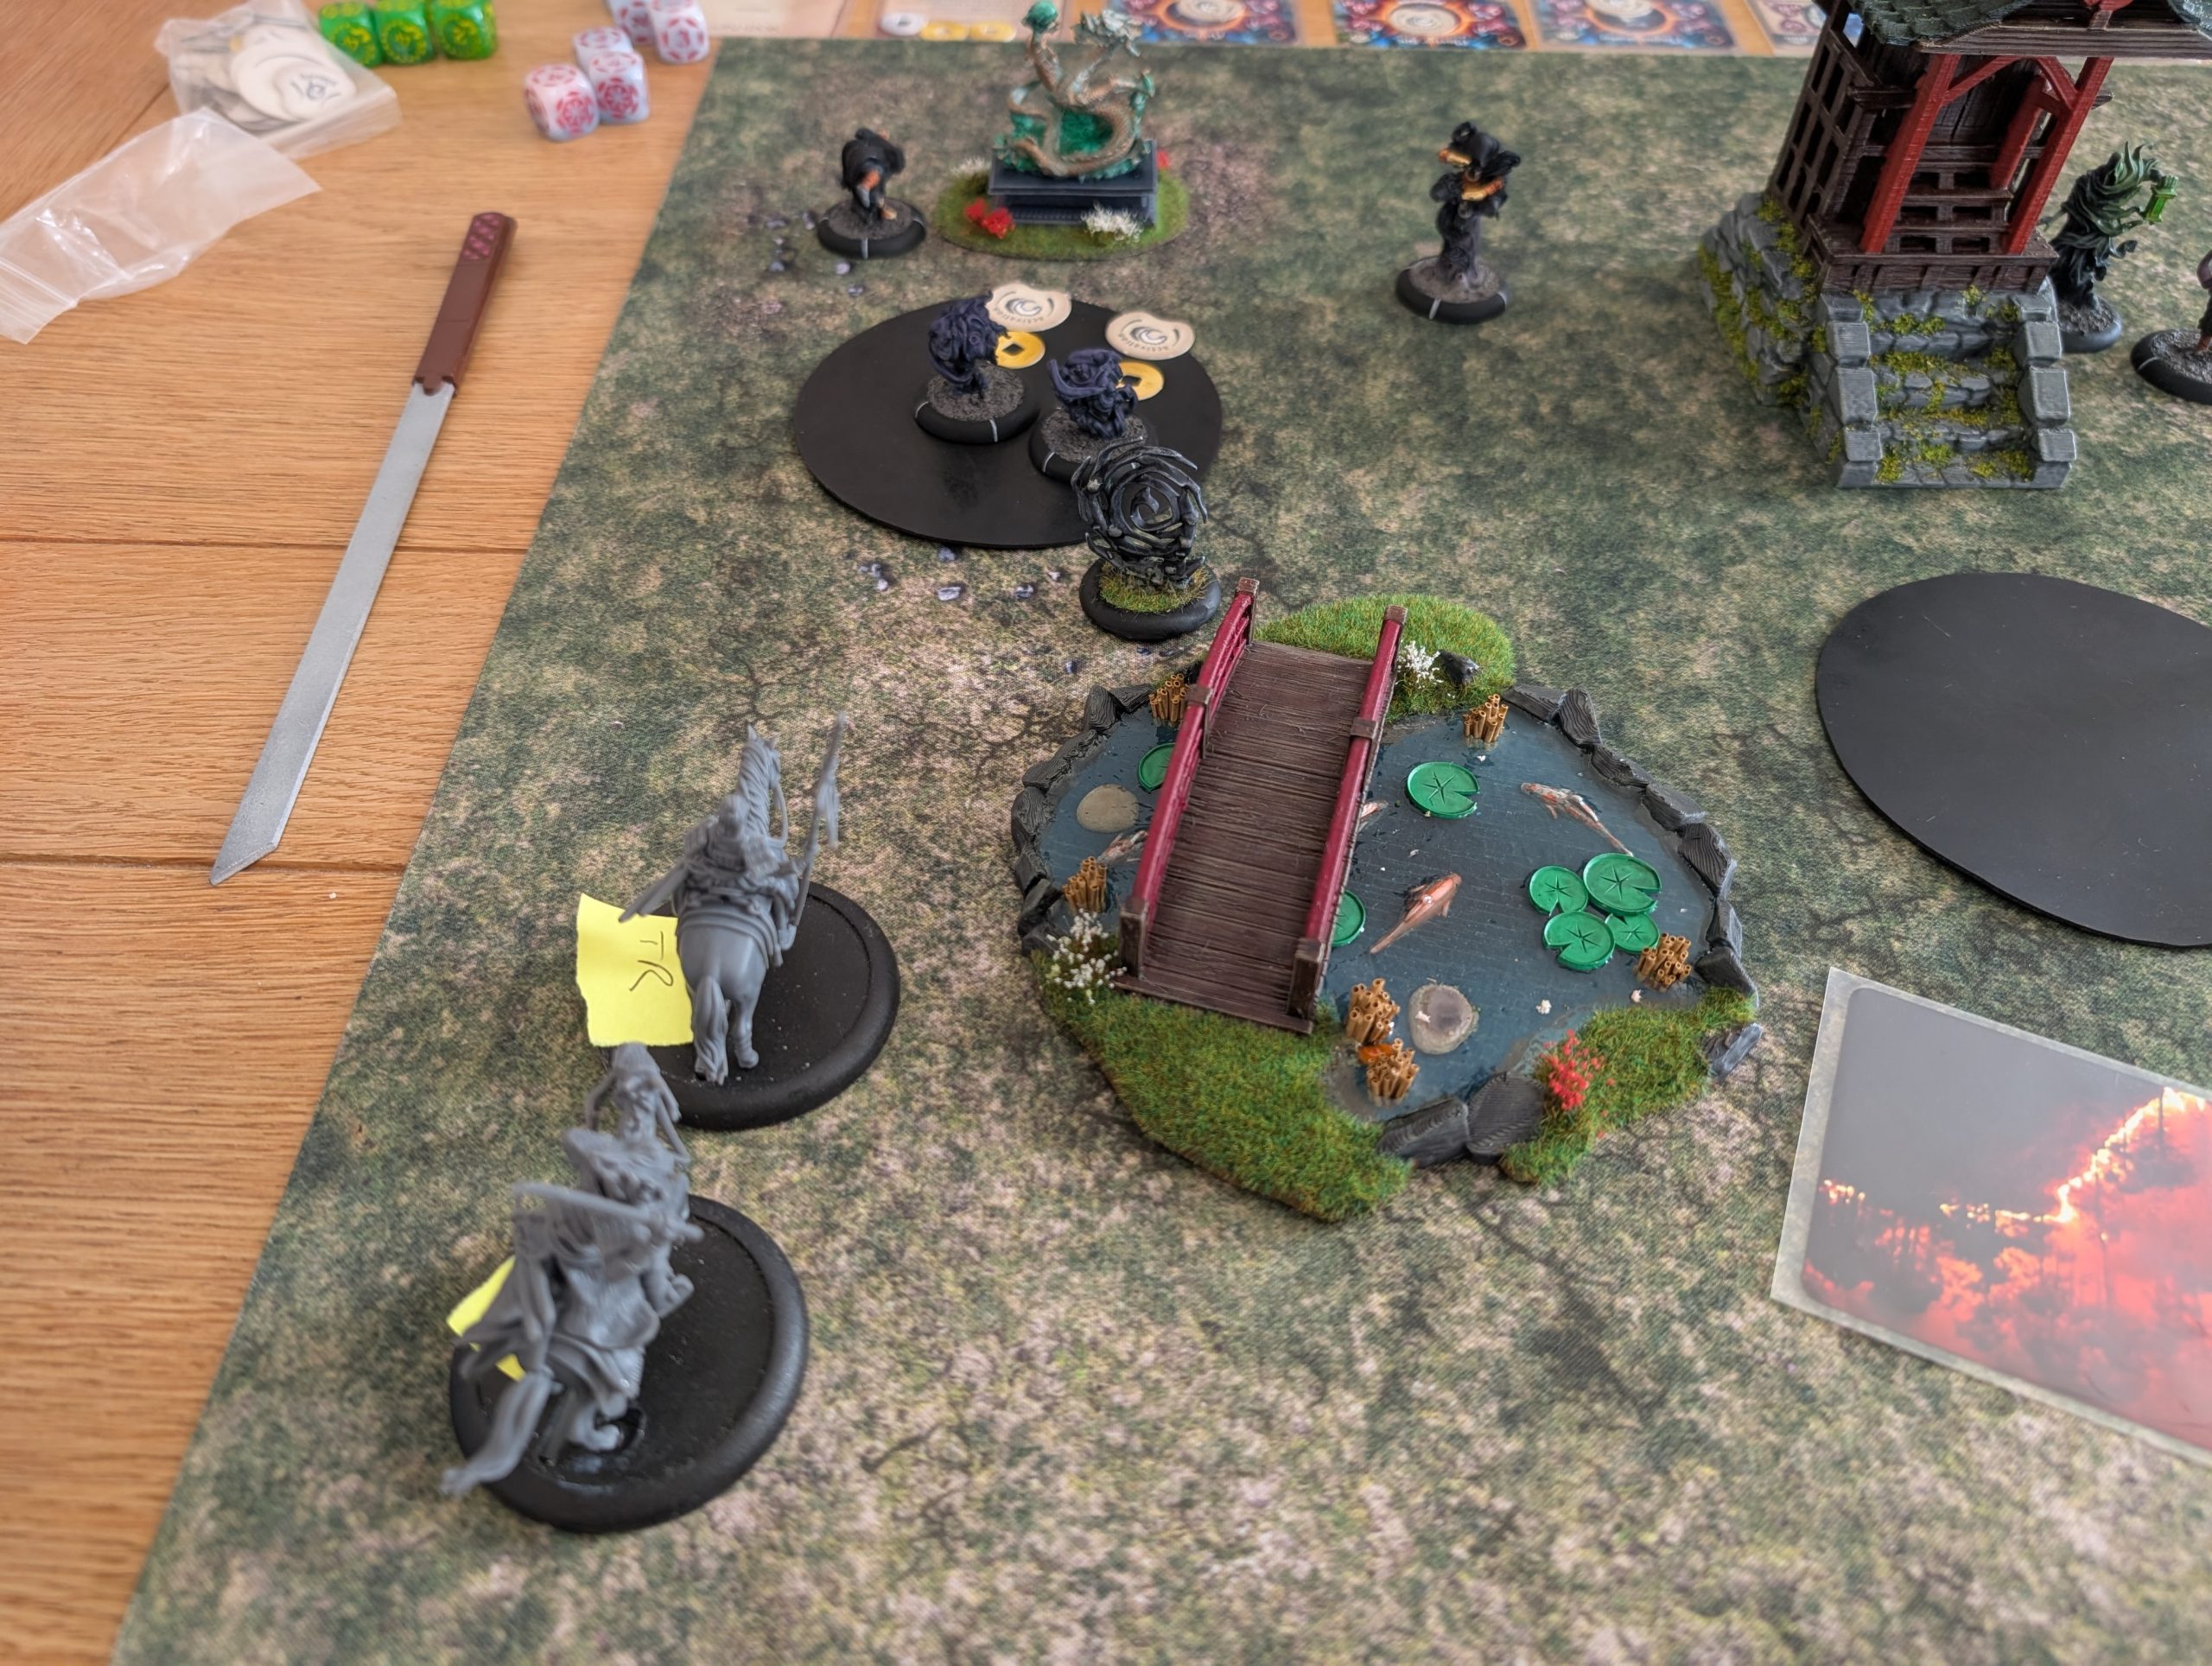
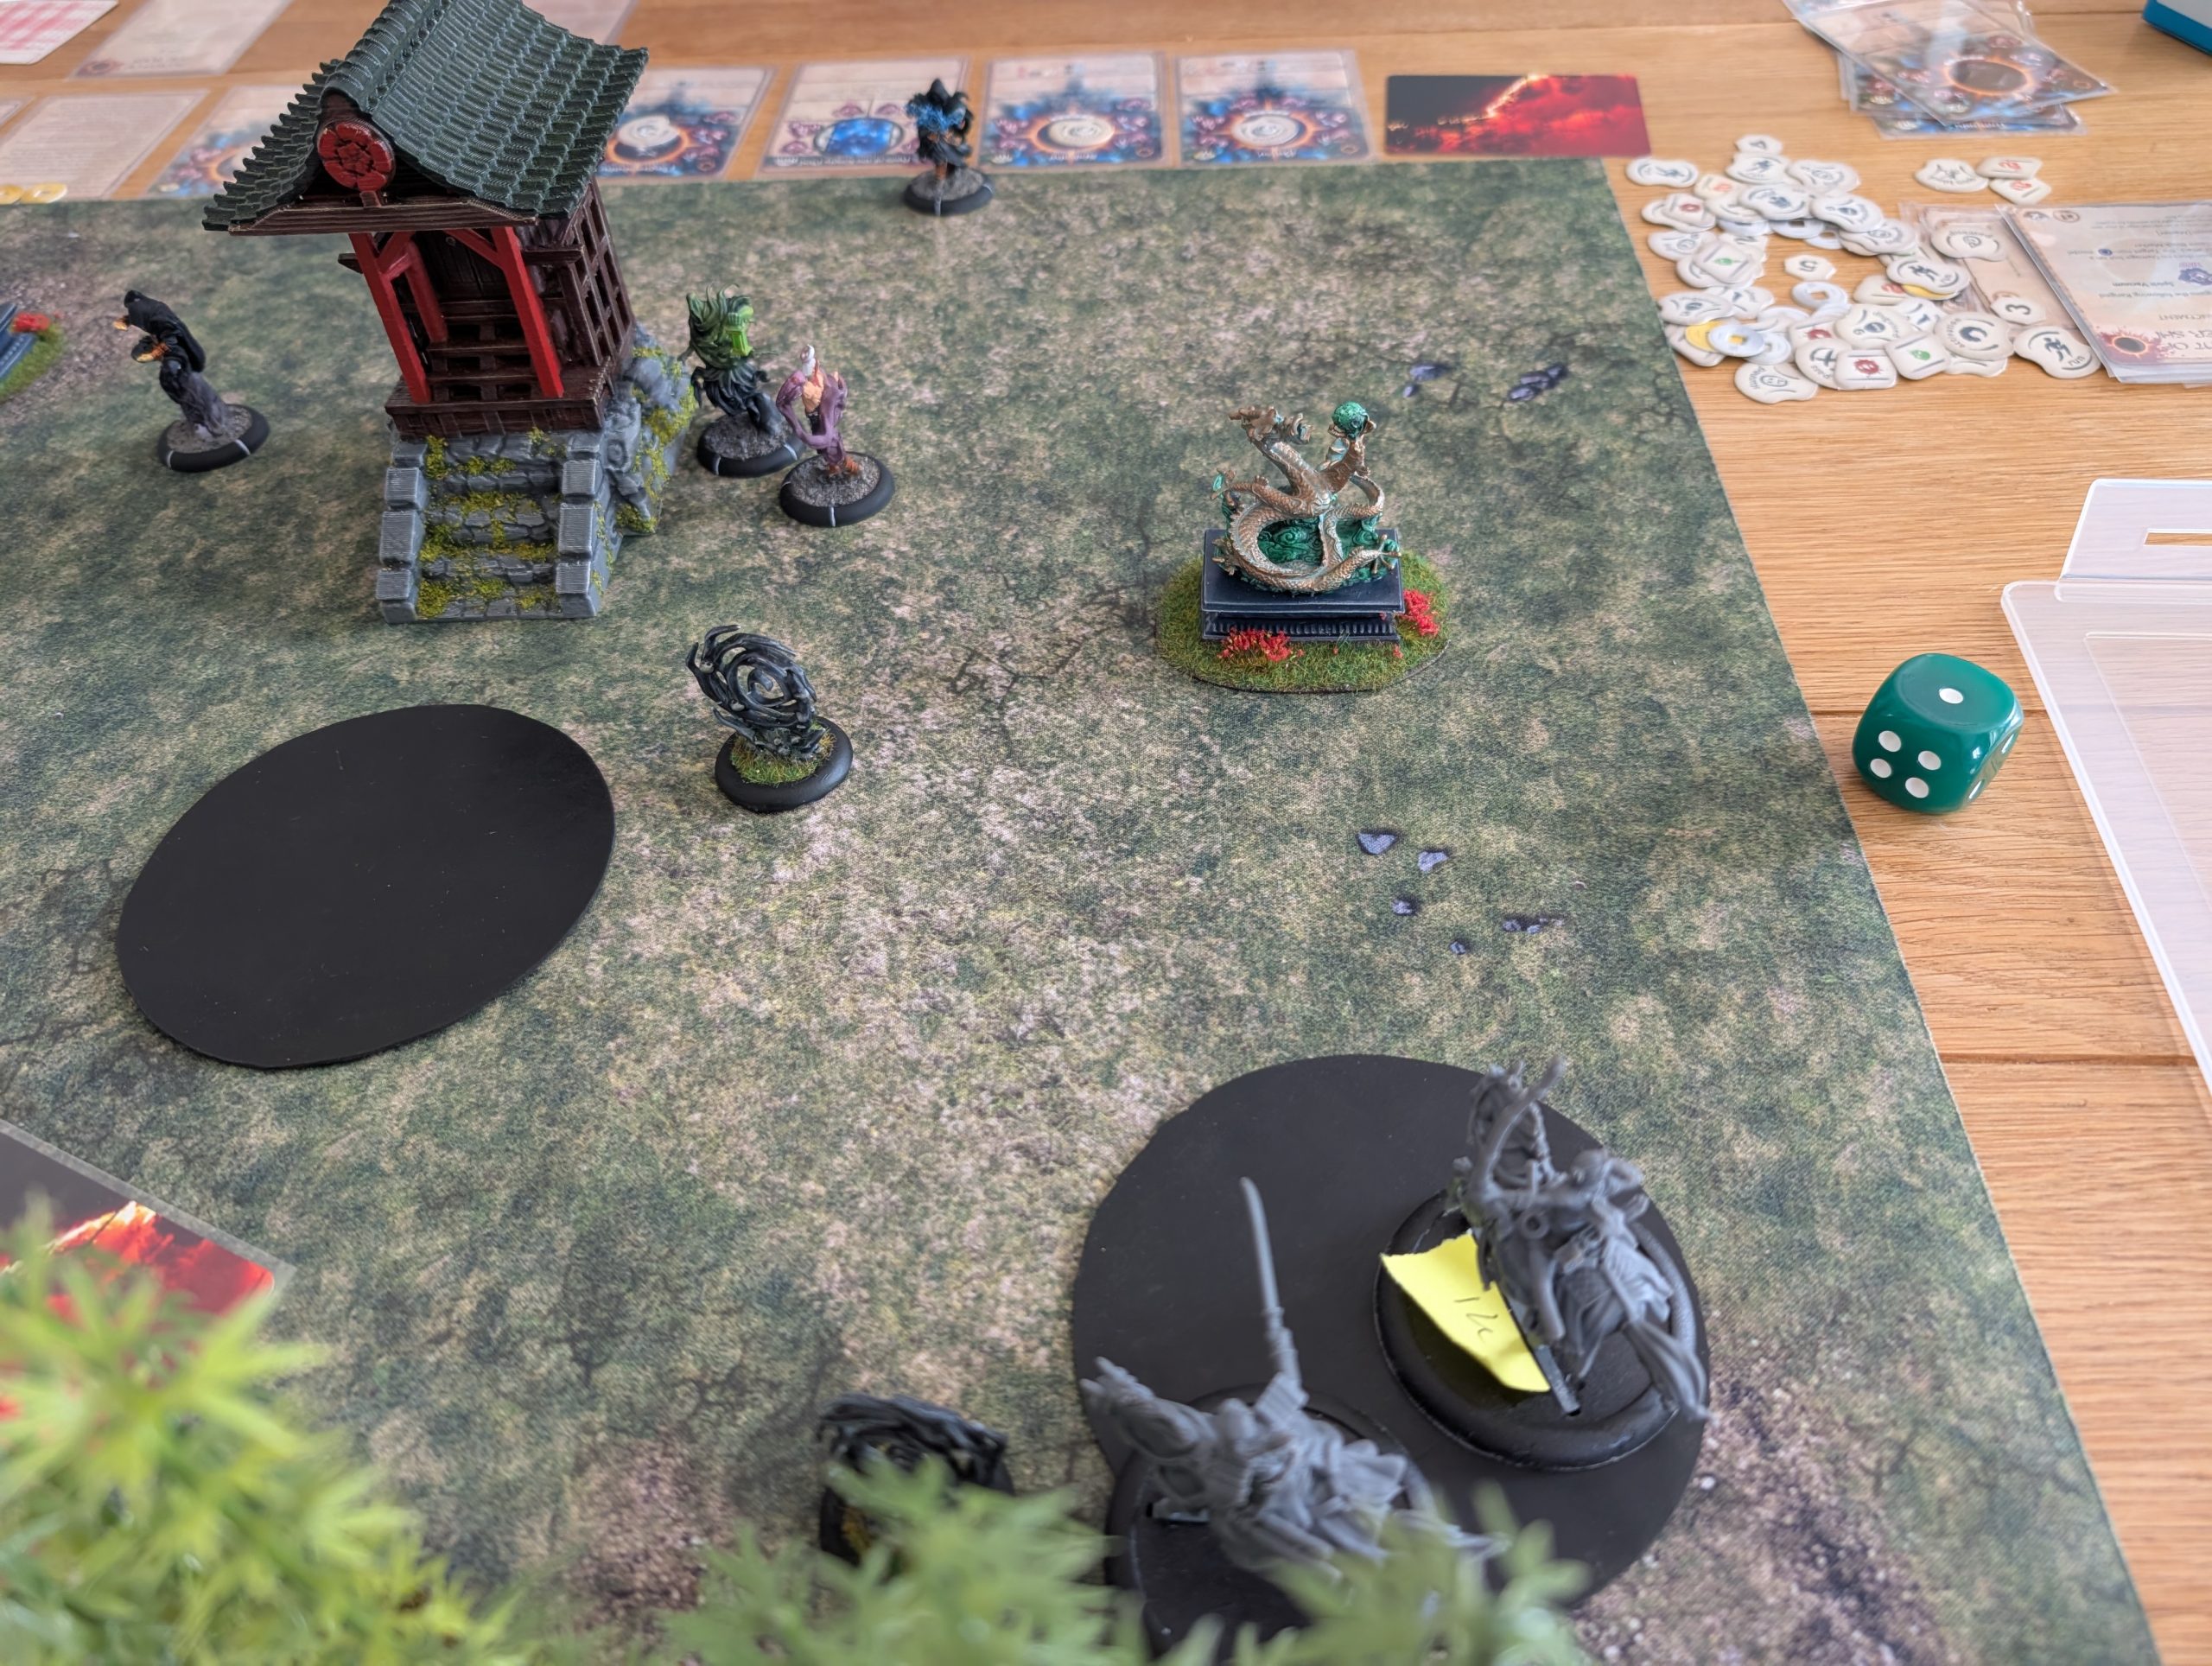
Turn 2.
I win the initiative and launch OY into a charge into one of the kami. OY has a special ability that when they charge, they can move through other models and those models can also move (for free) into base to base with the charged model, so TR also gets into btb with the kami. The resulting combat kills the kami.
Shikaku again uses Look into the Void and again succeeds the test to cause TK 2 wounds.
I activate OY again and push the combat with the other Kami. Once again, OY does the business and kills the kami, so that’s two less models for me to worry about.
My son, enjoying Shikaku’s special ability, again succeeds with Look into the Void and once again causes damage to TK. This is too much for TK and he is killed by the attack.
Enraged, TR charges Shikaku. Shikaku is inside one of the zones and I need to push him out. He’s also without activations and therefore down a melee dice so this should be a good combat for me. I select Push Attack which, if successful, will push Shikaku back out of the zone but only cause half damage. I roll poorly and I’m only able to cause a couple of wounds but do at least push Shikaku back.
Master Shi again uses Contemplate the Void and WY loses an activation counter, which is really debilitating as I was looking to set up a charge to get into a zone of control with WY.
Kinshi can use their portals to move around easily and so I get IK to destroy one of the three that are deployed to try to reduce the options.
Kodai uses the portals to move around quickly and attack OY with a push attack. He rolls well and causes a wound and pushes OY back out of the zone. This leaves my son controlling two zones at the end of turn 2 and so he earns 1 Victory Point.
State of play at the end of turn 2.
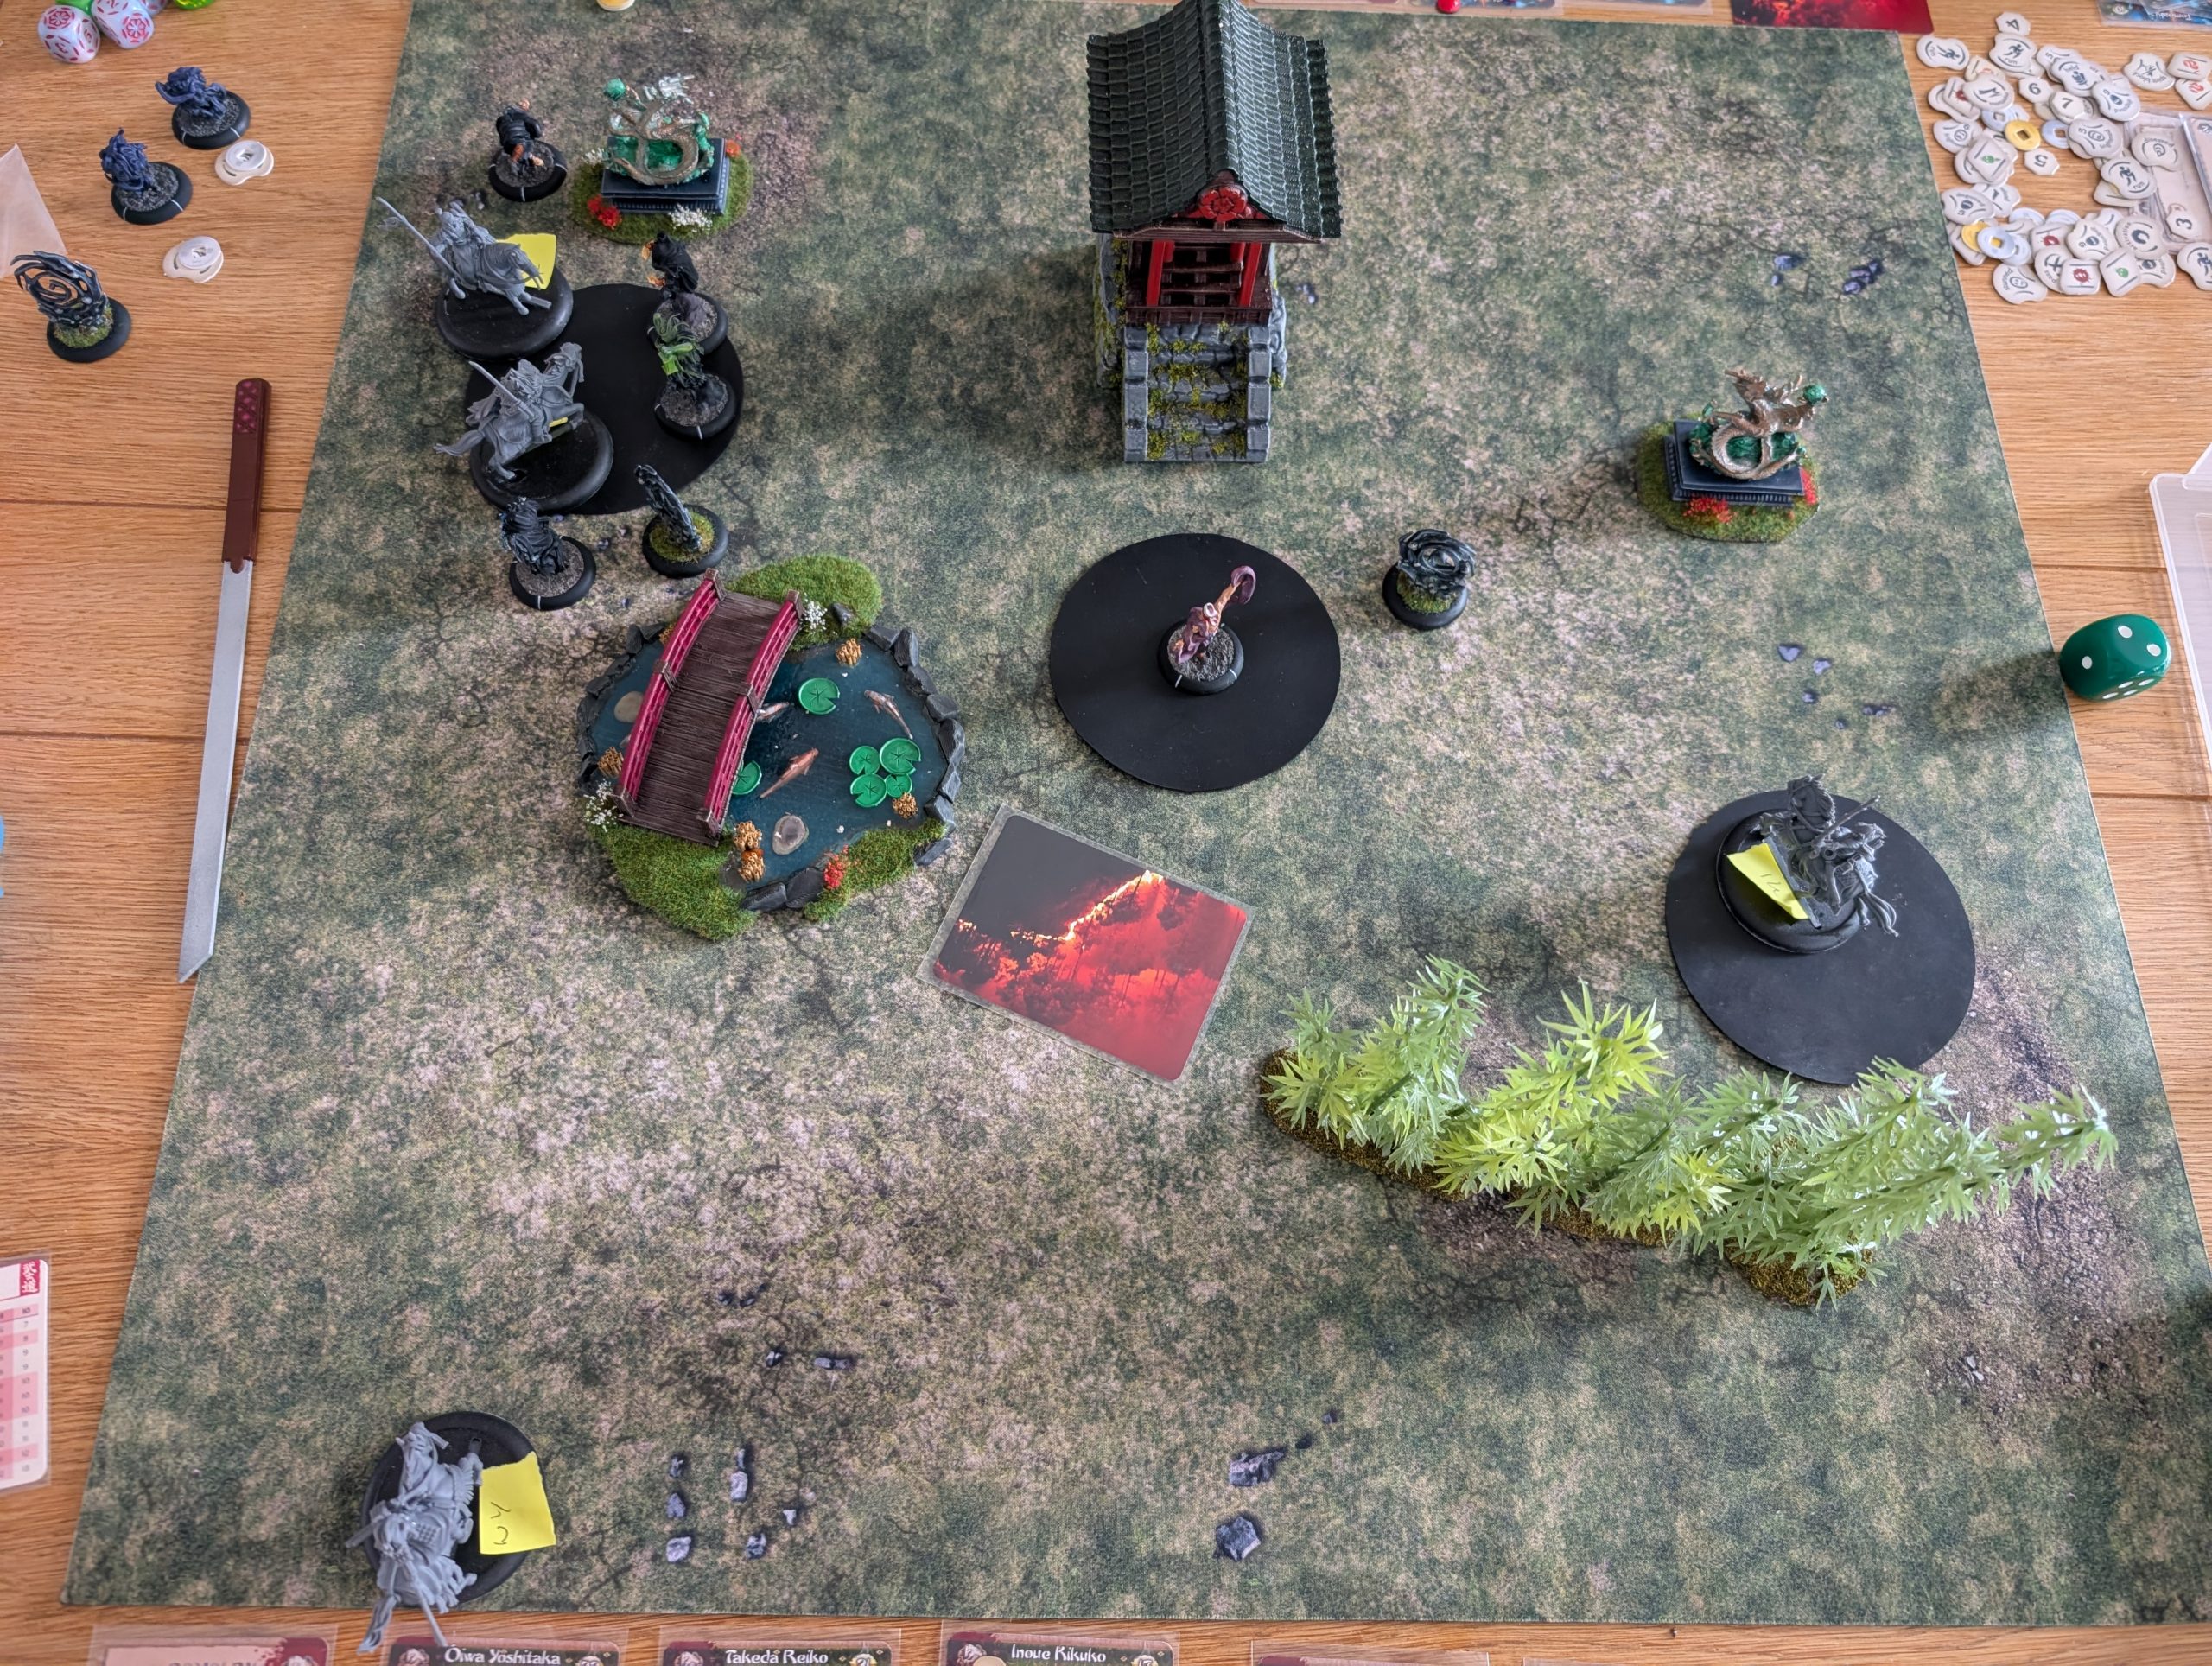
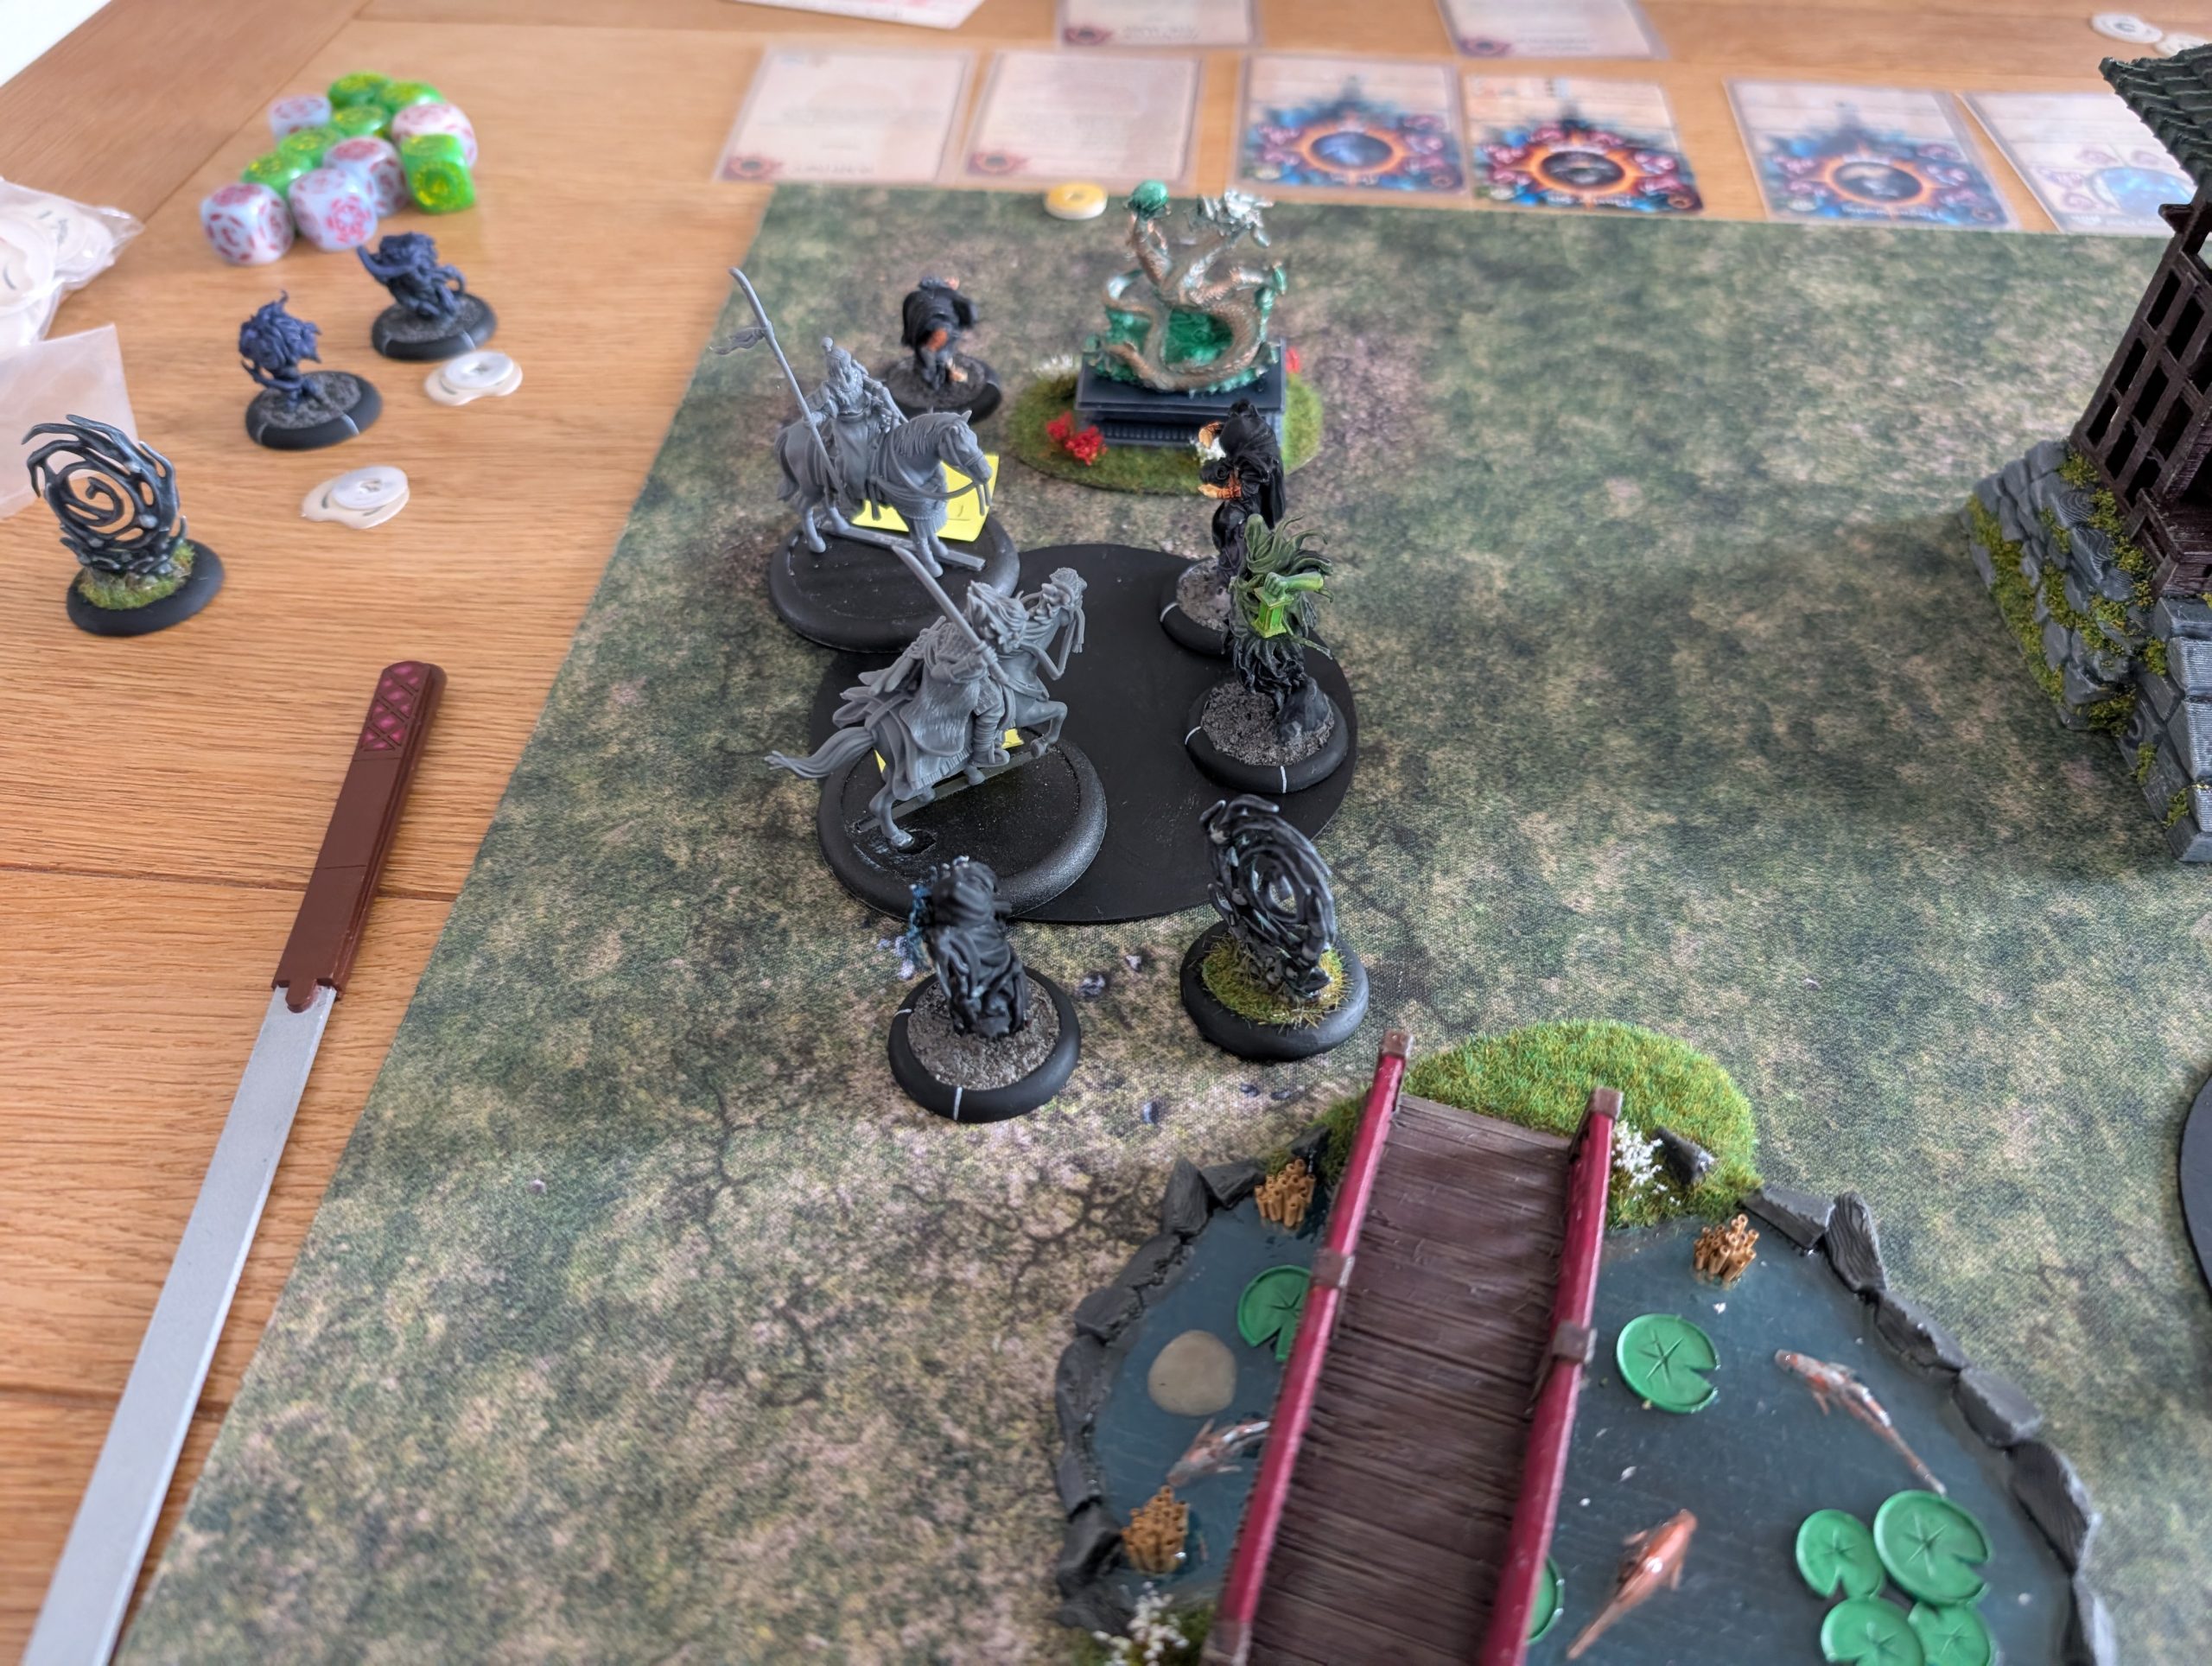
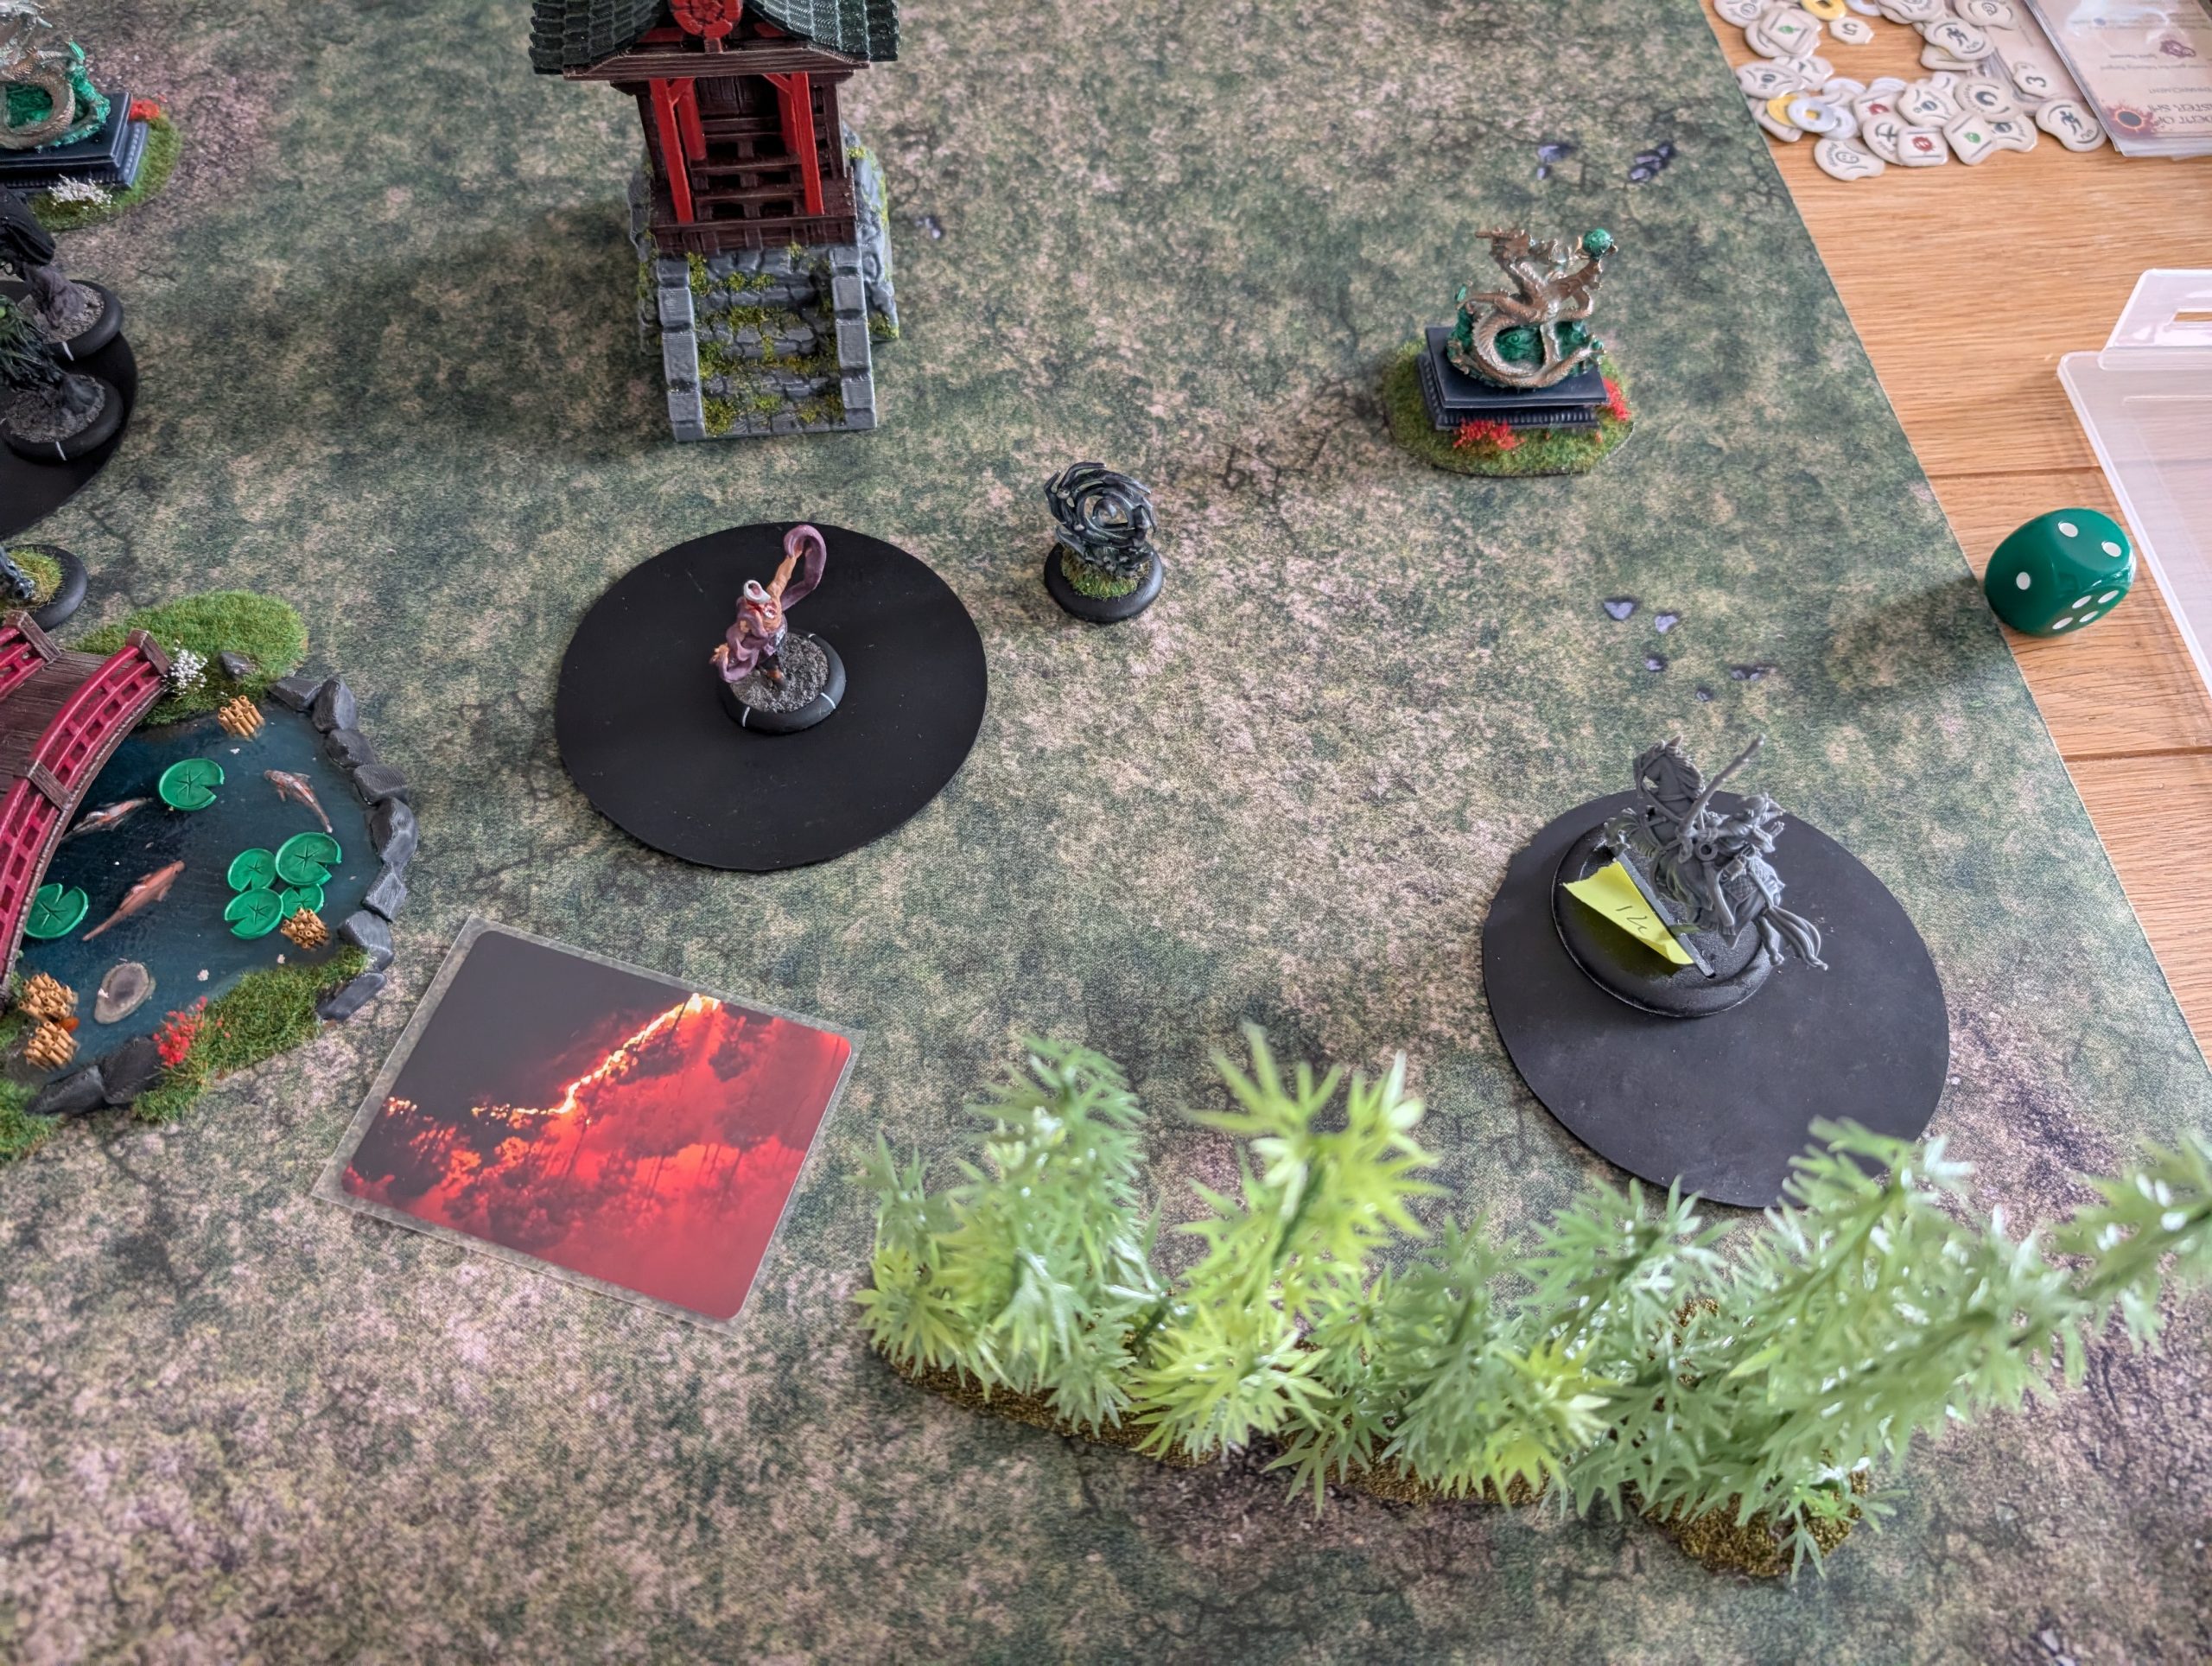
Turn 3.
I again win the initiative and start by charging OY into Batsu. Batsu isn’t great in combat and I’m able to inflict 3 wounds and also play a side step defence to move back out of combat. This doesn’t work so well as Batsu uses a ki feat to put down a scorched earth marker that puts out fire tokens for anyone in the marker or passing through it, so that’s OY and TR both getting burnt.
Reacting to further scorched earth events, WY charges Batsu and kills him.
Maser Shi looks to attack TR. Fortunately, TR has Reach and so gets to attack first. I put all my melee dice into attack and declare a push attack. Fortunately I’m successful and Master Shi gets shoved back out of melee before he can land his attack.
Shikaku once again uses his Look into the Void successfully on OY and out right kills OY. Will my son ever fail his dice rolls?
I charge TR into Shikaku to try to nullify his Look into the Void ability. I spend some Ki to also upgrade the attack with a +2 to the dice pool and put all three of my dice into attack. I’m hoping that I can kill Shikaku outright. I promptly roll a 3, 1 and 1. 1’s don’t count so my total attack level is 3 plus the extra 2 I’ve paid for, so 5 in total. No problem I thought, TR has the ability to re roll a melee dice and I promptly reroll a 1 into another 1. So I’m stuck with 5. My son rolls two defence dice and scores 6 in total so I’m unsuccessful. This hurts. My son also rolled a single attack dice scoring 3. As I rolled no defence dice, that’s a successful hit and I end up taking 3 wounds for my trouble. Not a good result.
I use WY to launch a slam attack against Nagashikaku which gives a better result, shoving Nigashikaku back 3” and I use WY Ki ability to also inflict 4 wounds. Not quite enough to kill Nagashikaku.
Kodai once again goes portal hopping and is able to leap out behind WY and create a surprise (this removes a melee dice from WY). With the dice that I have left, WY rolls poorly and Kodai inflicts 5 wounds and WY is looking very unhealthy.
IK looks to use her bow and moves into position to shoot at Shikaku. I promptly roll 3 2s, which is not enough and annoying given that IK should really be hitting quite easily – another missed opportunity.
As the round closes out, TR takes fire damage from the scorched earth marker and that’s enough to kill.
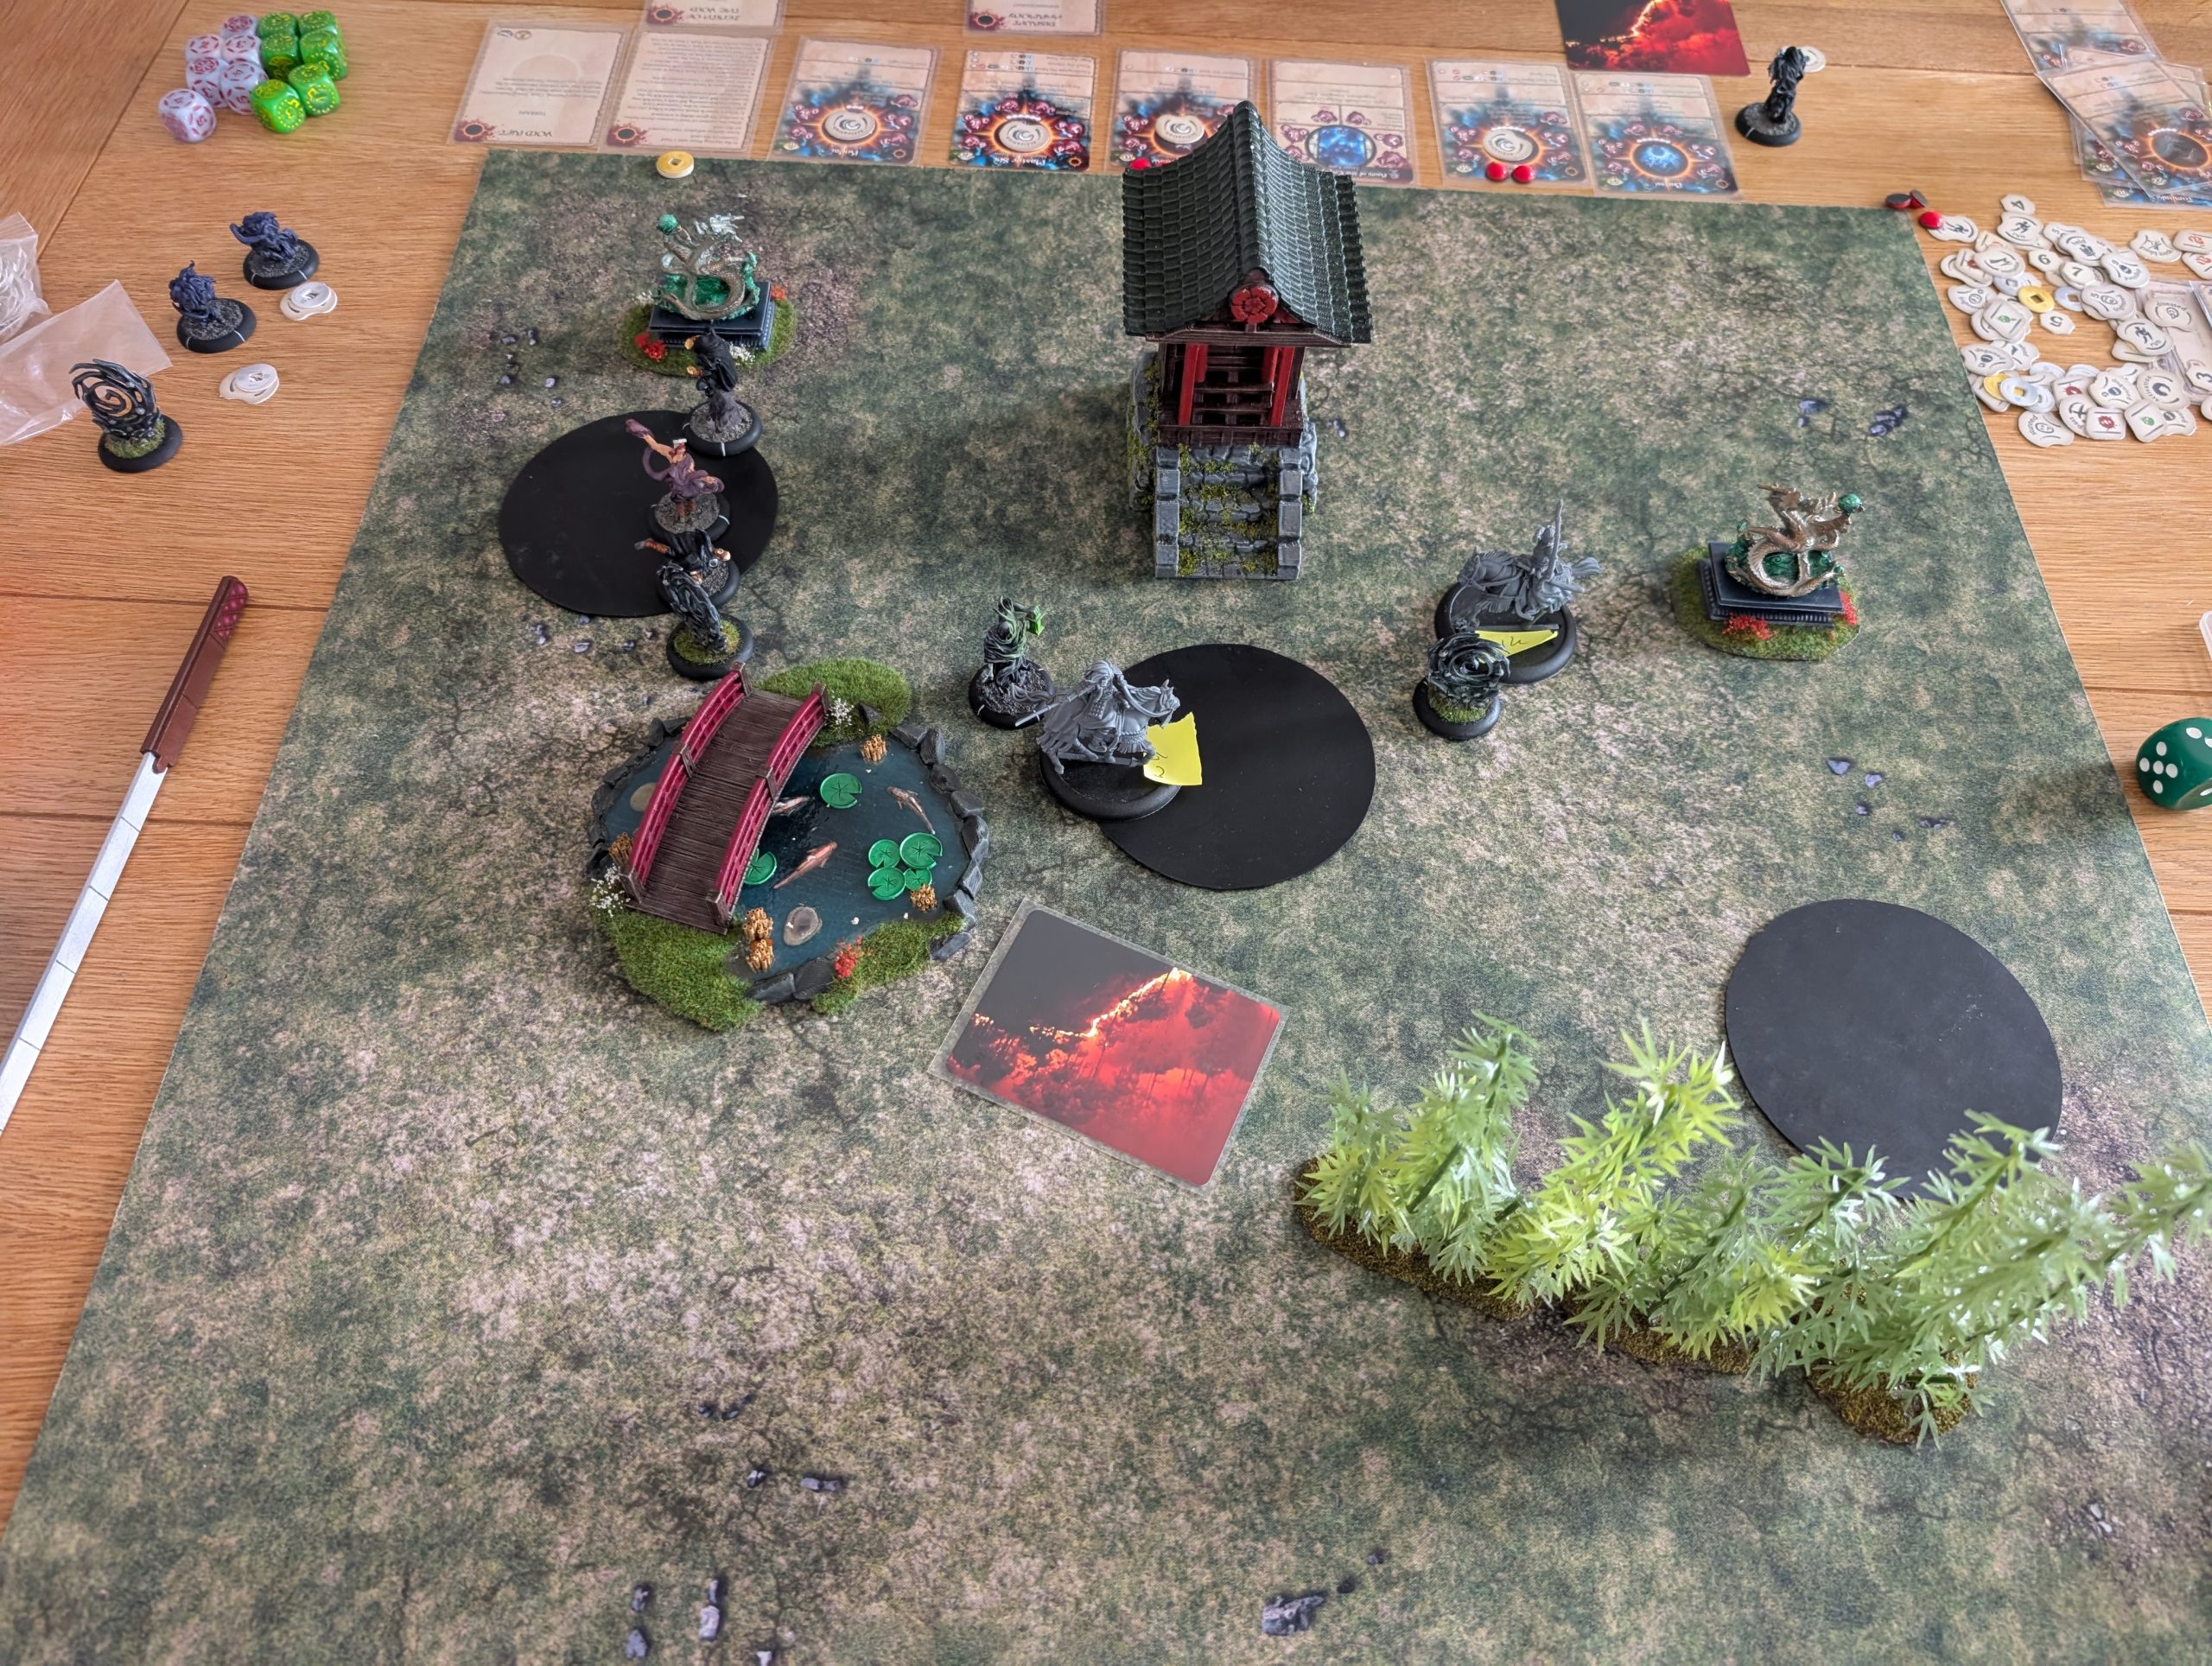
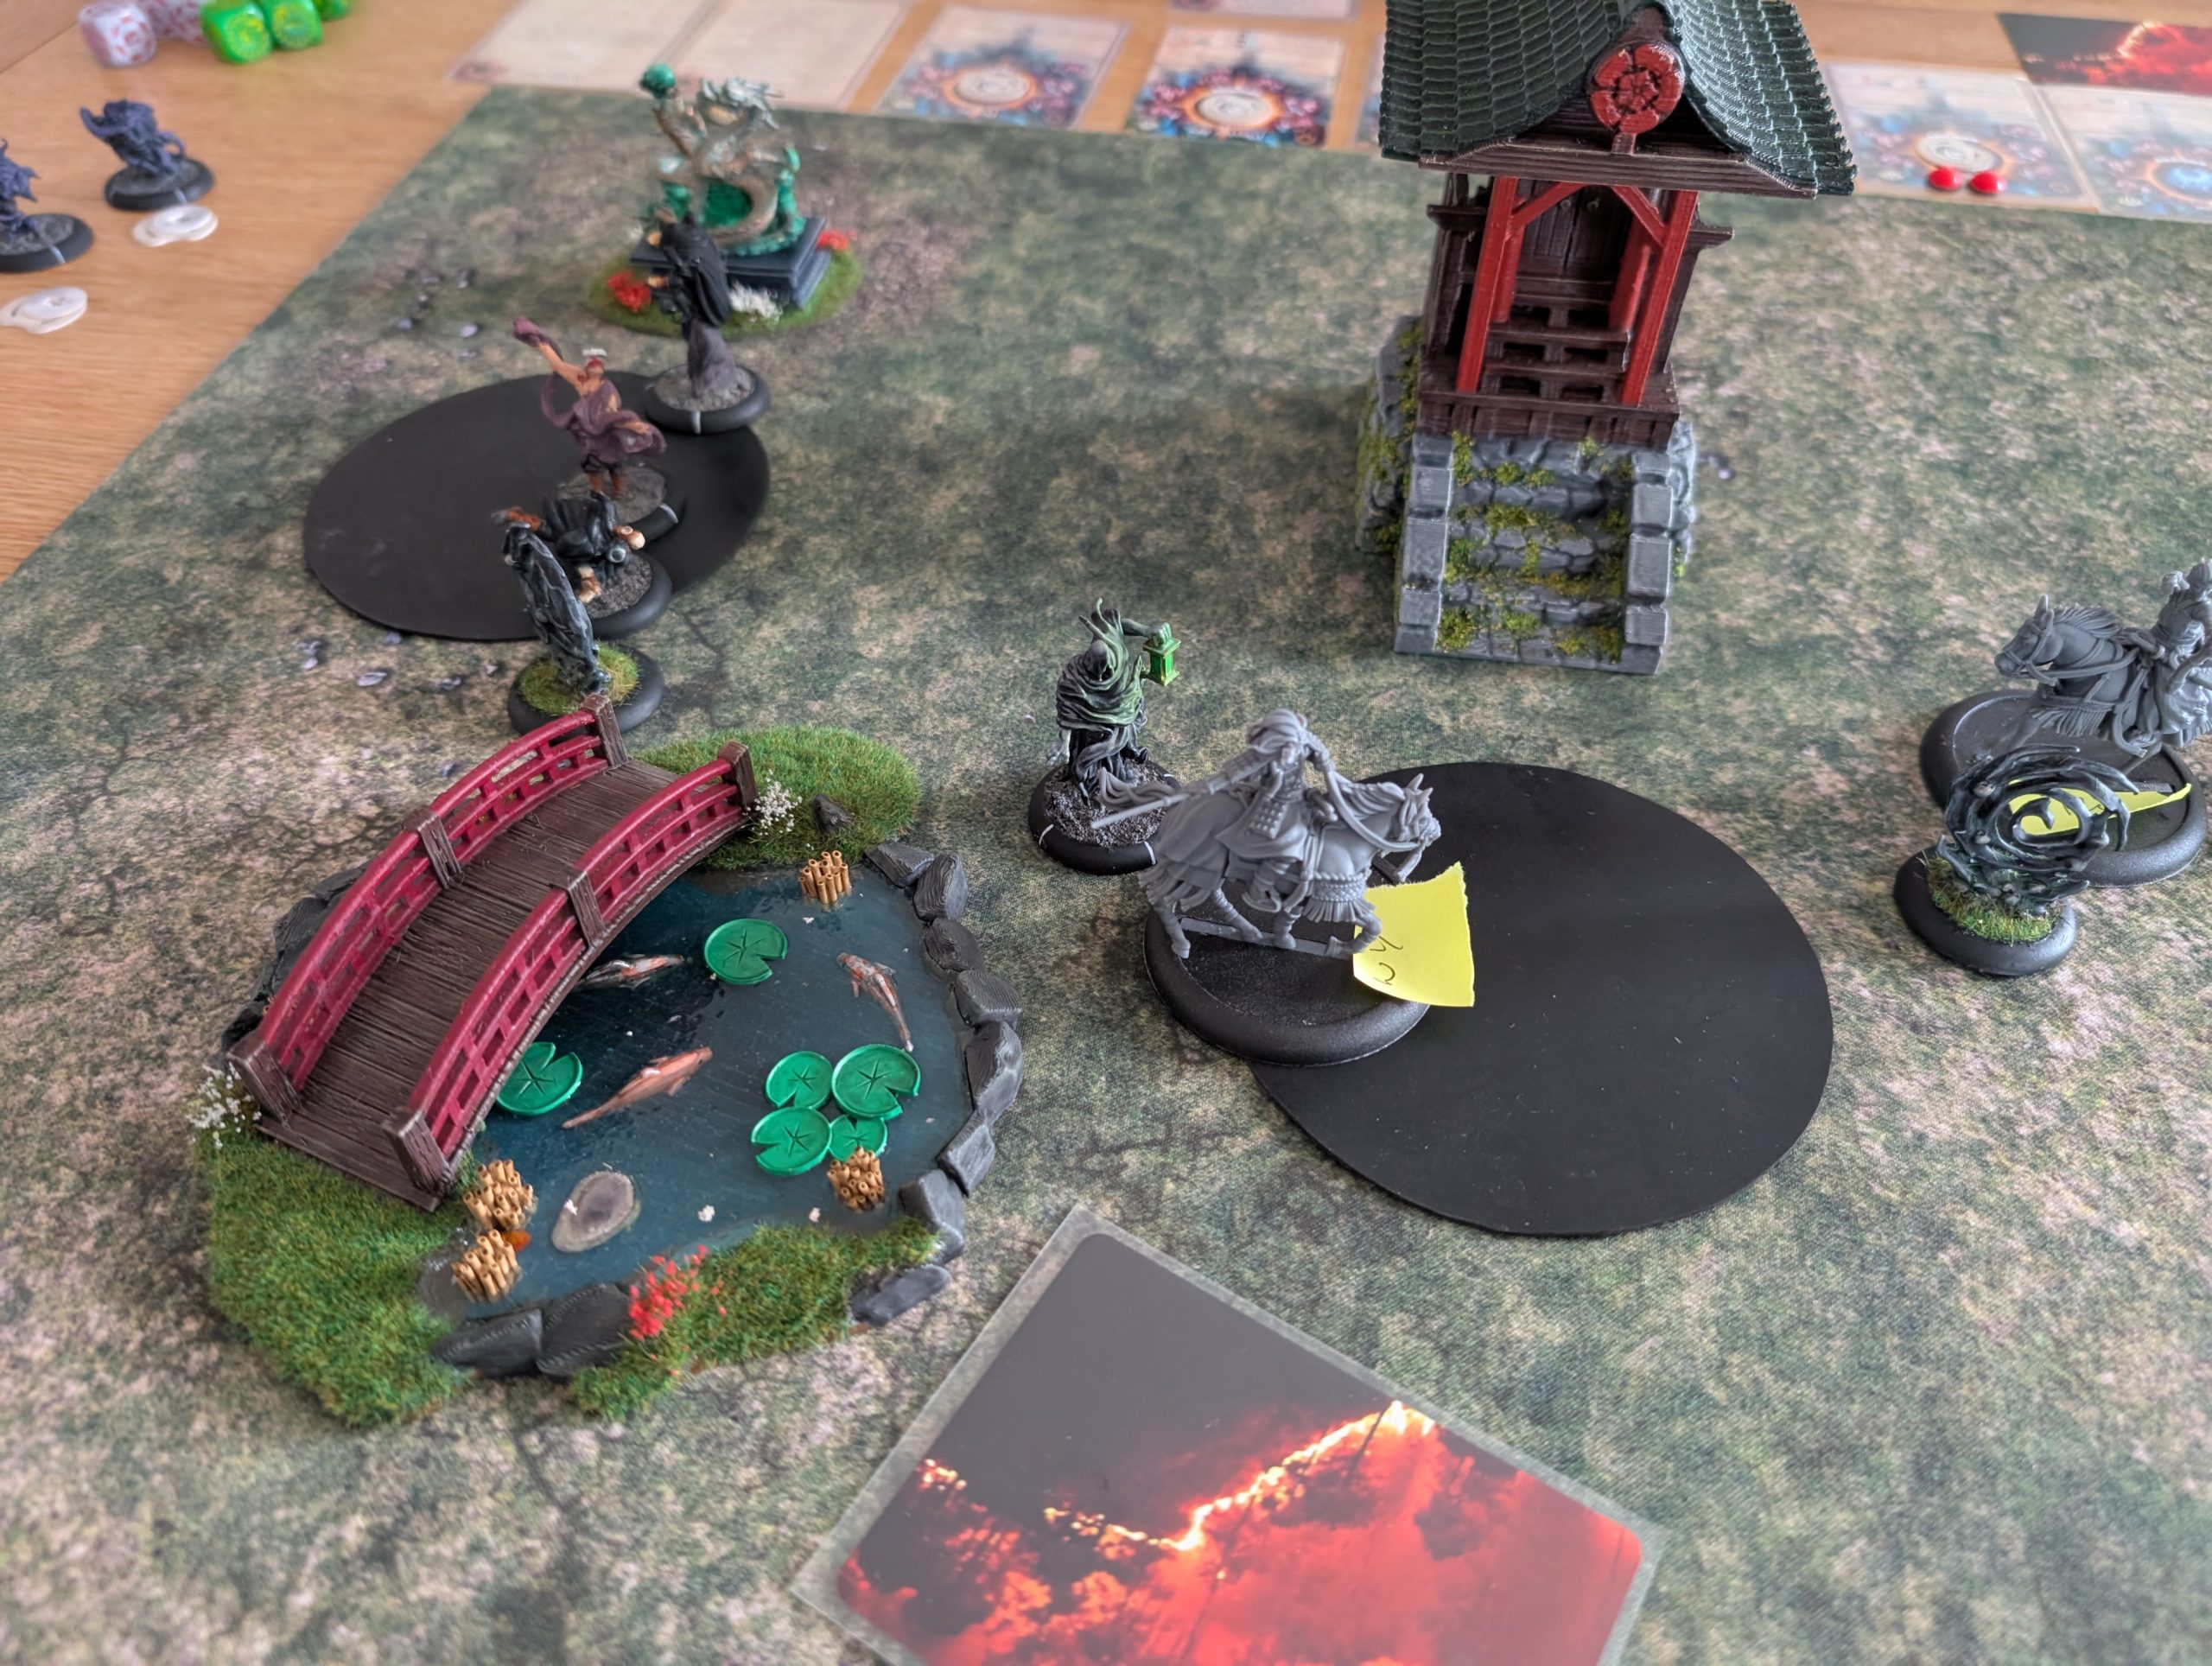
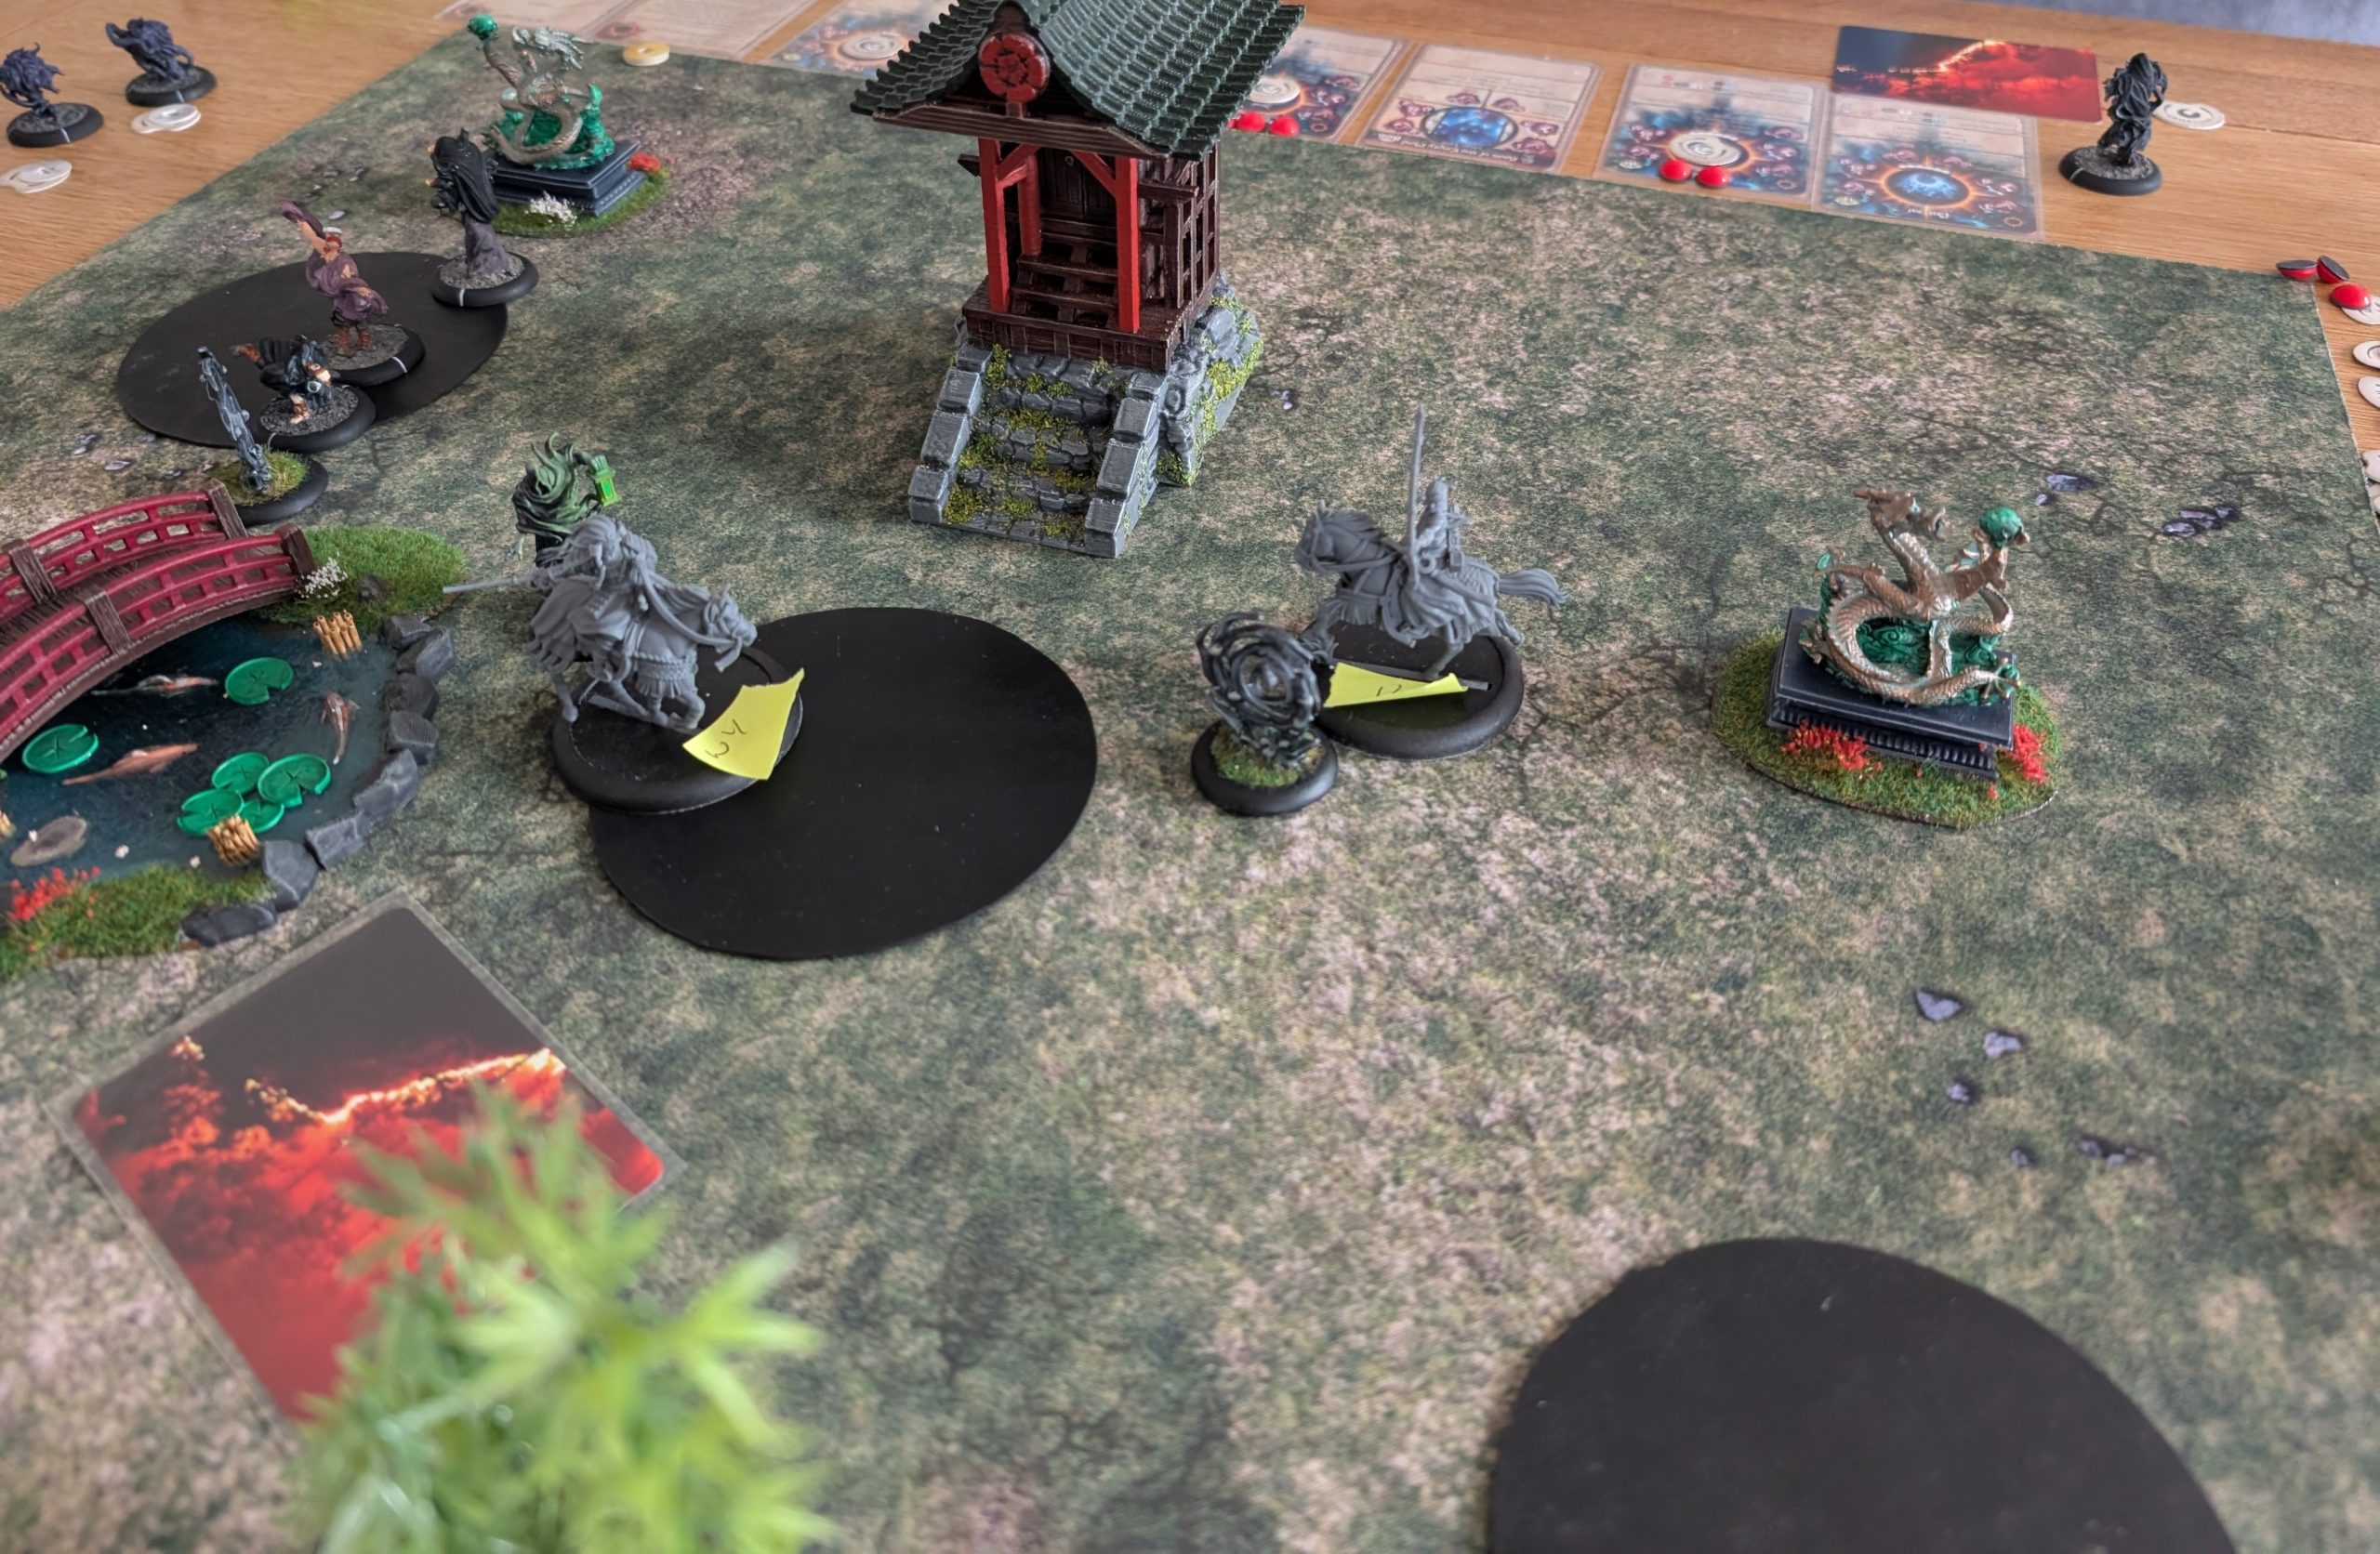
Turn 4.
My son wins the initiative and Master Shi uses his Contemplate no Mind Ki feat. I roll so badly to defend this Ki feat that IK loses both activations and so will take no action at all this turn. This is a massive blow as I was hoping to use her bow and Ki feat to try to remove some of Kinshi models that are close to death.
WY launches an attack but fails to land a blow and Kodai is able to once again portal hop to surprise WY and kill. With just an inactive IK left on the table, my son is able occupy two zones and claim the second VP. At this point, I conceded as victory was gone.
Overall, a good game and my son was able to ramp up the Kinshi’s abilities very quickly. The Horselords are quick and better in melee when compared to my normal faction, Cult of Yurei. But clearly I need some more practice with them.
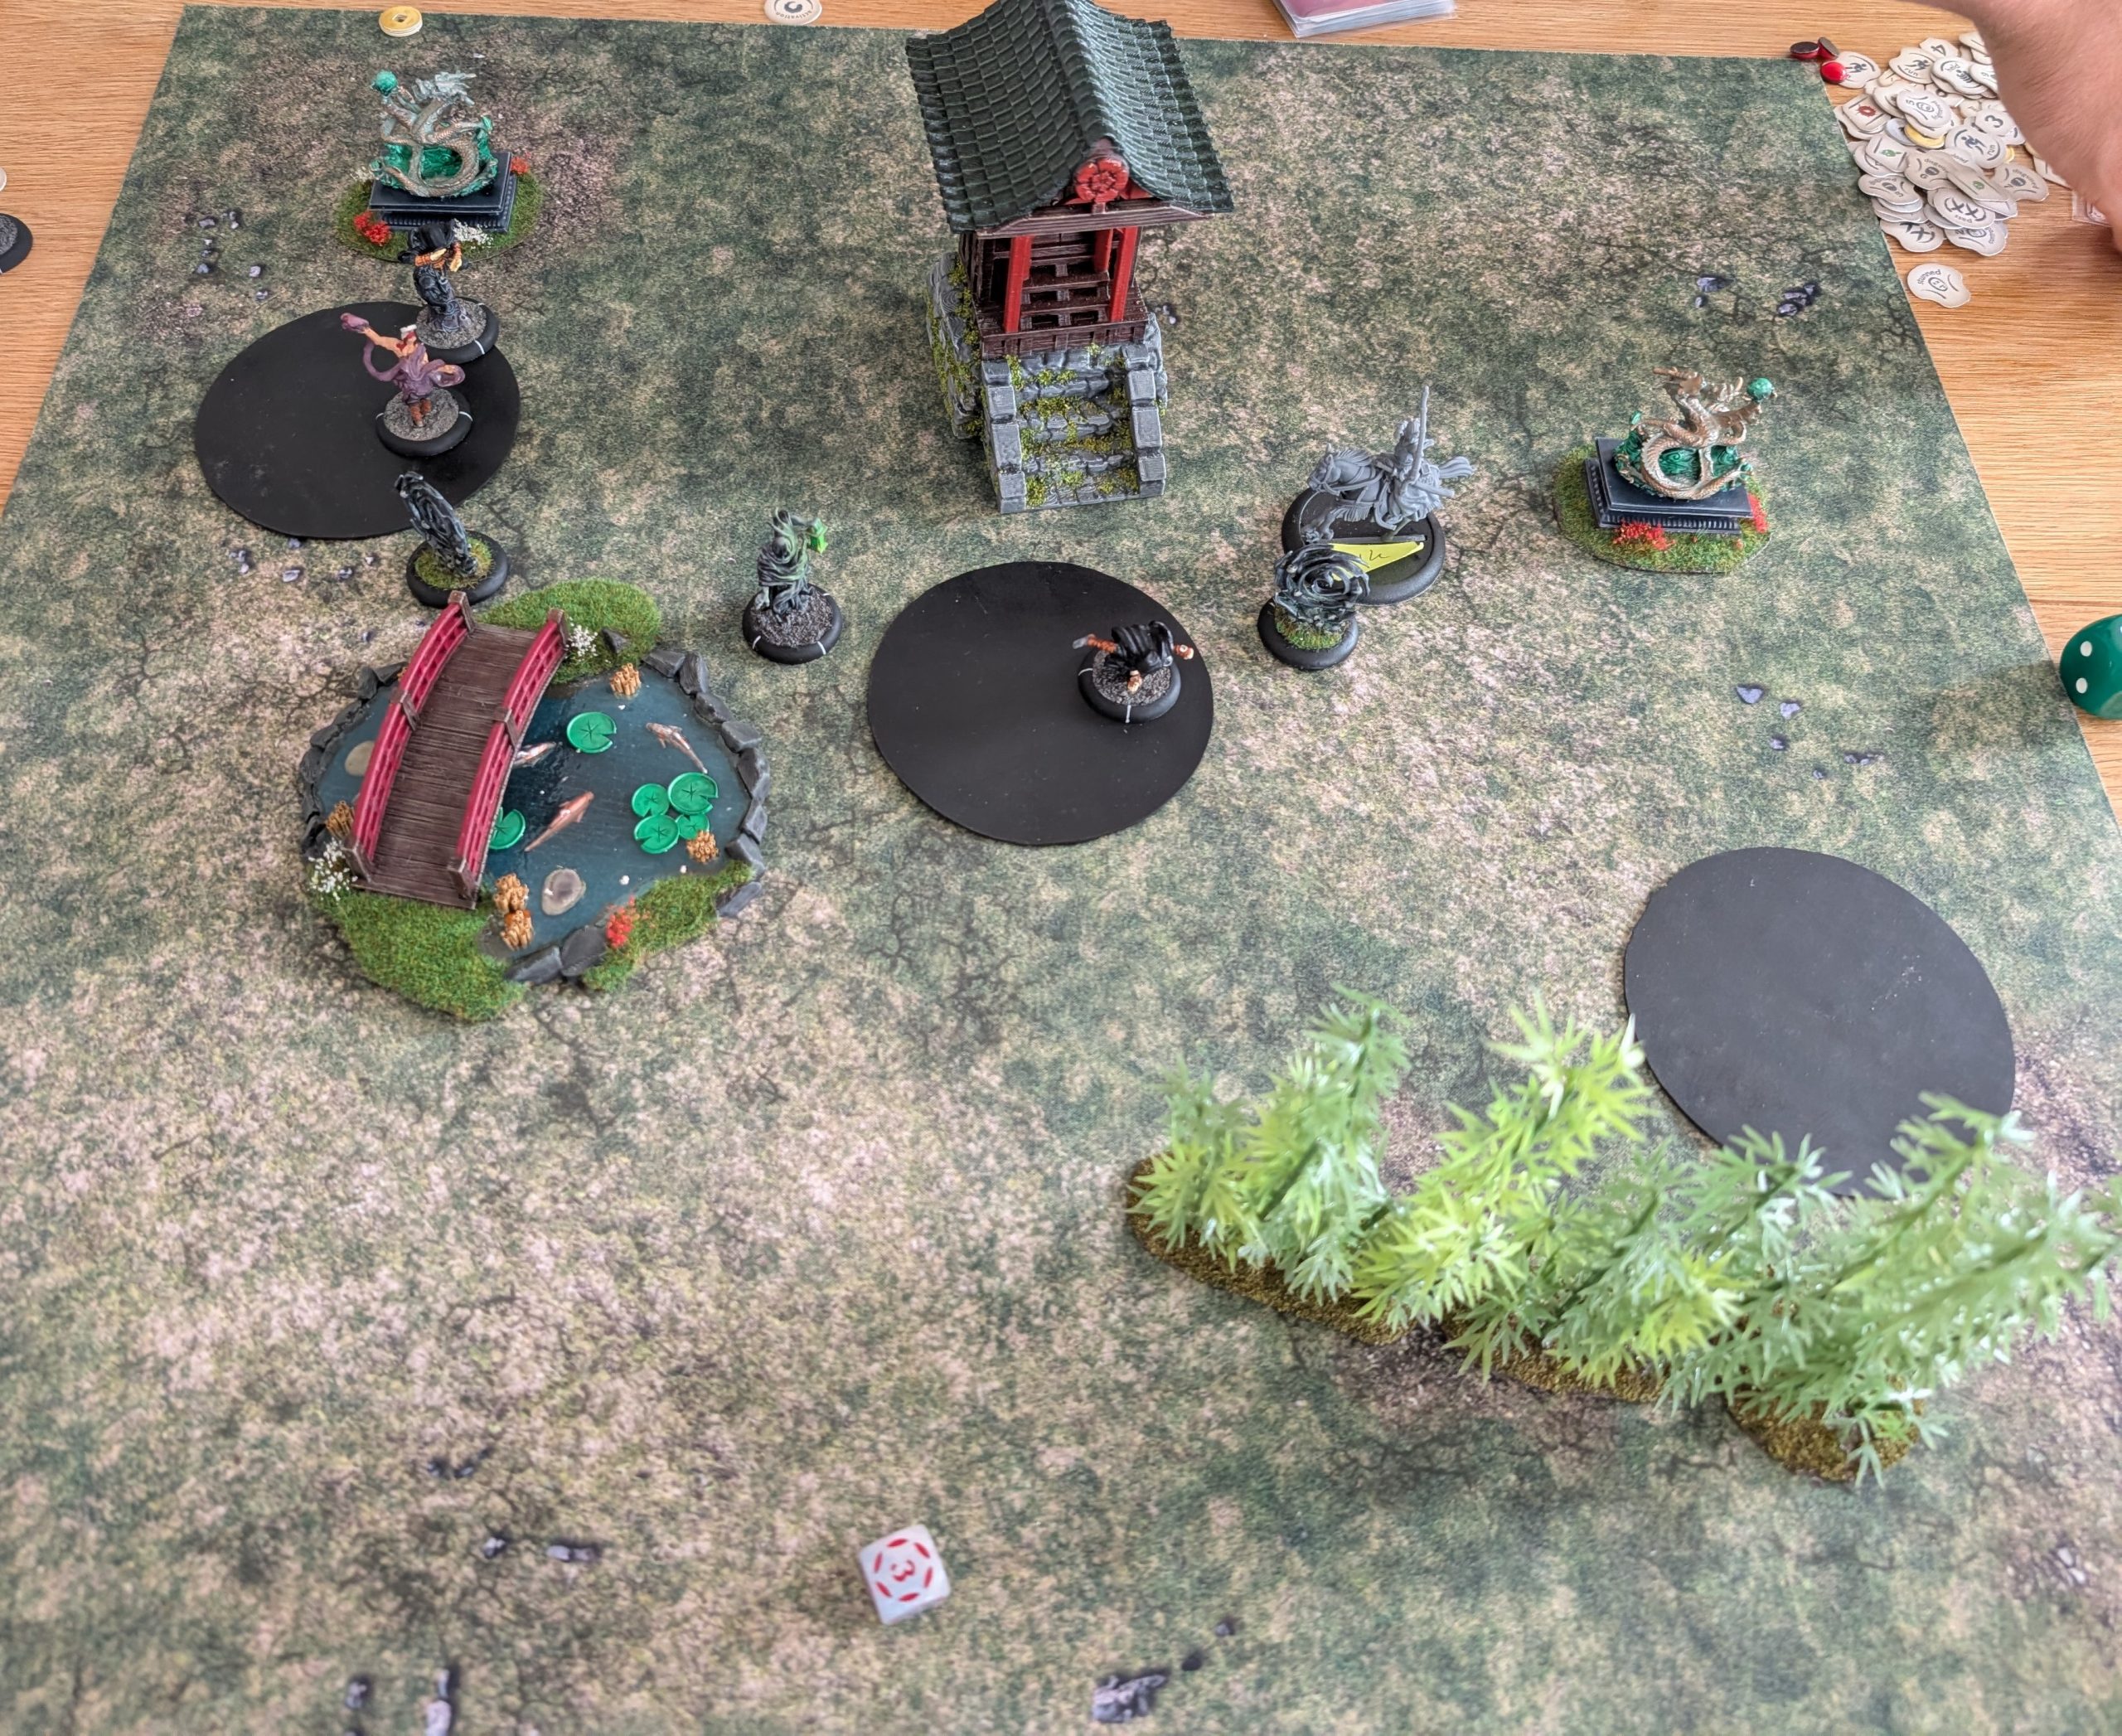 The point that I conceded
Aug 25 2026
More skeletons, in this case an Ashigaru called Akoshi.
In game, like the other skeletons, this fella gets Durable (just a single wound at a time), Regenerate (1 wound back at the end of the round) and immune to most states (like fear, dazed etc). Akoshi also creates Fear but at a lower level, so unlikely to impact anything but the weakest of foes, but still useful to have. Akoshi does have armour, which reduces any damage rolls, so lower success attacks may not even wound at all because of this. Finally, Akoshi is armed with a yari, giving him (I’m assuming Akoshi is a him, I’ve not checked the pelvic bone to see whether Akoshi is a her) reach and granting the first attack in the first round of any melee. And with 3 melee dice, Akoshi should be able to hold their own in combat.
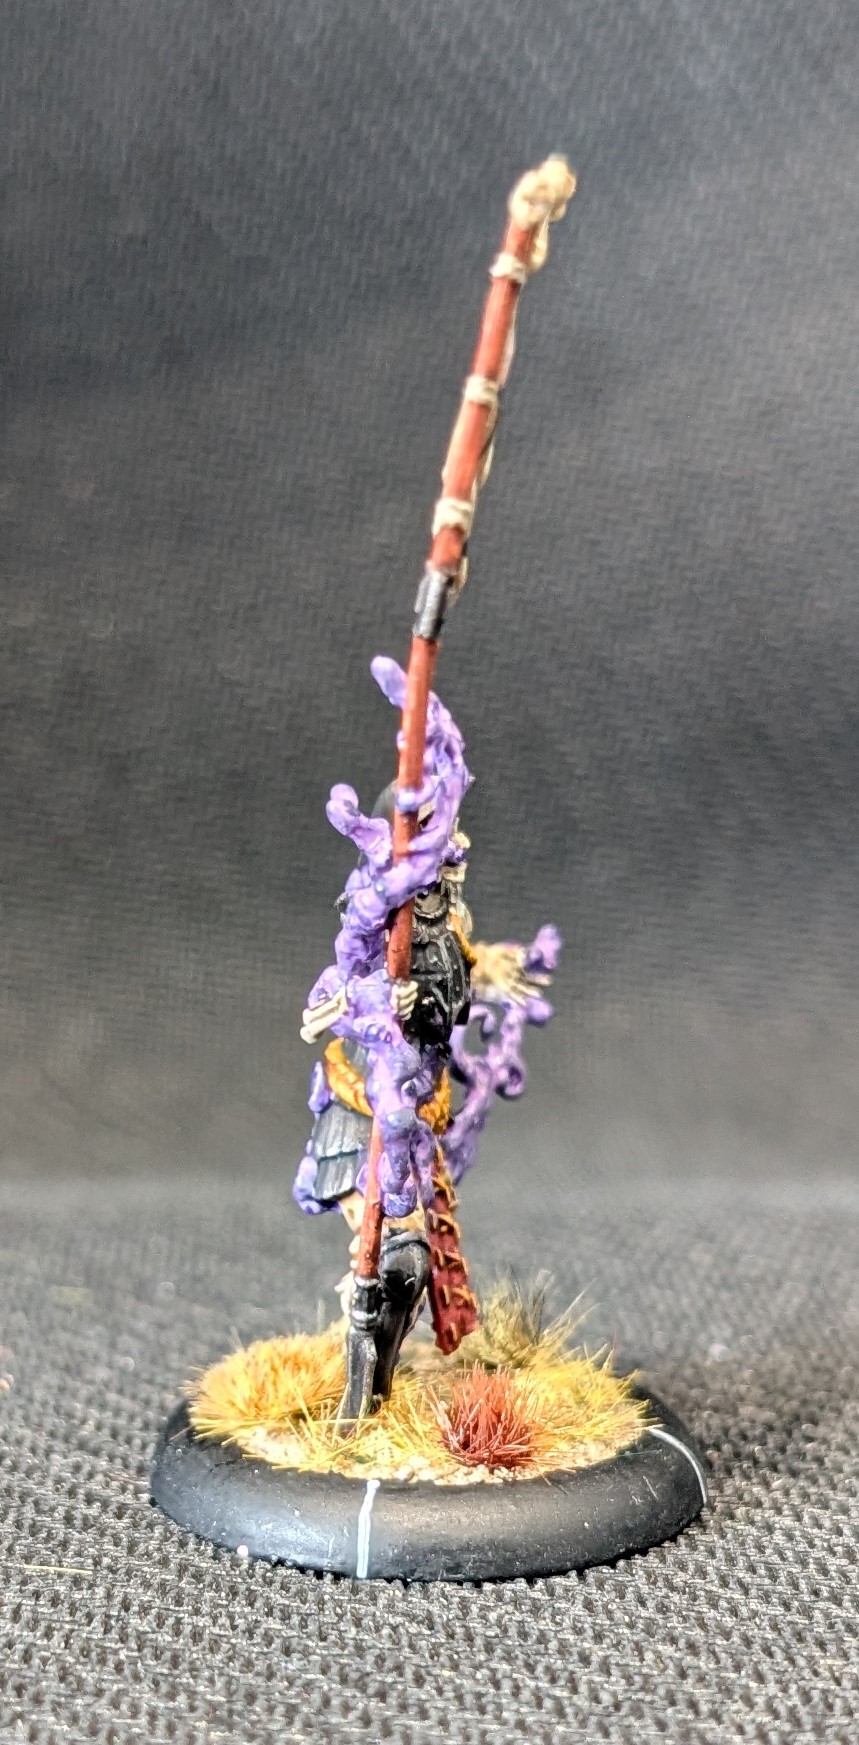
For the painting, the bones were painted in exactly the same way as the other skeletons. As was the purple smoke. I’ve chosen just a black armour for Akoshi – I’m assuming that as they were an ashigaru, their armour would be less ornate. I’ve started with a dark rubber base and given this a very heavy nuln oil wash. Then taking the base and gradually adding Luftwaffe grey and then light grey, I’ve shaded up the higher areas to create the highlights. Once done, I gave it a final nuln oil to smooth it out.
The red cloth started out as Aldabaran red mixed with a little red leather. Then using the Aldabaran to build up the highlight. Before adding a little orange for the top highlight. Scrofulous brown for the stitching and rope belt, given a strong tone wash. The trousers were khaki given a wash and then highlighted back up with khaki and increasing amounts of off white. Same approach for the banner.
To complete the banner, I’ve got my hands on some nail art transfers and just applied a suitably sized flower transfer.
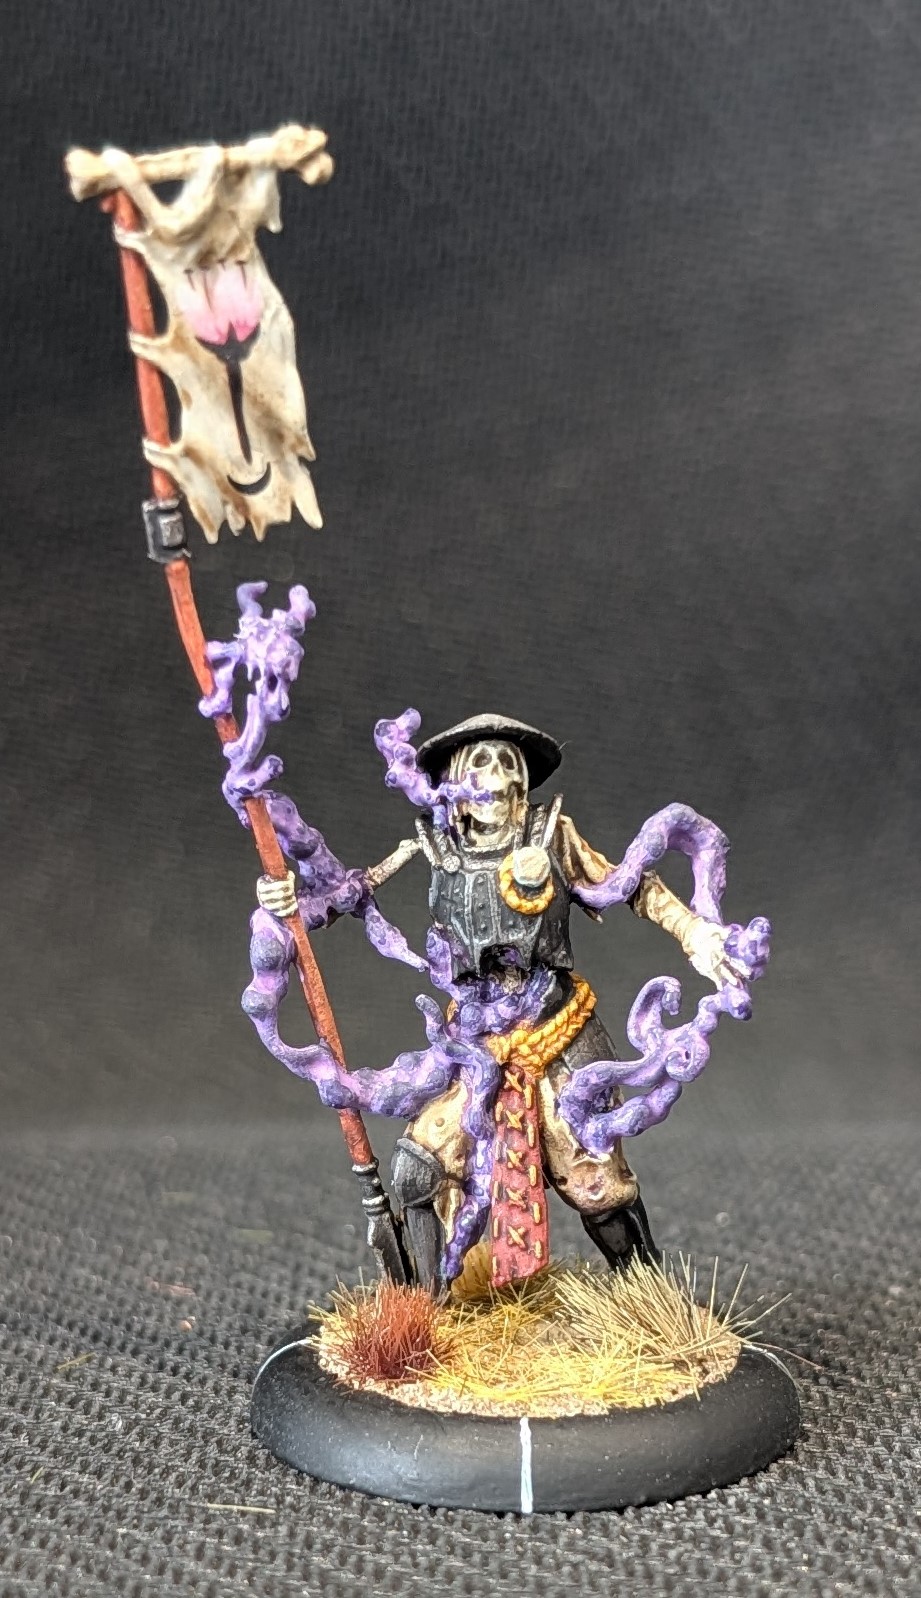 Akoshi the Ashigaru
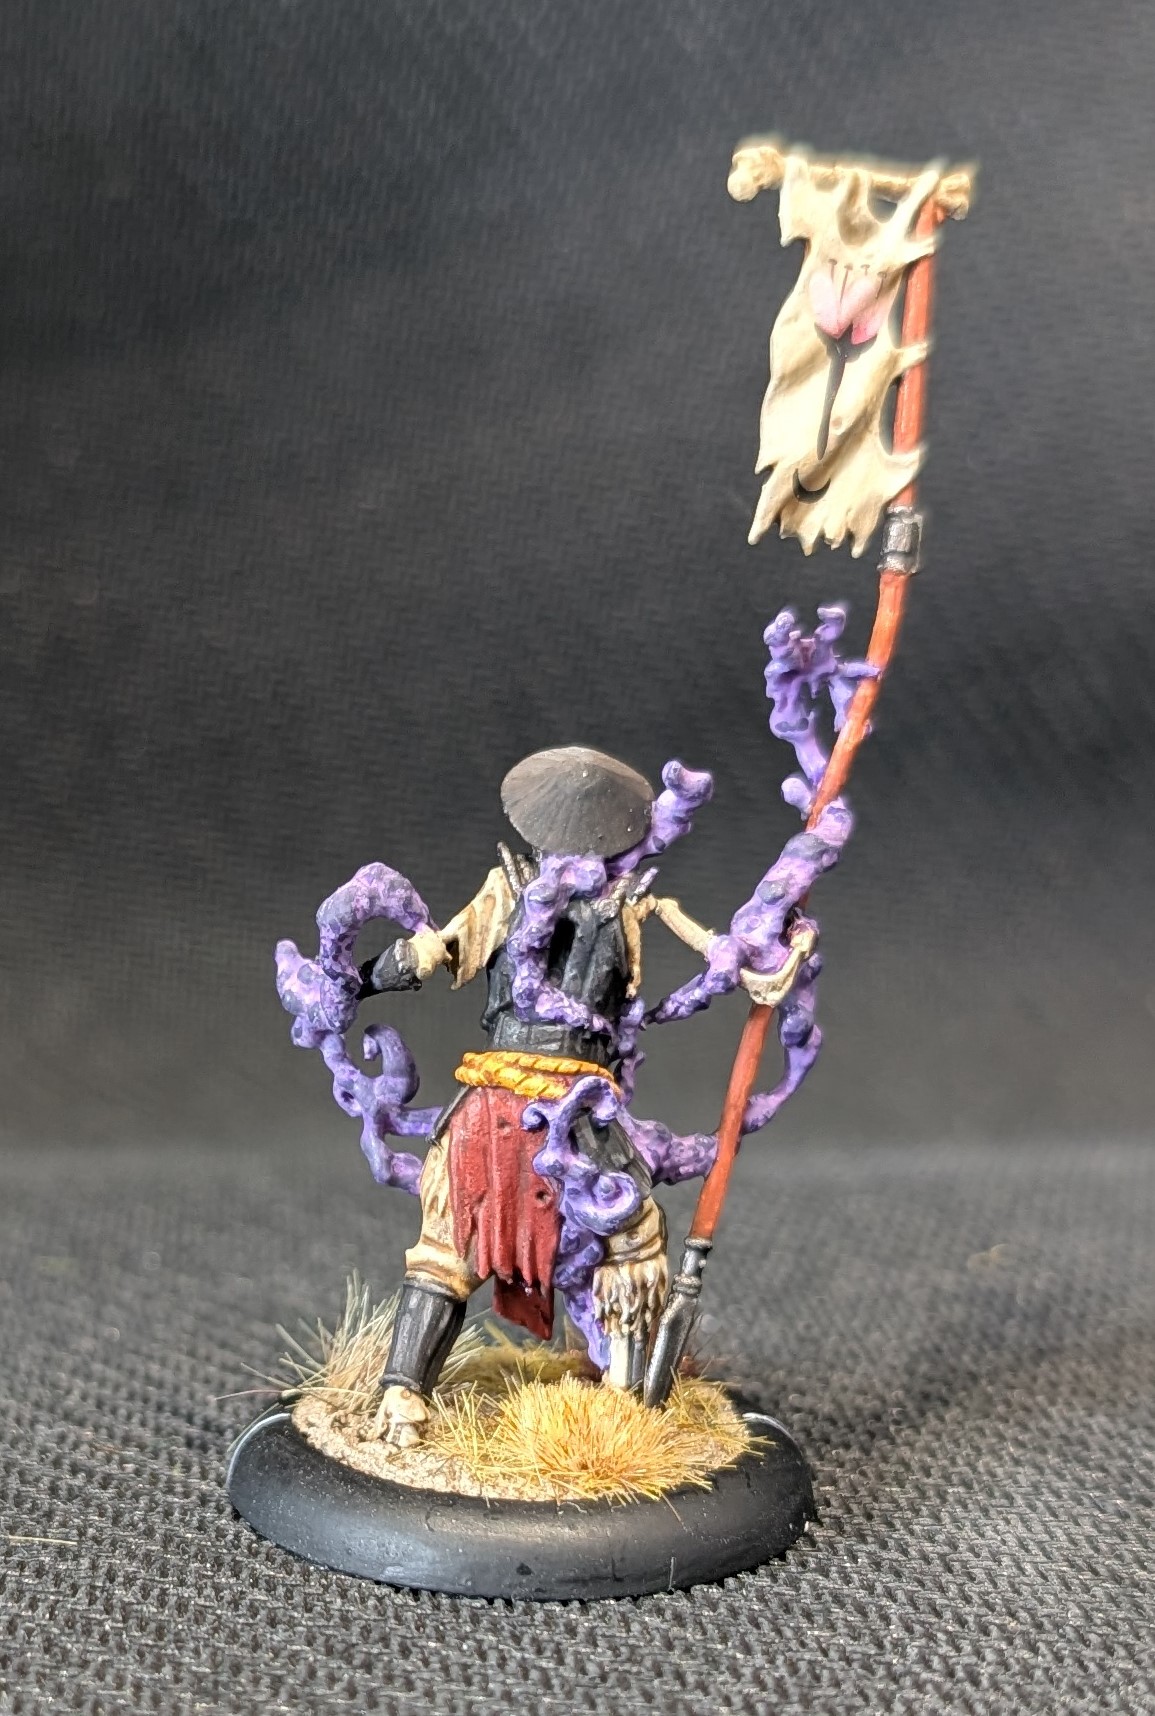
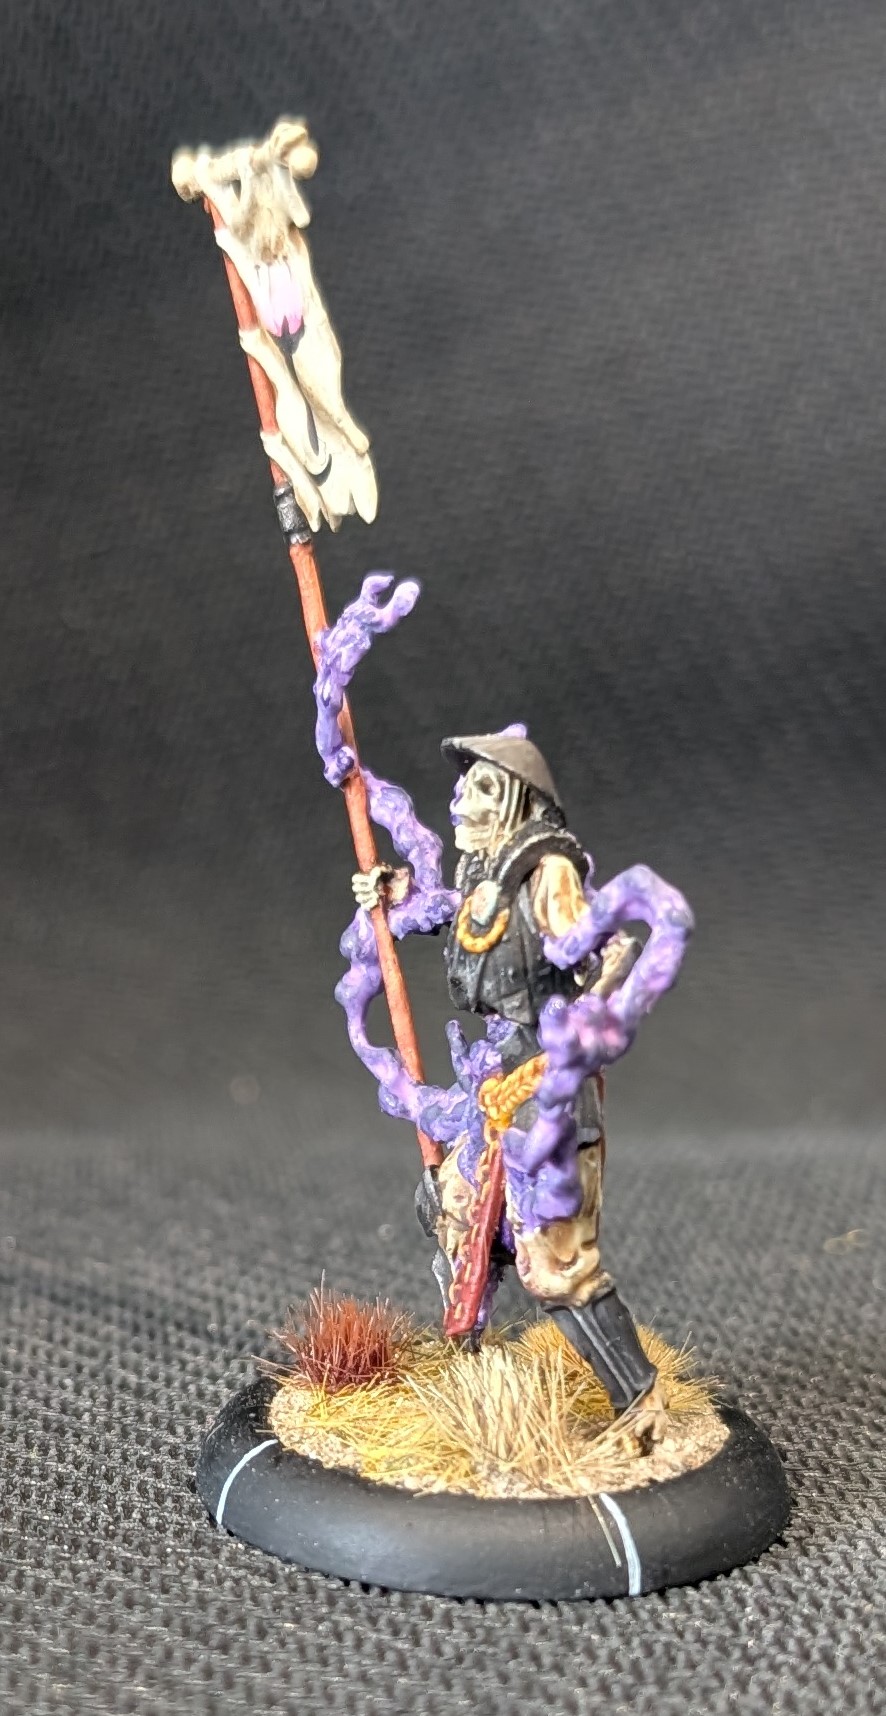
Aug 25 2026
I got a golden button for this. Go me.
I believe that my Bushido efforts have now won three golden buttons, making this the multi, multi award winning project.

Aug 17 2026
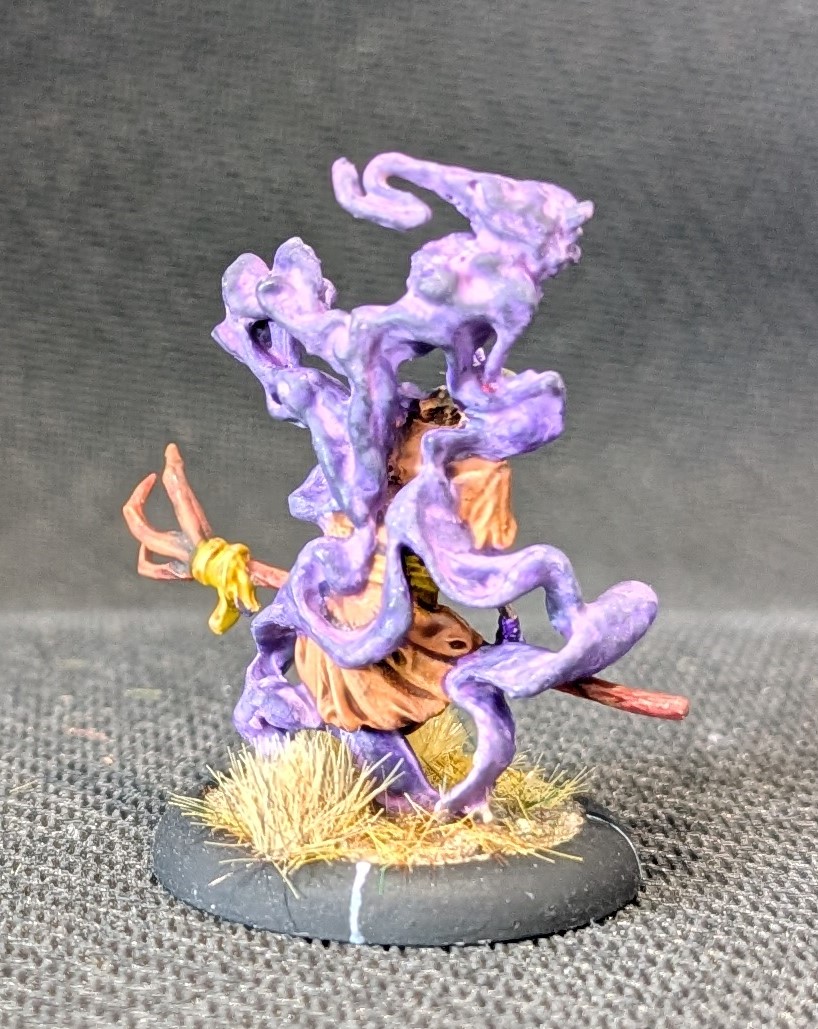
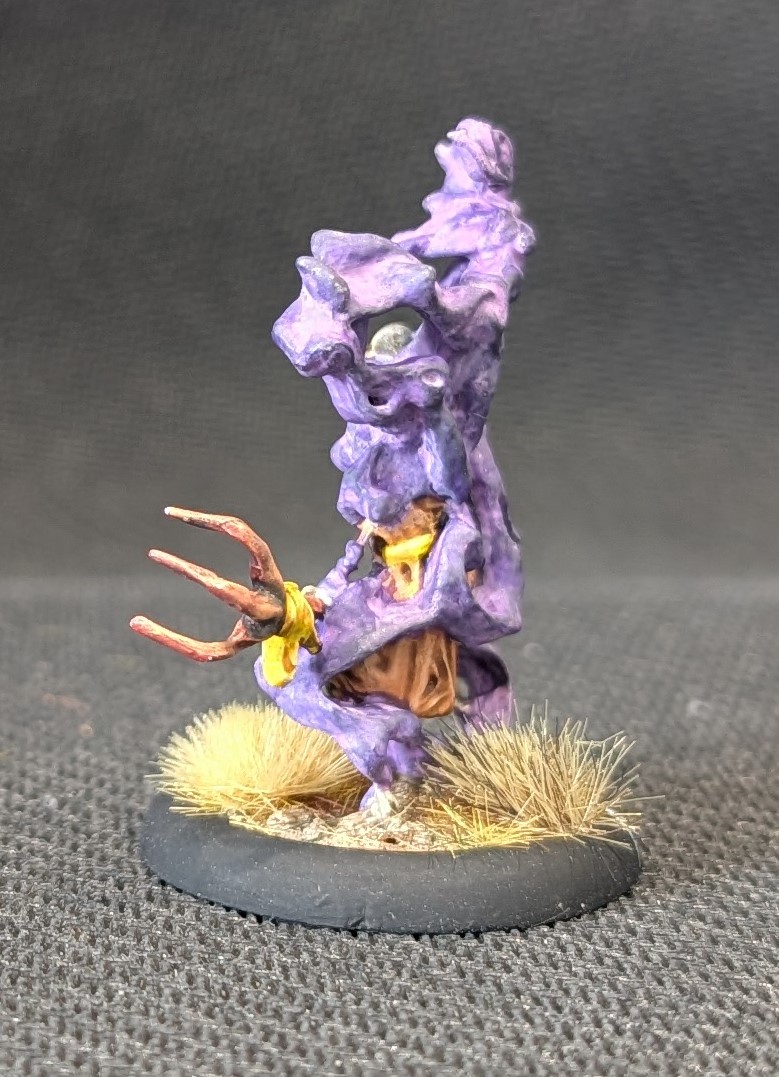
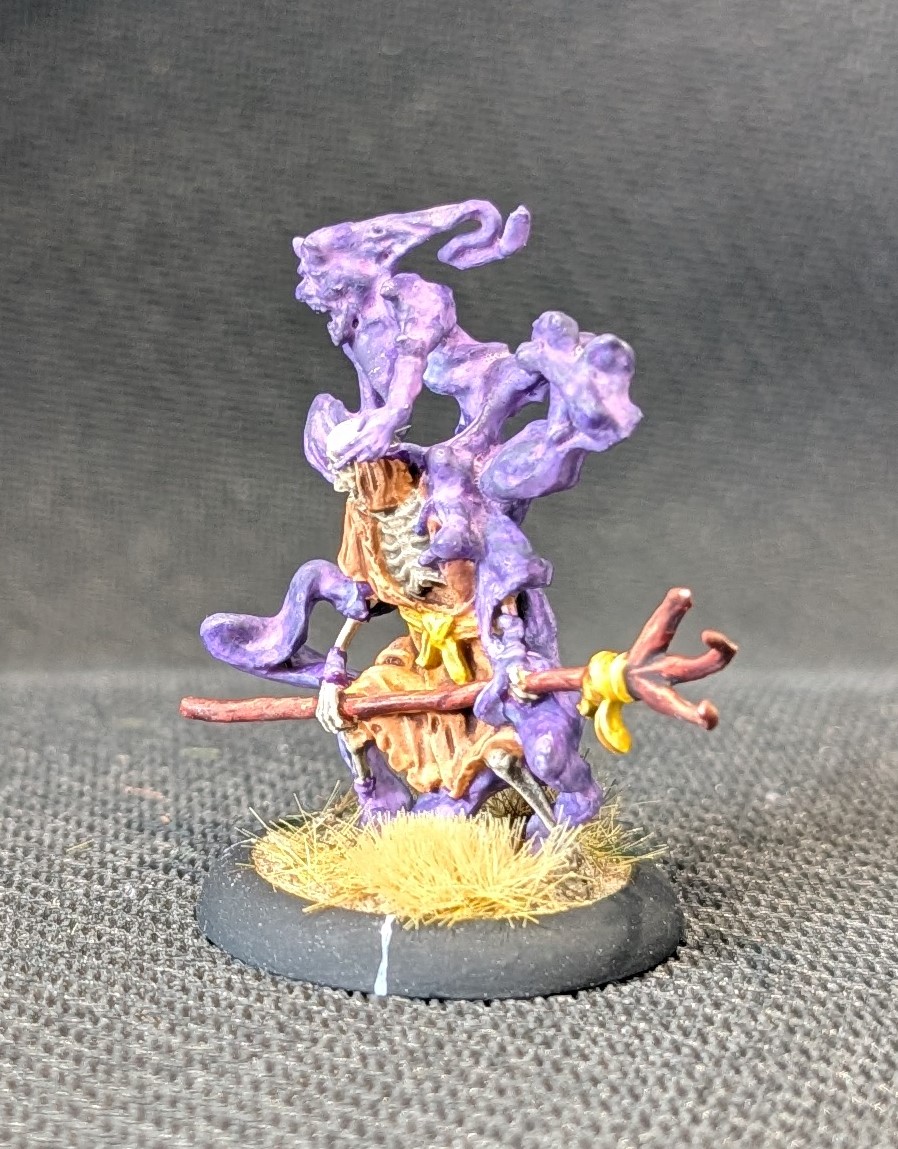
We continue with the Gashadokuro (skeletons) theme with Warui. This fella is a little cheeky on the table. He’s got reasonable combat ability and his weapon gives him Reach, allowing him to hit first in the first round of combat. Like all skeletons, he gets Durable (so he can only ever take 1 wound per combat round) and Regenerate (gets a wound back at the end of the round). He also comes with Fear and Dread, meaning that anyone passing their fear test first time around has to re-roll it – and models who become fearful become a lot less useful in combat.
He has no special Ki abilities but should he be killed, I get to replace him with a Kami model for free. This can be any Kami I want and some of these Kami can be quite powerful, so this creates the problem for your opponent, do they want to kill Warui or not…
Painting wise, it’s the same bone effect as for the other skeletons before, German Black Brown base, a wet brush of light brown, a light dry brush of bleached bone with a final highlight of Iraqi sand.
I opted for speed paints for the cloth and rake. I’ve then dry brushed this with Iraqi Sand and then applied a light wash to tie it together.
The purple didn’t come out as planned on this model. It was the same approach as before, with a mid purple base, a light wash to get into the cracks with a darker purple applied to the thicker areas of smoke. Then some glazes to try to tie it all together, but for some reason, I just couldn’t get a smooth transition. My patience ran out in the end and I gave up!
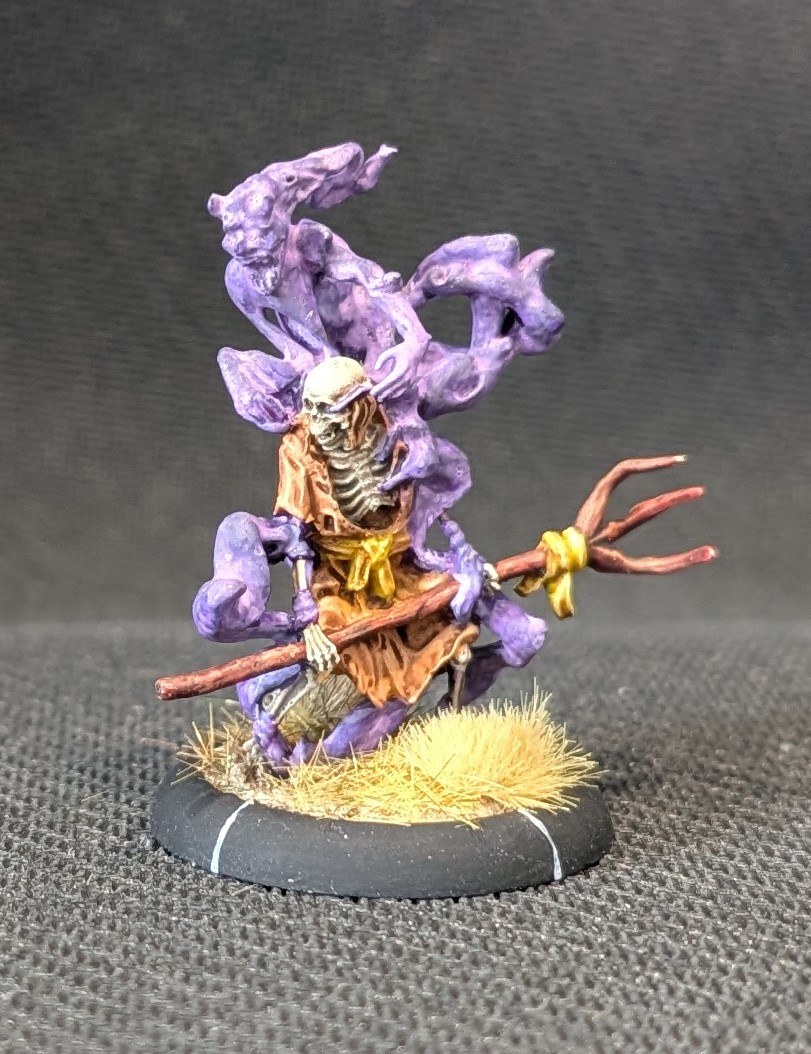
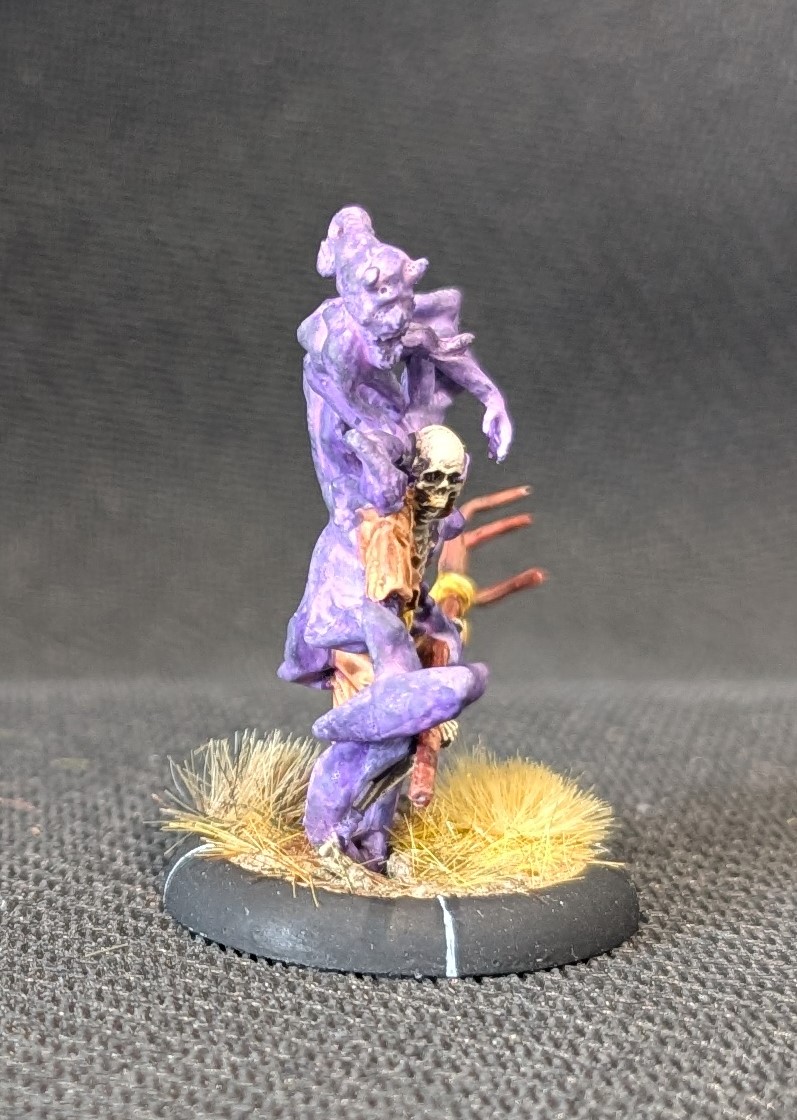
Jul 28 2026
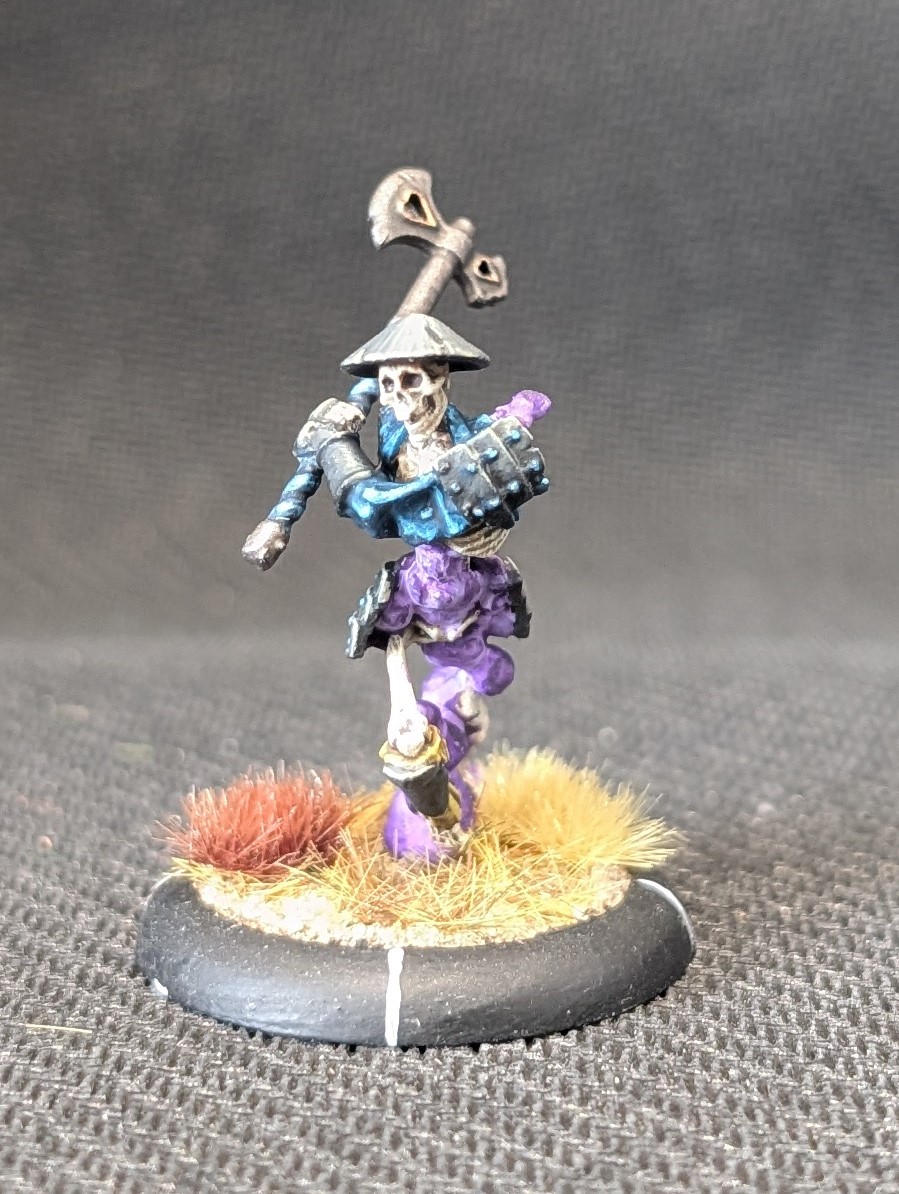
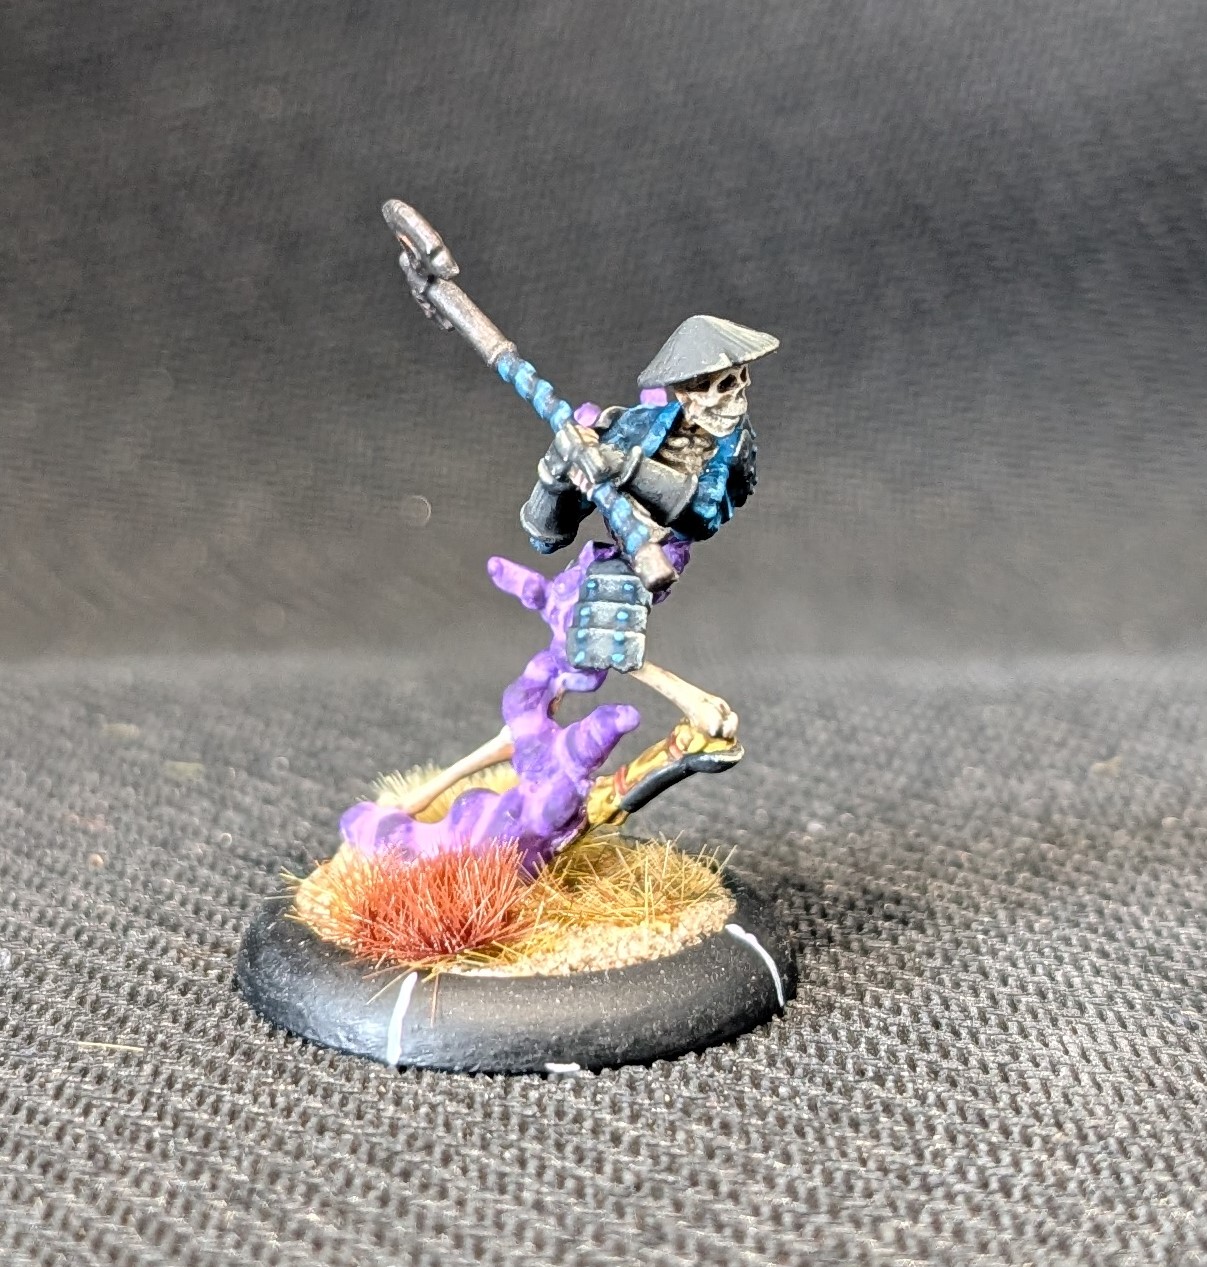
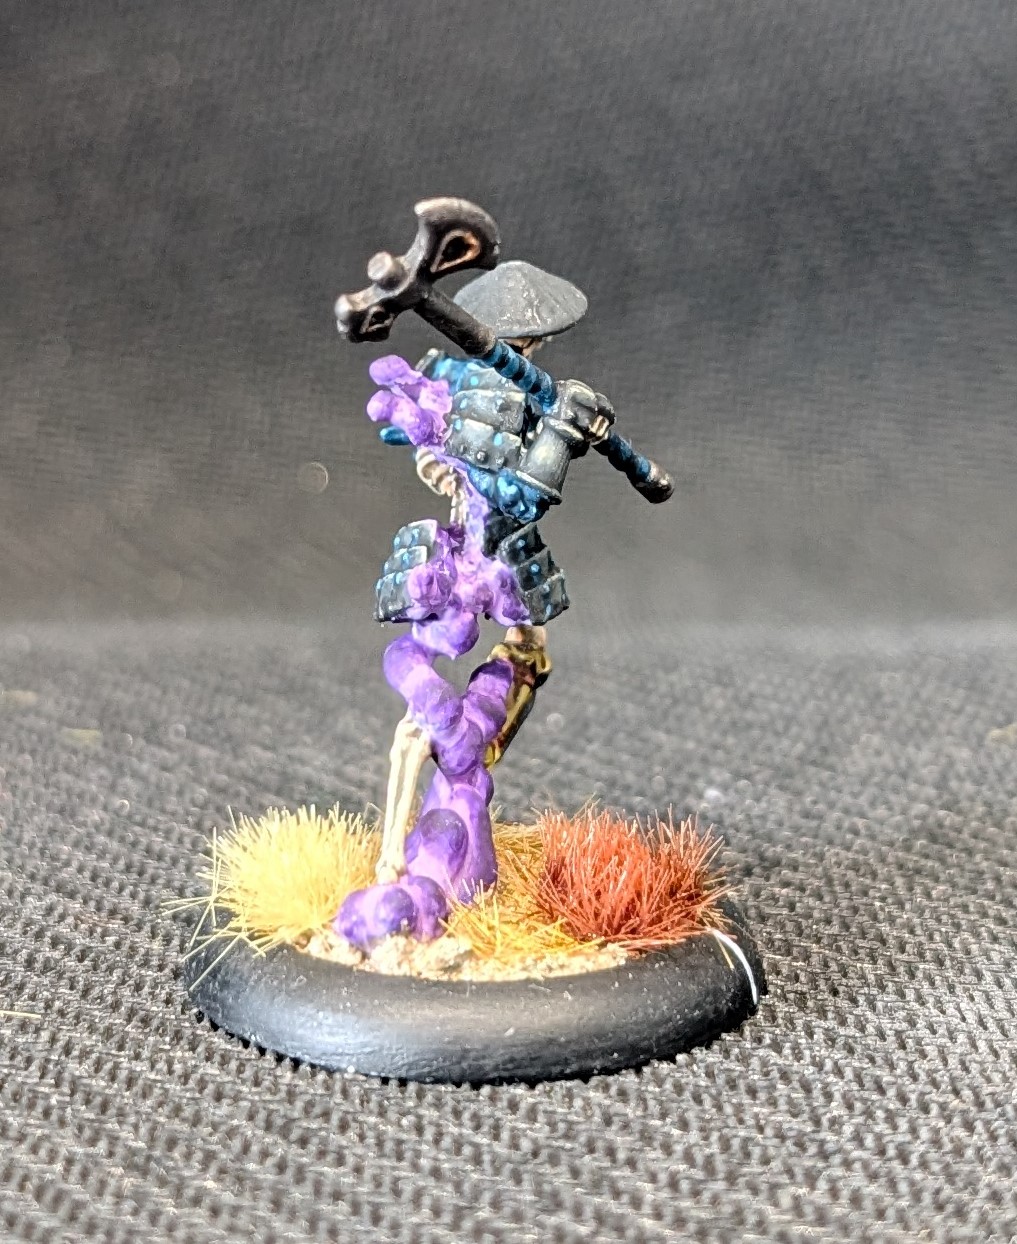
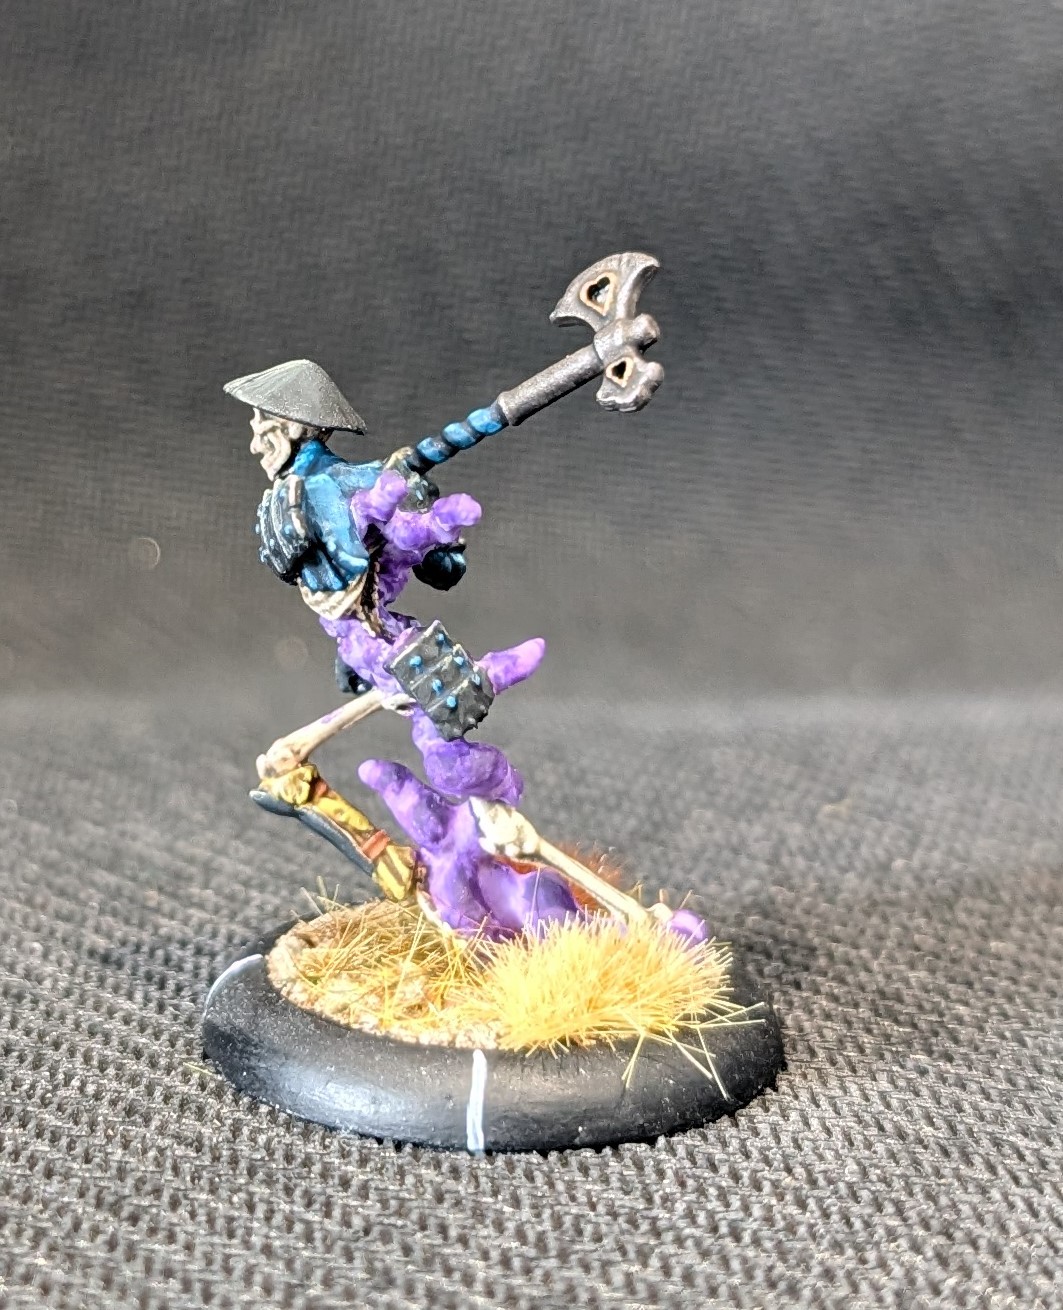
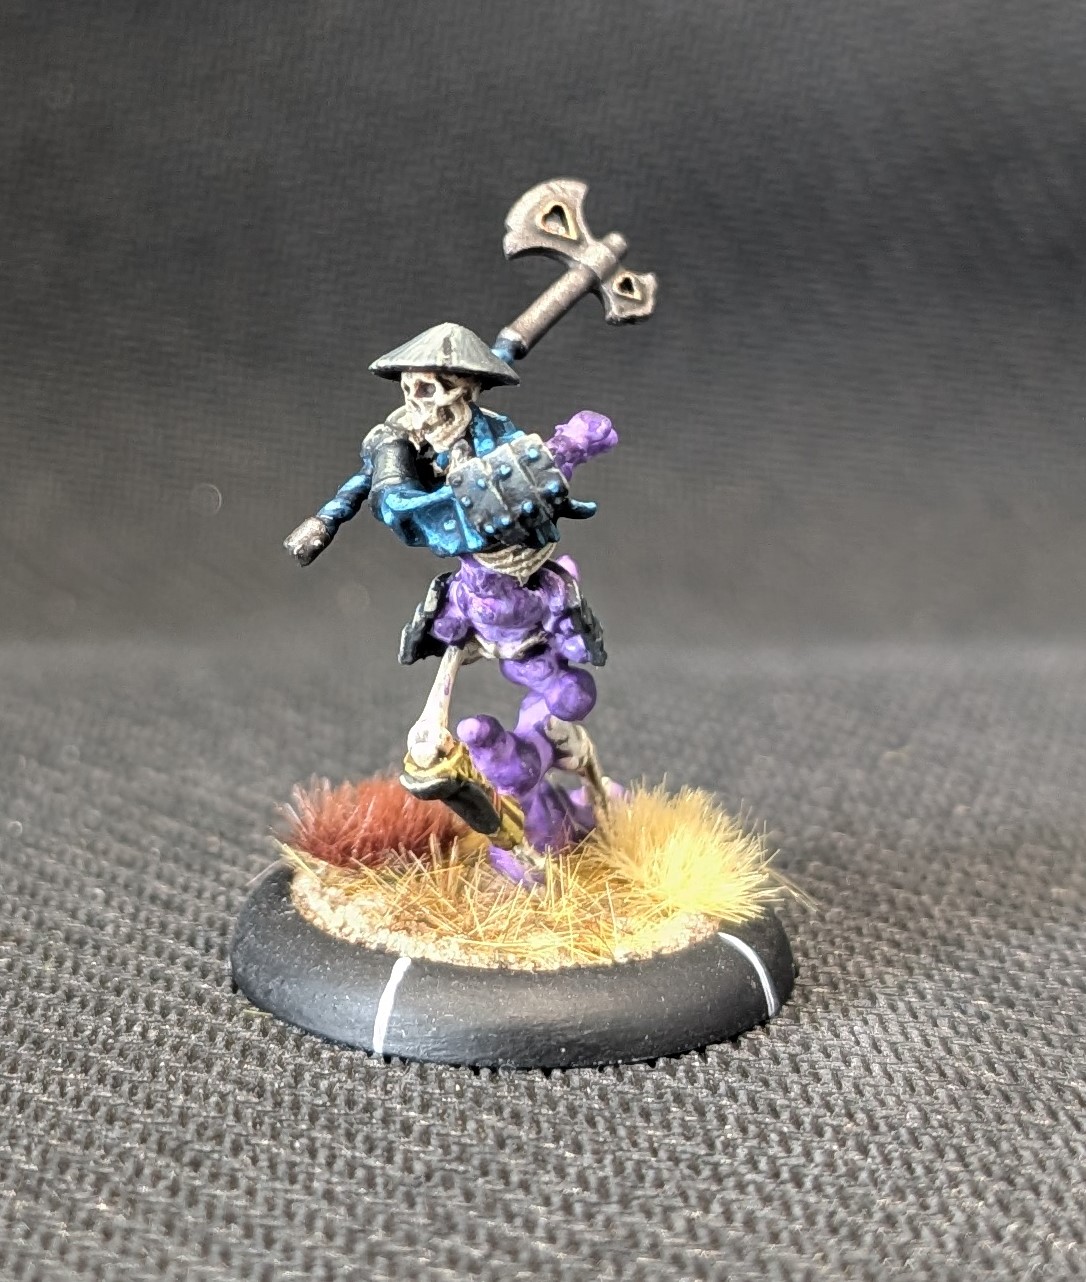
Working my way through my skeletons (or Gashadokuro) we have Eiko. I like this model in the game and have used him quite a lot. For a reasonable points cost, he adds a bit of punch to the Cult of Yurei’s front line. He has no Ki abilities and only has 3 melee dice but his axe gives him brutal that provides a +1 to the attack roll which is almost as good as another melee dice. He’s also durable, so he’s only going to take one wound at a time, regardless of how many wounds the opponent does, so you can put all your melee dice into attack knowing that the worst downside is he takes a single wound in return. And he has regenerate, so he’ll get that wound back at the end of the round. Being a skeleton he is immune to all states and he causes Fear, albeit at a low level.
To paint the bones, I took the same approach as Satou Hatchi in a previous post. That’s German Black Brown base, a wet brush of light brown, a light dry brush of bleached bone with a final highlight of Iraqi sand.
The armour was painted a base of dark rubber and given a nuln oil wash. I’ve then picked out all of the non recessed areas with dark rubber again before adding light grey into the dark rubber to begin highlighting up the raised parts. I’ve finished with a light dry brush of light grey. The blues started with a base of Prussian Blue with a nightshade wash. Then gradually mixing ice blue into the prussian blue to highlight up.
The metal axe was given a base of gunmetal with a couple of nuln oil washes. The edges were then picked out in gunmetal and then the very highest points given a touch of polished metal.
The purple smoke was the same as for Satou Hatchi. This was multiple glazes to try to tie everything together.
I picked up some new dry grass tufts at UKGE, so I’ve added these to the base. I think I’ll now have to go back through the rest of my collection and add these to the older models to tie everything together.
Jul 23 2026
I’m not the only one being busy with the paint brush, my son has also been working on his Temple of Rokan faction. He’s not that bothered with the painting and so is quite happy with the speed paints and he seems to get more out of them than I’ve managed so far.
Here’s what he’s finished off. Firstly, the Kitsune sub faction for the Temple. No idea of their names apart from the Nine Tailed Fox on the left
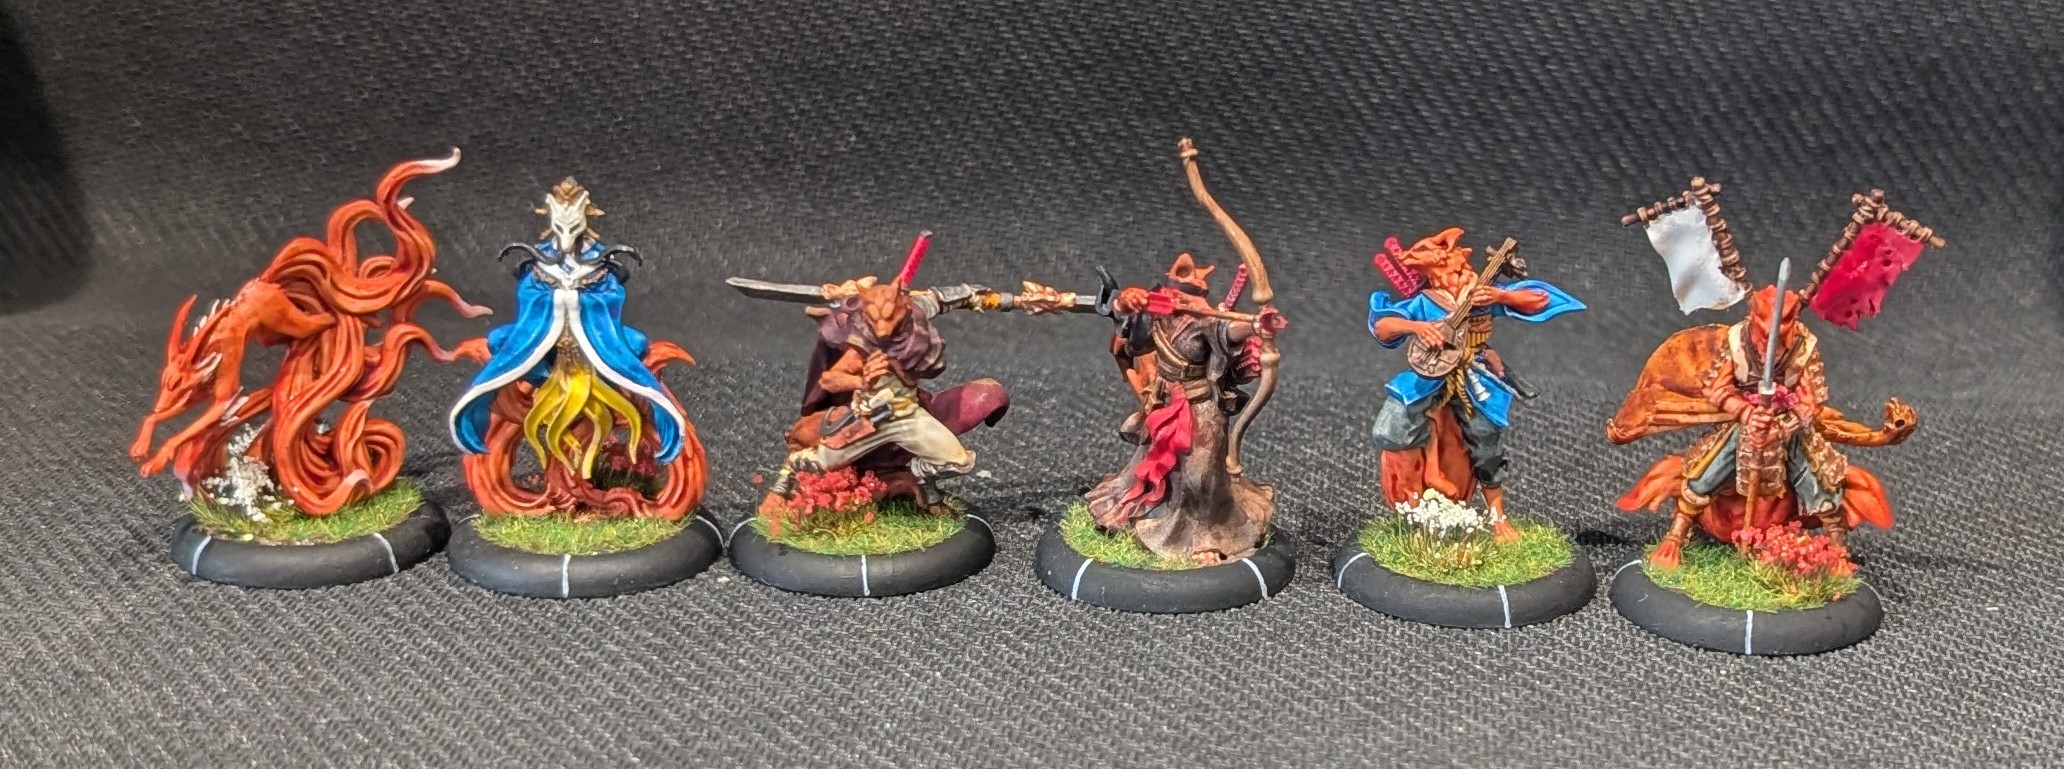 Foxy people
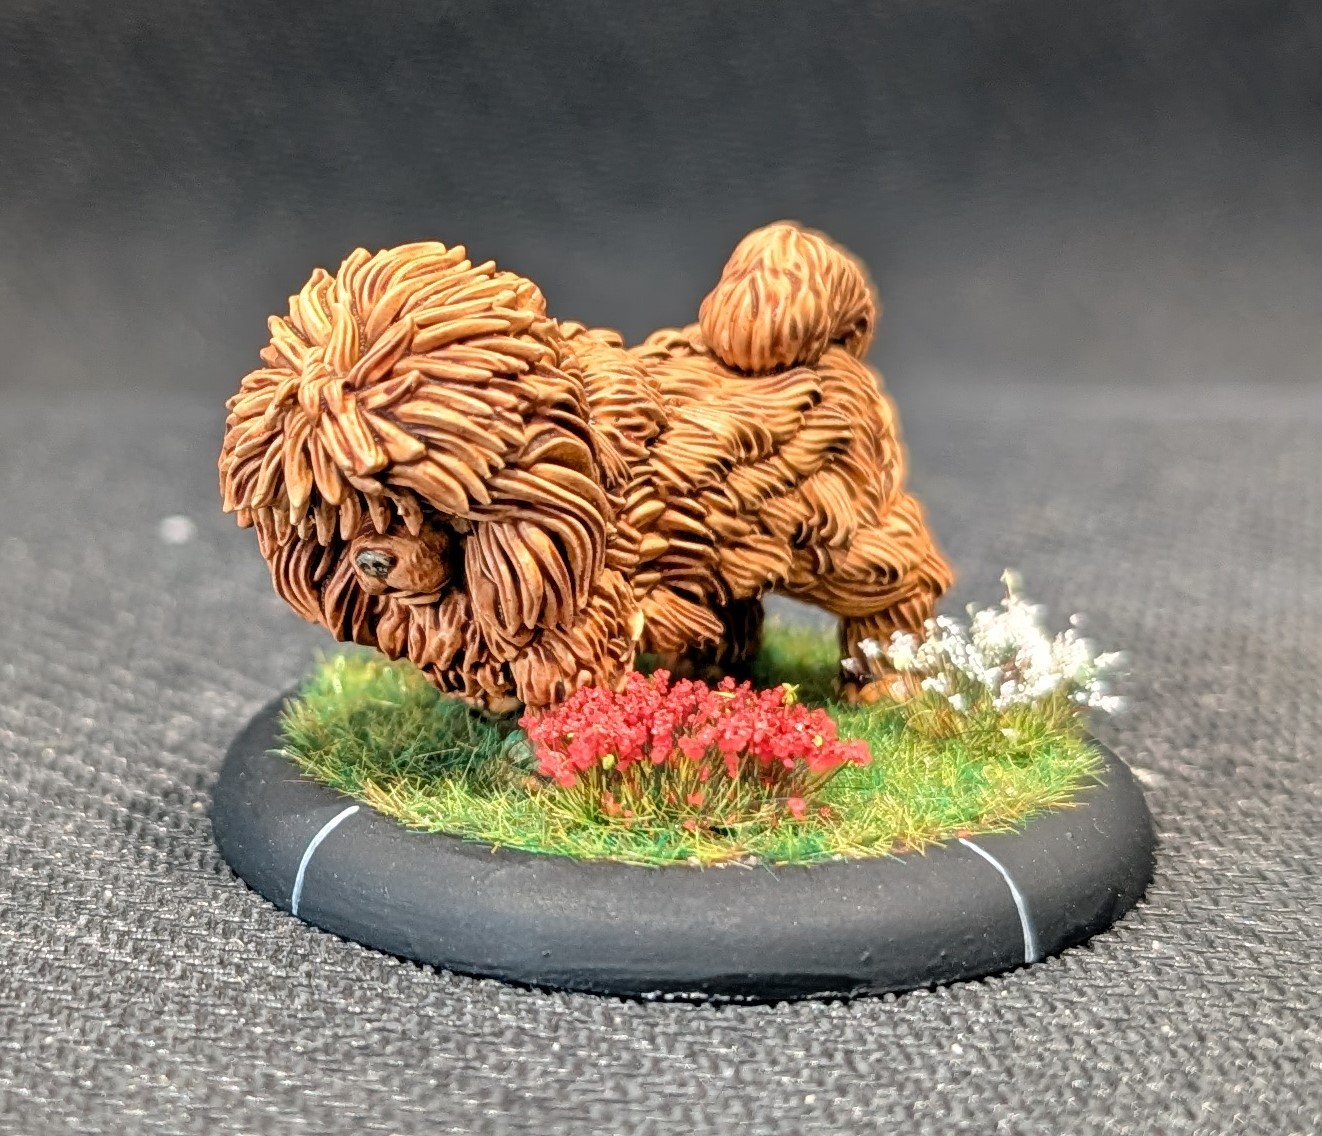 Byiba, a massive shaggy dog
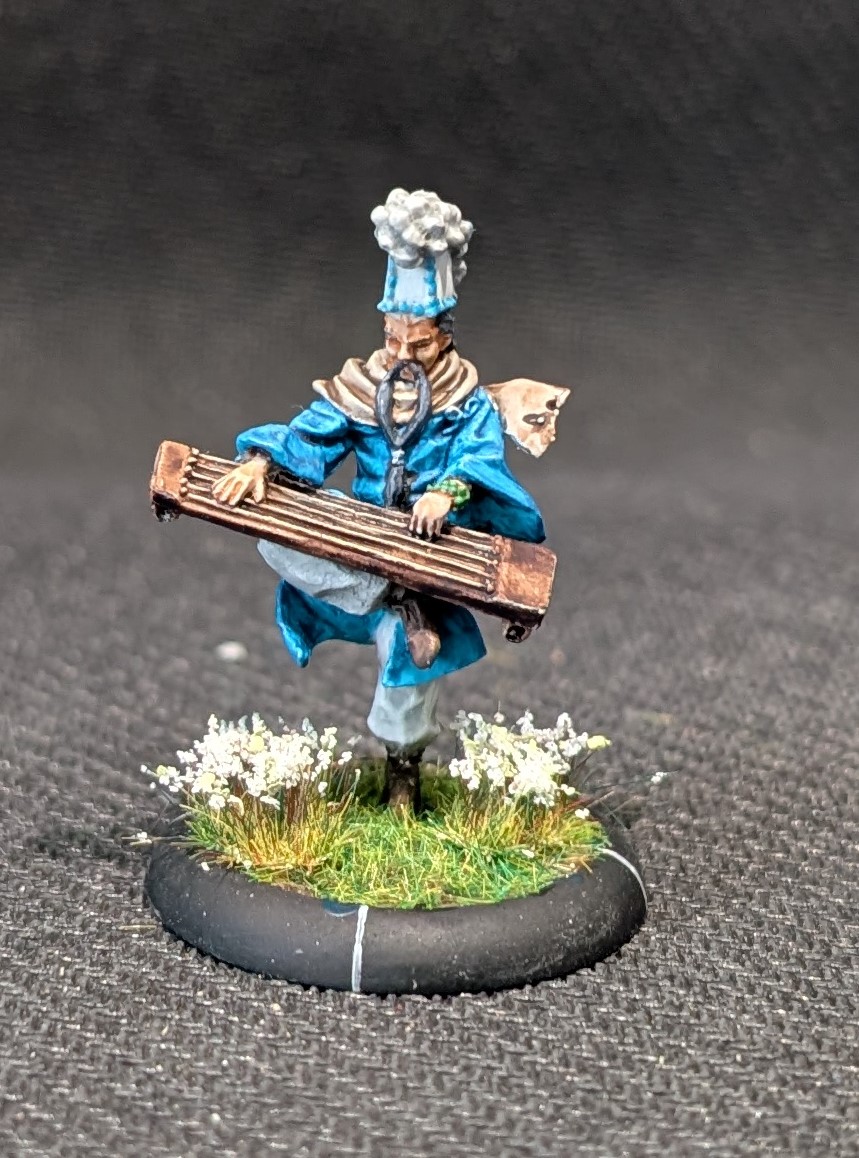 Tsutsumi, an elderly monk playing an instrument while balanced on one leg
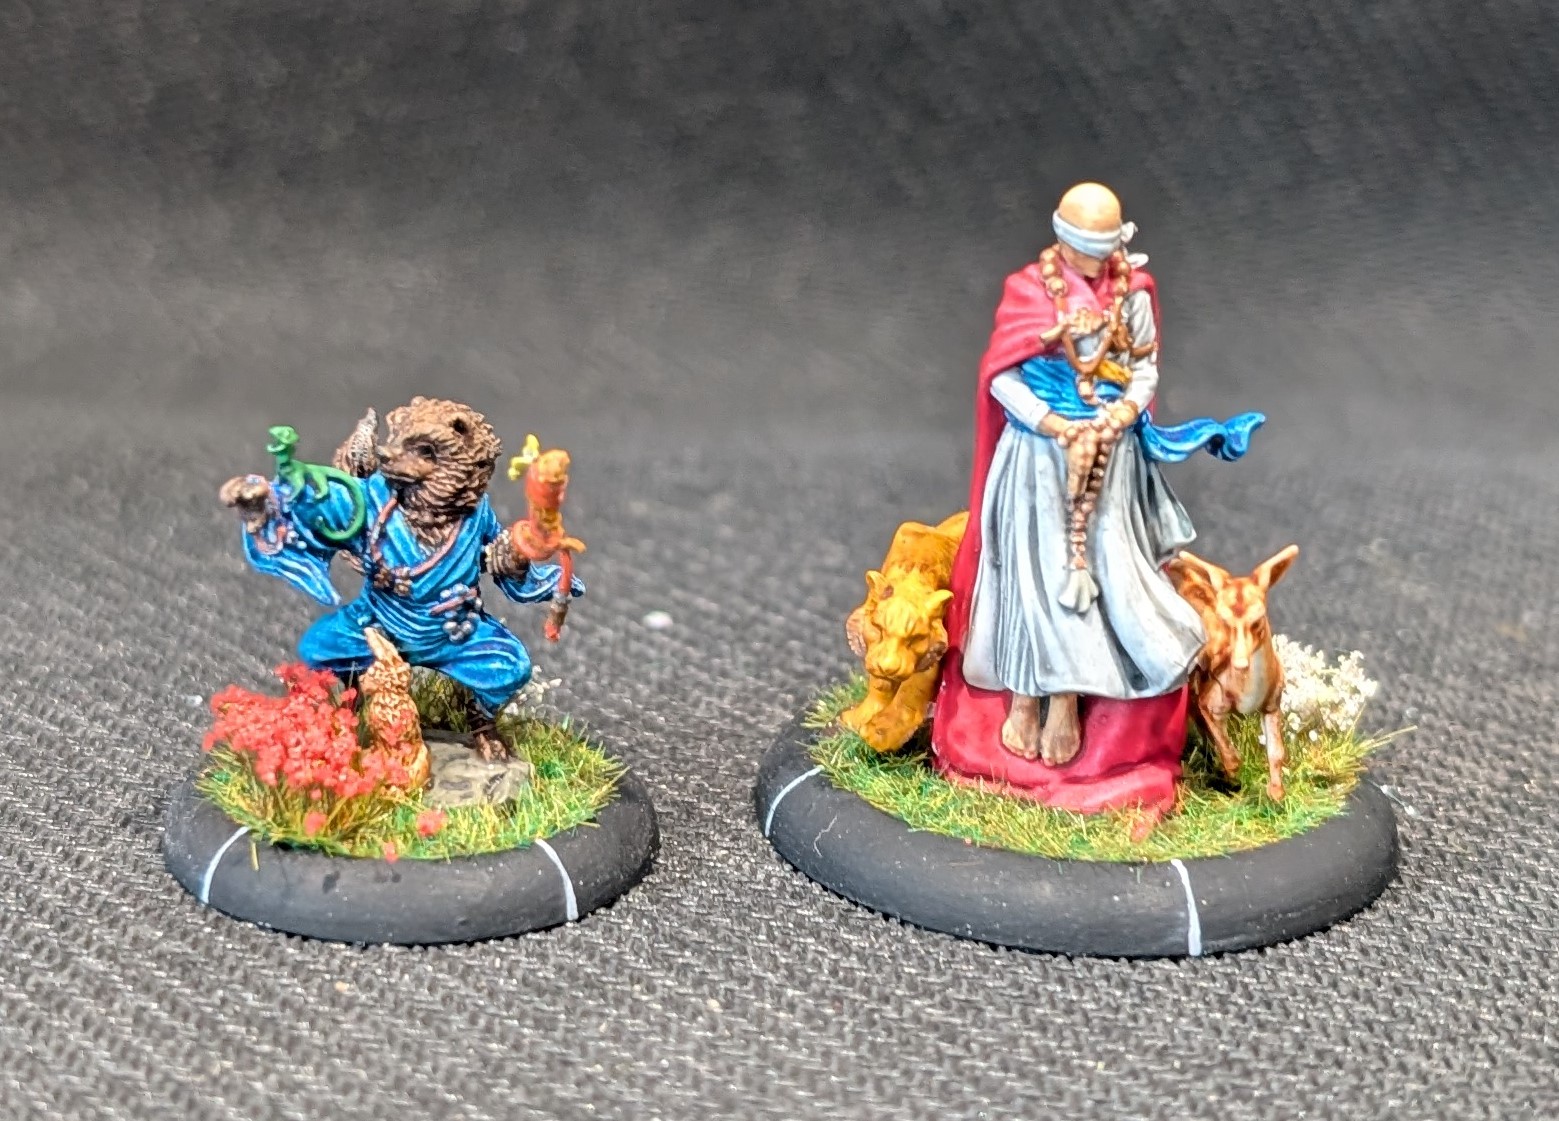 Two Masters, on the left Master Akari and on the left Master Koju
Jul 22 2026
For some reason I have two of these models, not sure why as you’re only allowed one. Satou Hatchi is the first of my Gashadokuro (meaning starving skeleton) and decided to paint all of my skeletons together to get a similar bone colour.
In game, he’s a high value model. He comes with 4 melee dice which is very unusual for Cult of Yurei models but also very handy. He does not have an special Ki abilities and does not generate Ki either. His strength lies in combat, where he can use either his Katana that provides a reroll to his opponents defence dice (handy for getting rid of any 6’s that were rolled) or he can use his Yari that gives him Reach (attack first) and gains a +1 on his defence roll.
In addition to his combat abilities, he comes with Armour (reduces the damage roll) and Fear. Like all skeletons in the game, he’s immune to just about all states (like blind, disease, poison etc). He has Prowess in Melee, so he can re-roll one dice of his choosing.
He only comes with 4 wounds, which is normally a problem but like all skeletons, he is Durable, meaning that he can only ever take 1 wound at a time, regardless of how many wounds are dealt. He also regenerates 1 wound at the start of every turn and an extra wound if you win the tactical roll at the start of the turn.
I painted all of the bones first (not just here but on all of the skeletons I have). Base cost of German Black brown followed by a wet brush of light brown with the idea of just leaving the very deepest recesses with the black brown. Once dry, I then applied a light dry brush of bleached bone followed by Iraq Sand on the highest points. I’m quite happy with the effect that it has created.
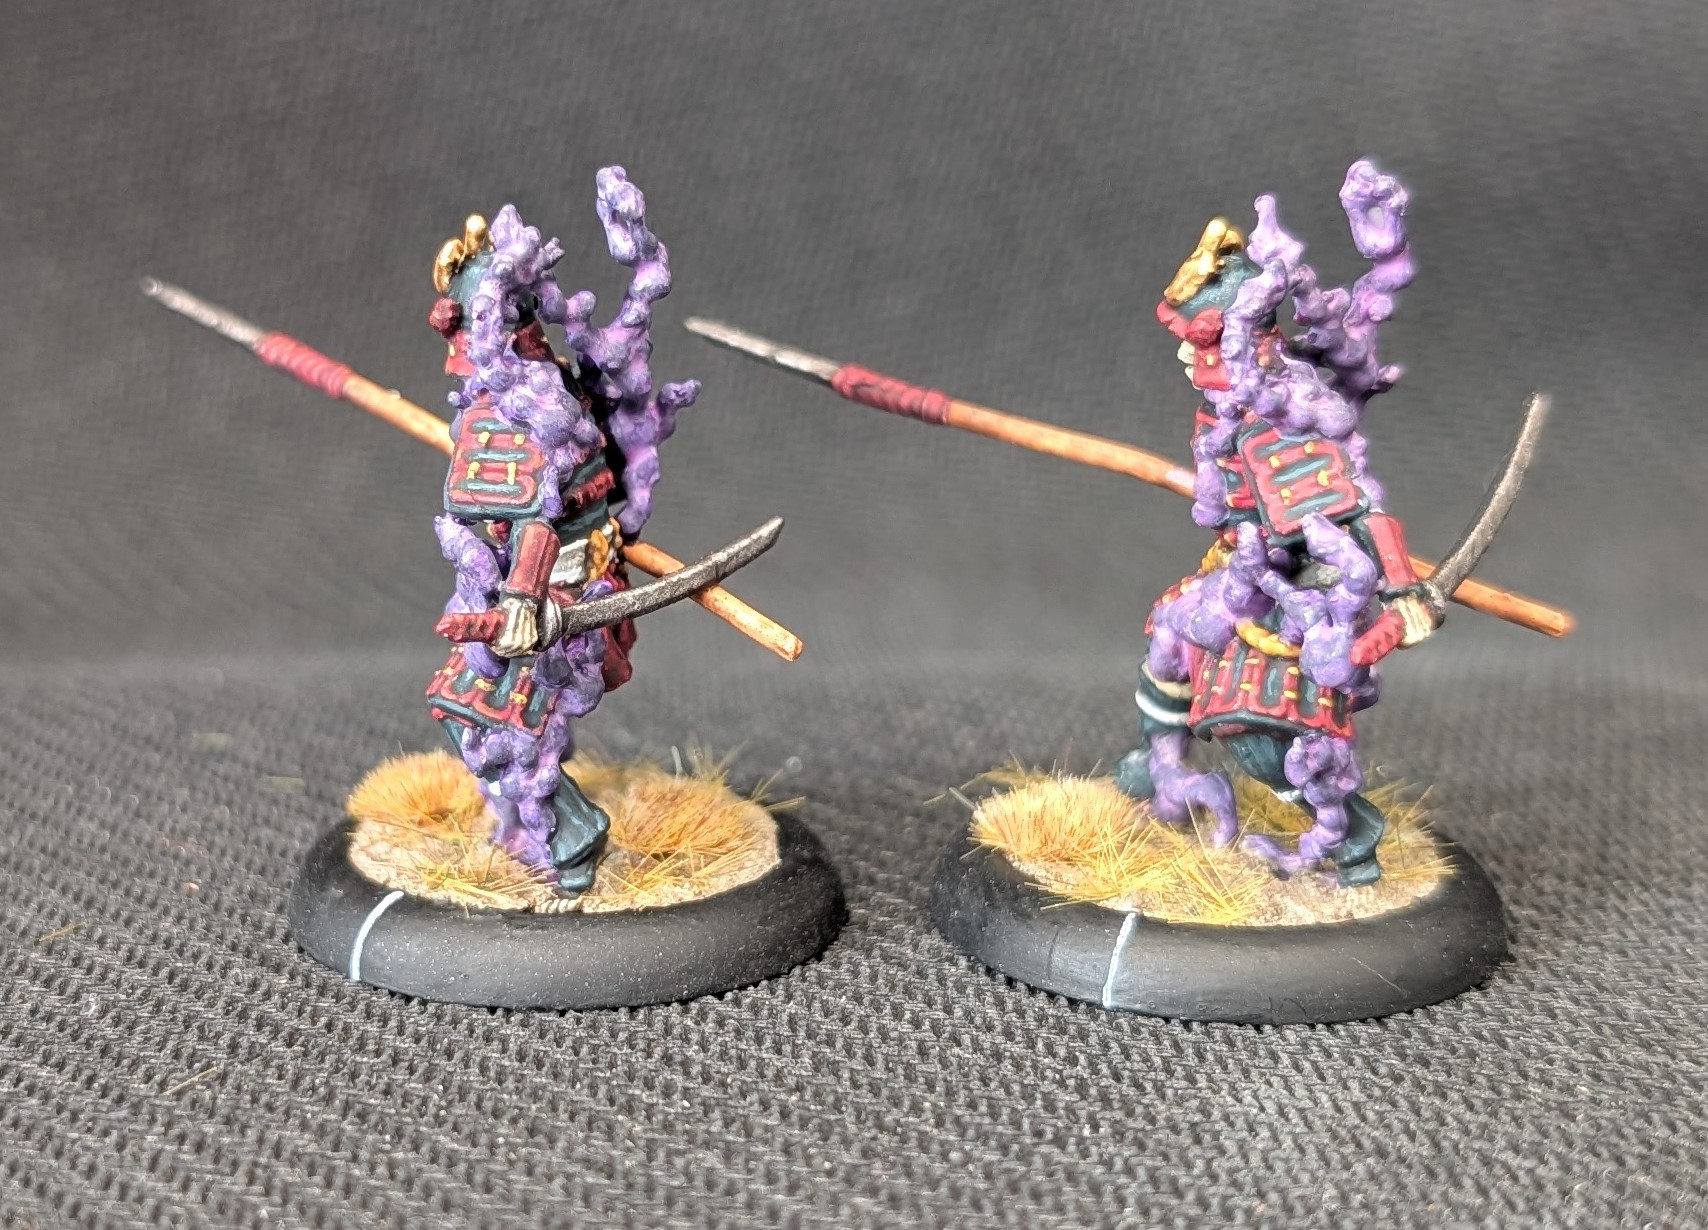
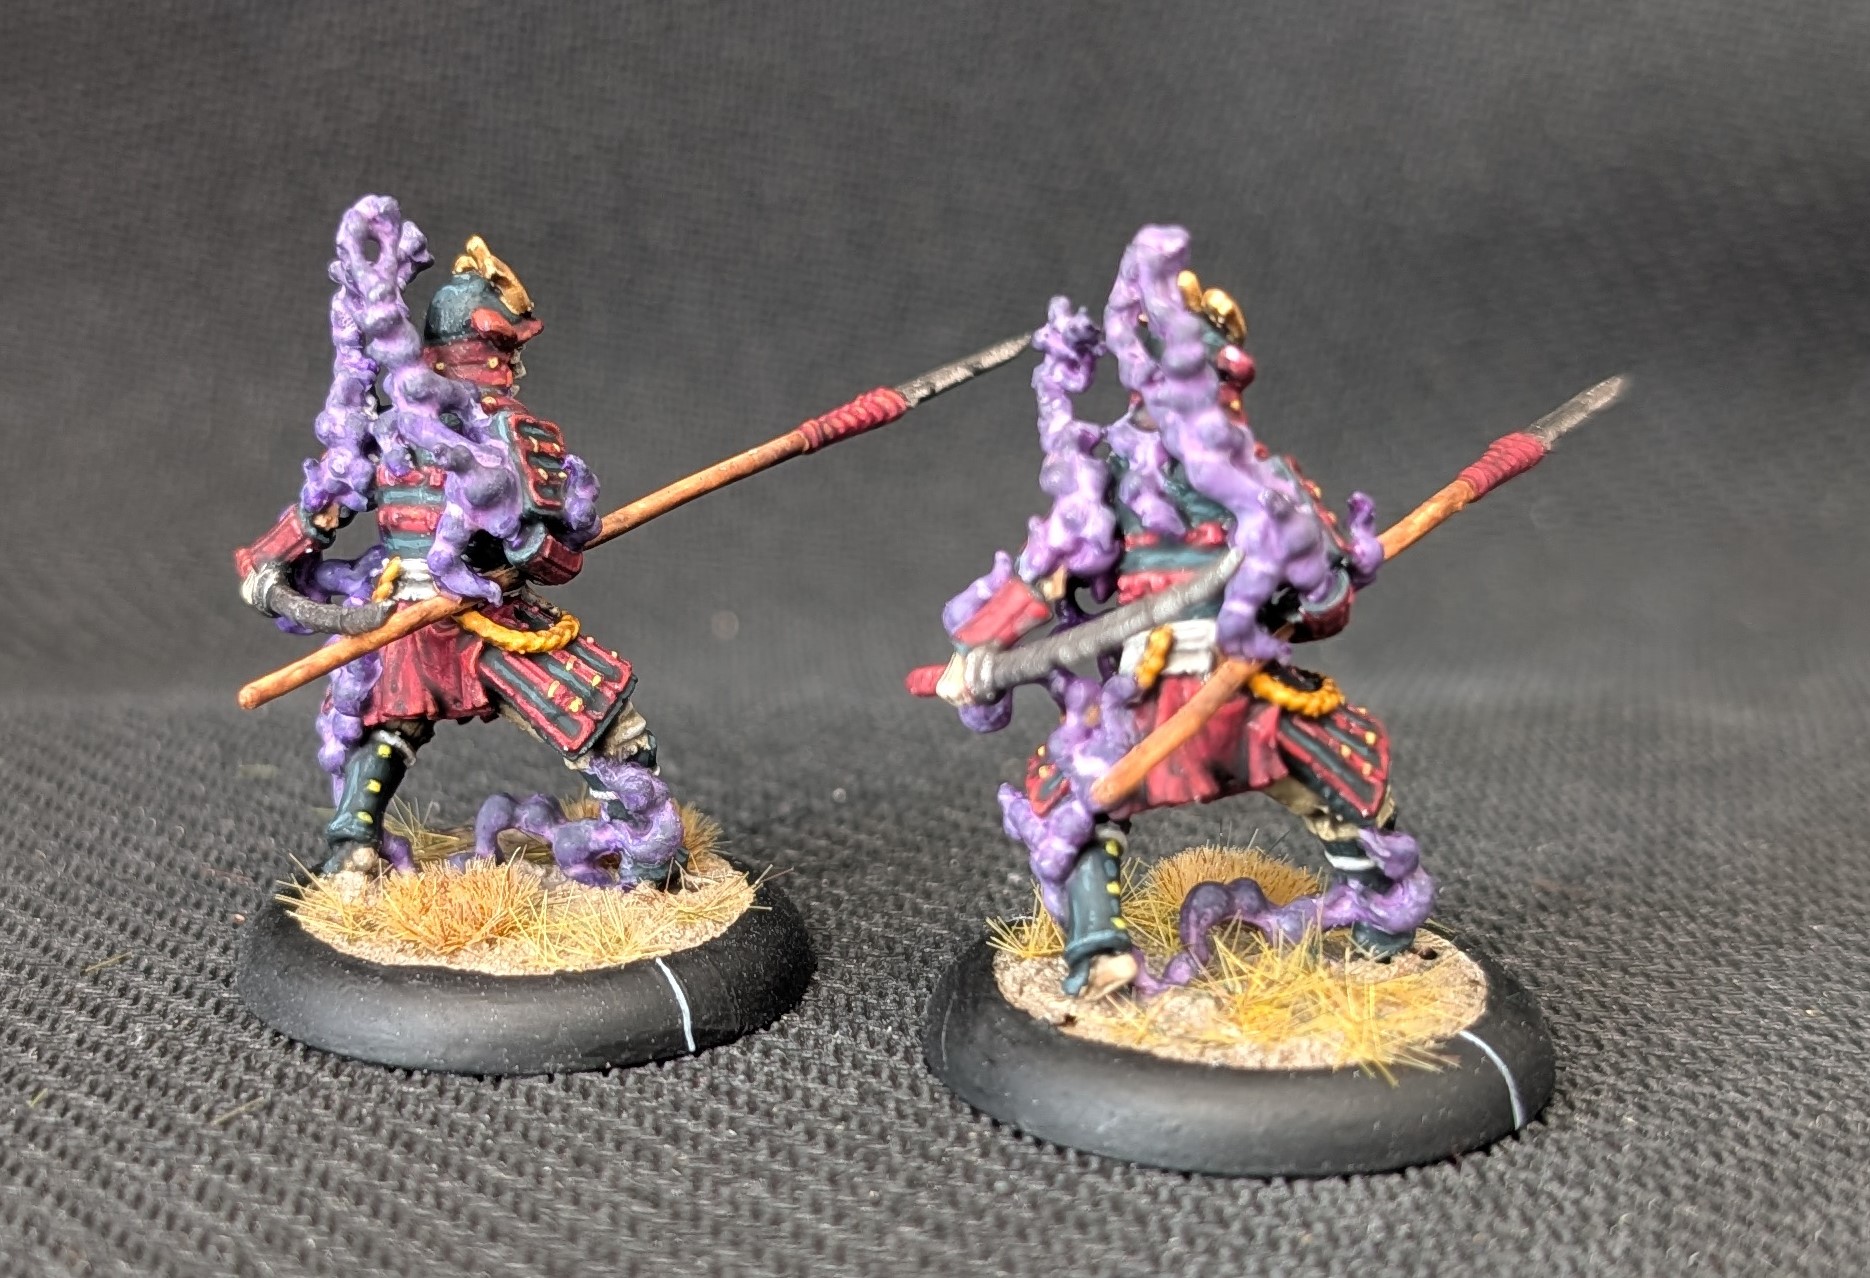
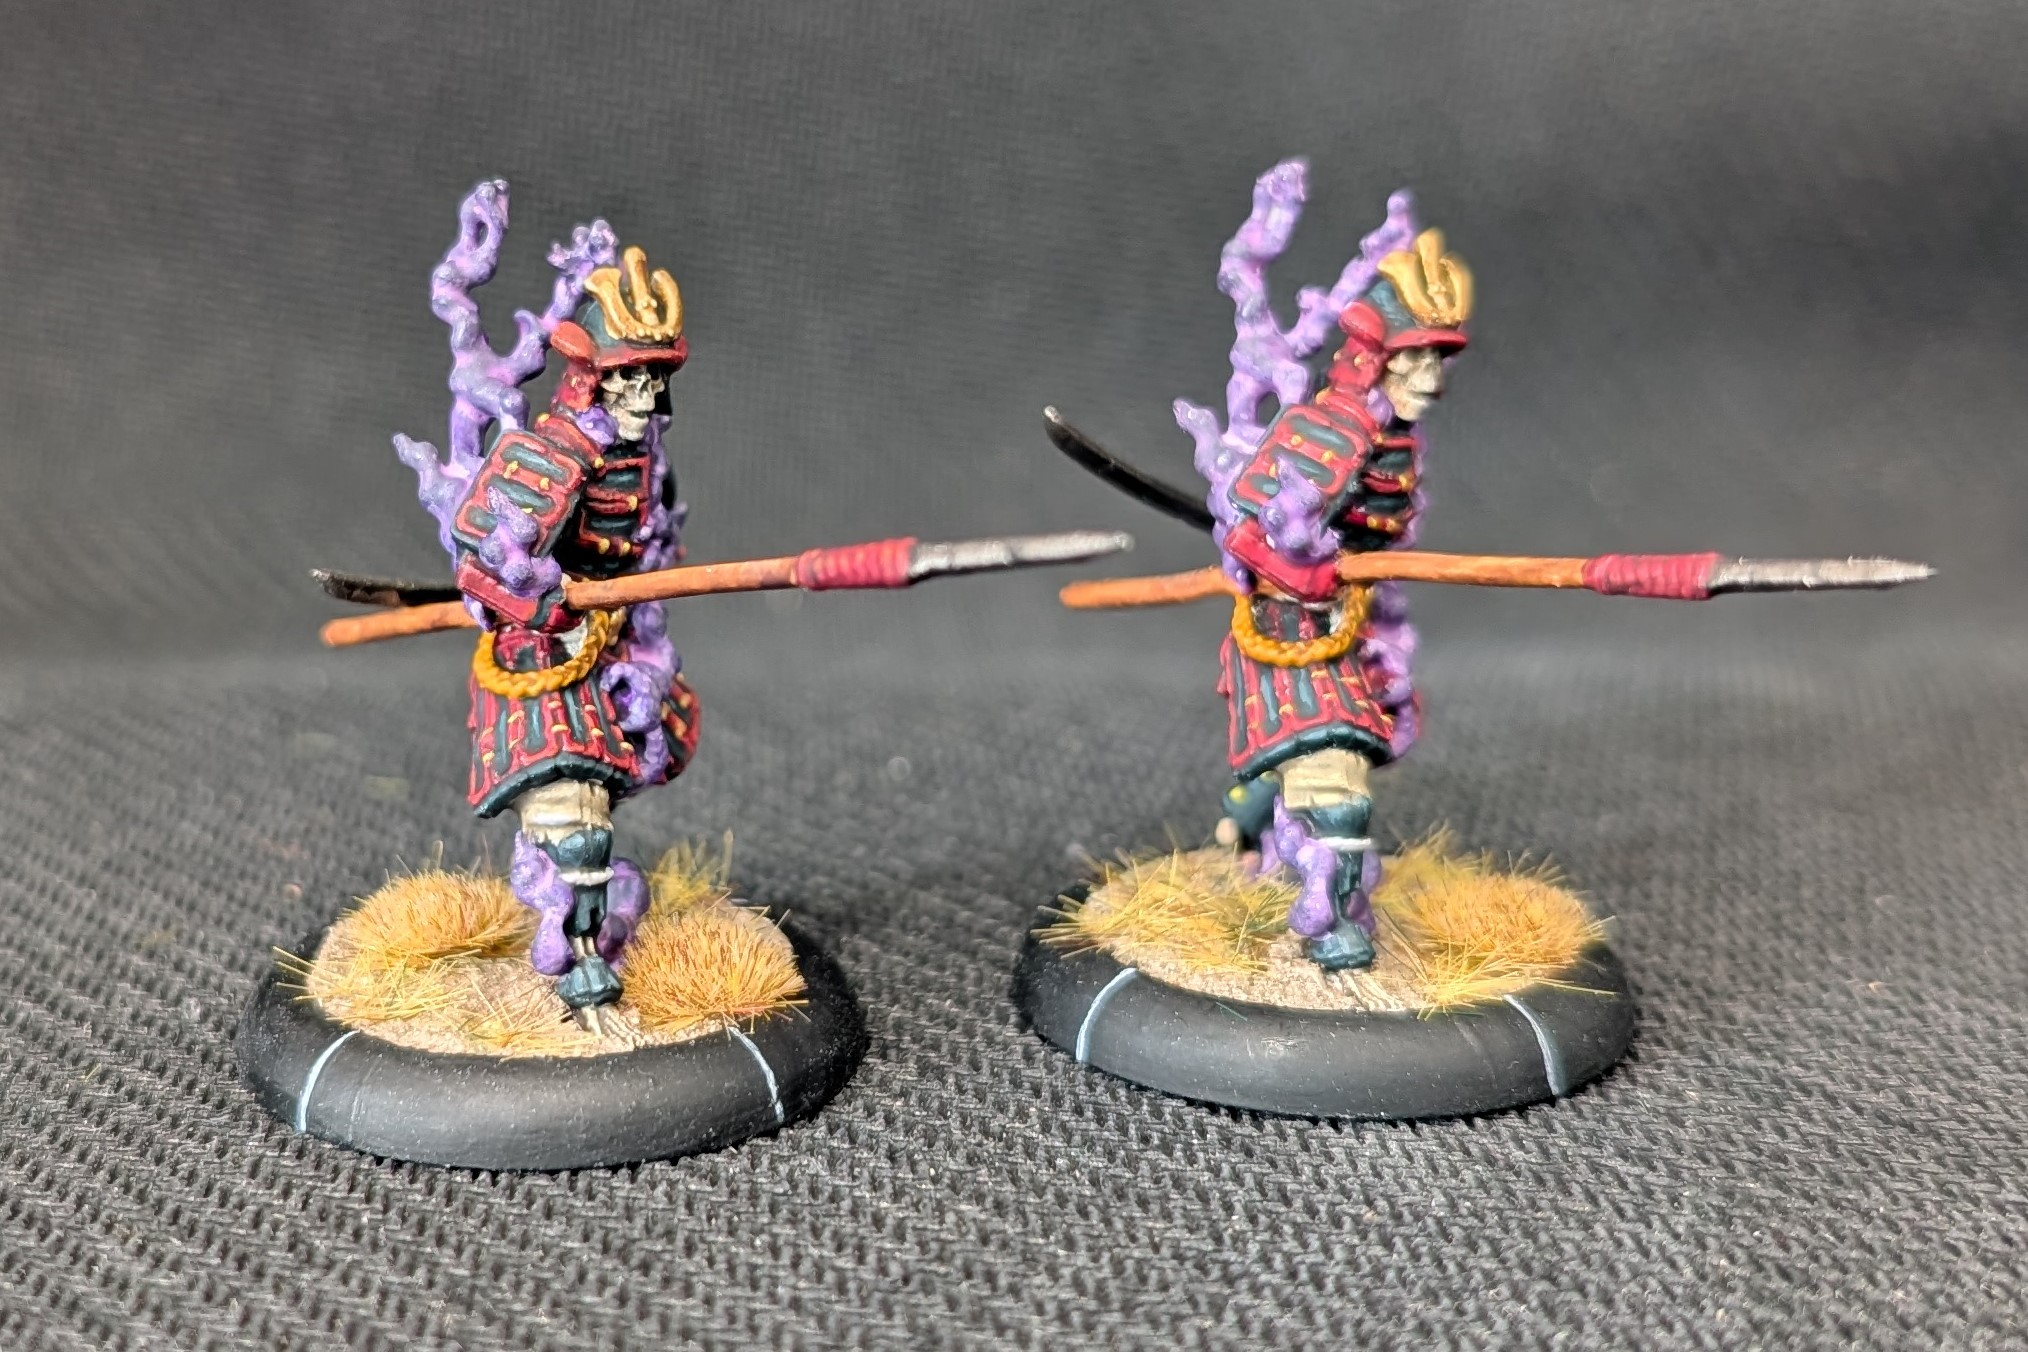
I spent some time looking at pictures of Japanese samurai armour. I really like the black/red effect, so opted for that. The black was firstly a dark grey given a couple of washes of nuln oil. I’ve then picked out the higher points with dark grey, dark grey/light grey and then and then just light grey. The red was a crimson then highlighted up using scarlet and orange to finish. I picked out the cord with scruffulous brown.
The purple smoke was a base of imperial purple followed by a wash of purple/off white mix (smoke is lighter in the thinner areas and darker in the thicker areas). I’ve then glazed the thicker areas with a dark purple glaze to get the contrast. Final step was to apply a mid purple glaze over everything to tie this together.
The rest of the model was made up of some gold, light brown with a wash for the Yari shaft and gun metal with nuln oil for the steel areas.
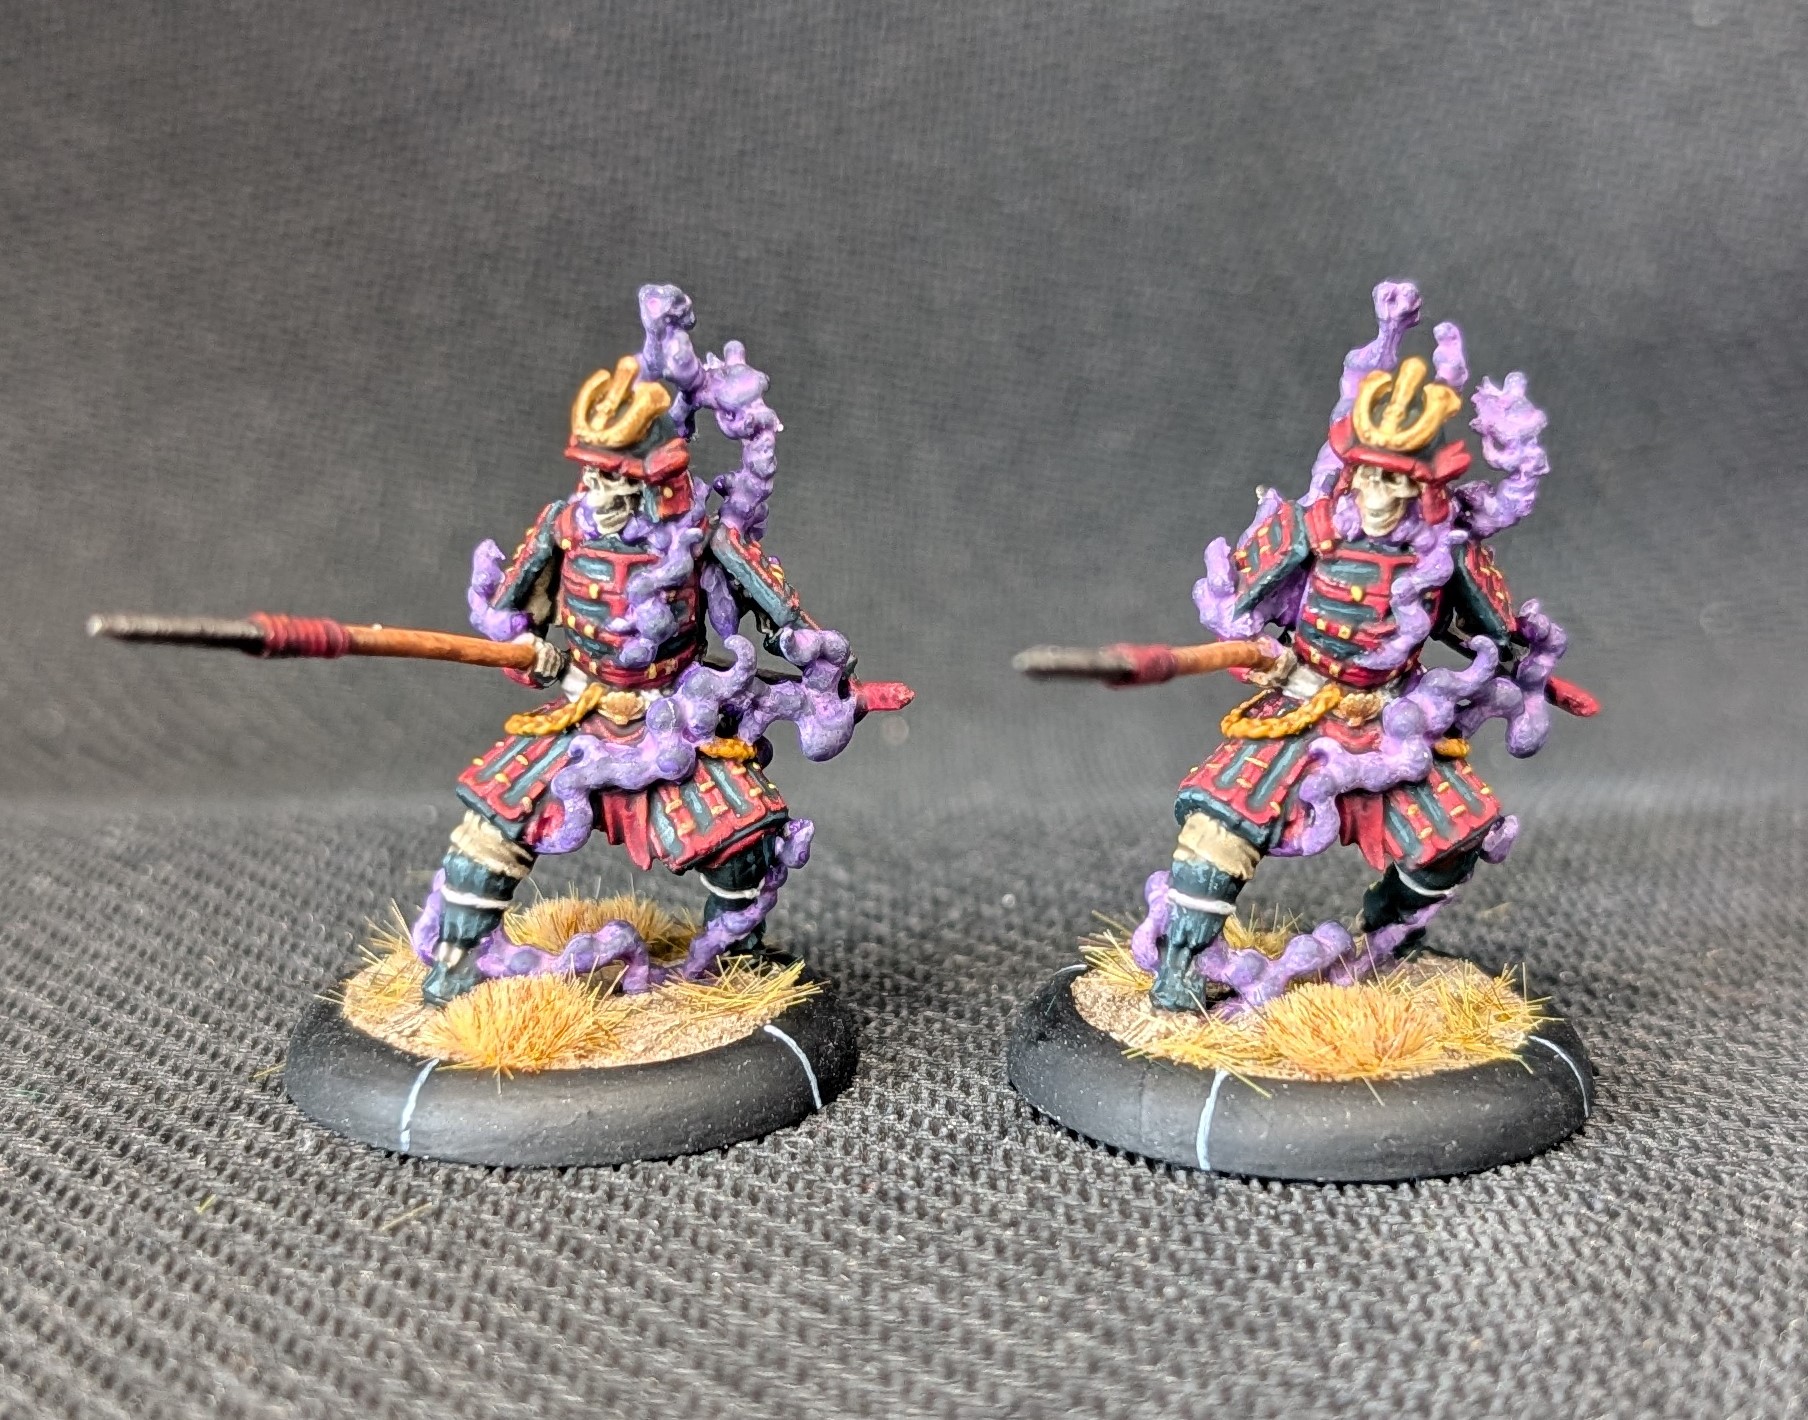 Satou Hatchi(s)
| # | Наименование новости | Тональность | Информативность | Дата публикации |
|---|---|---|---|---|
| 1 | Middle Earth Strategy Battle Game Rediscovered! | 0 | 12.41 | 30-09-2026 |
| 2 | STALINGRAD Bolt Action Mega Battle! | 0 | 10.87 | 19-04-2021 |
| 3 | Dottirs of Hel | 0 | 8.57 | 31-08-2025 |
| 4 | Painting Marvel Crisis Protocol With 144Artist | 0 | 7.87 | 19-01-2024 |
| 5 | Tales of a hobby butterfly | 0 | 7.07 | 29-03-2023 |
| 6 | Playing Bid Whist Makes Me A Better Lawyer | 0 | 5.62 | 24-09-2026 |
| 7 | Набор для творчества на осень: как выбрать по возрасту и ... | 0 | 6.2 | 01-10-2026 |
| 8 | Roleplay In The Underhive With New Necromunda Game | 0 | 3.91 | 21-09-2026 |
| 9 | Our editors pick the very best of Amazon’s Top 100 Toys list | 0 | 9.71 | 17-09-2026 |